
Customer Portal
Give your repair-shop customers a logged-in portal where they can track repairs and appointments, reschedule or cancel, manage their details, and get their automatic loyalty discount.
What can you do with this?
- Let customers track their repairs -- they see all their appointments, live repair statuses, prices, and repair notes without emailing you to ask.
- Let them help themselves -- customers can reschedule or cancel an appointment, add it to their calendar, update their contact details, and change their password right from the portal.
- Speed up repeat bookings -- when a logged-in customer starts a new booking, their name, email, phone, and address are already filled in at checkout.
- Reward your business customers automatically -- assign a coupon to a customer and it shows up in their portal; a single assigned coupon applies on its own when they book. Perfect for fixed price agreements with recurring B2B clients.
- Let customers choose how you contact them -- they pick Email, SMS, Phone Call, or no repair updates, and your team sees that preference in the Repairs Workflow.
A garage that services a local taxi company assigns them a 15% loyalty coupon. The taxi company logs into the portal, sees the history of every car they've brought in, and books a new repair in a few clicks -- the 15% discount is already applied at checkout.
Where to find it
The Customer Portal is a paid addon, available on the Growth and Scale plans. There's no on/off switch -- it's active as soon as your license includes it. You set it up from the Plugin Shortcode settings page:
- In WordPress admin, go to RepairPlugin > Settings.
- In the settings sidebar, click Plugin Shortcode.
- Scroll down to the Customer Portal Shortcode section.
- Copy the shortcode:
[Repair_Portal].
![The Customer Portal Shortcode section showing the [Repair_Portal] shortcode with a copy button and the Base URL dropdown set to Find It Automatically](/screenshots/admin/portal-shortcode-settings.webp)
How to set it up
Add the portal to your site
- Create (or pick) a WordPress page for the portal -- for example "My Repairs" or "Customer Portal".
- Paste the
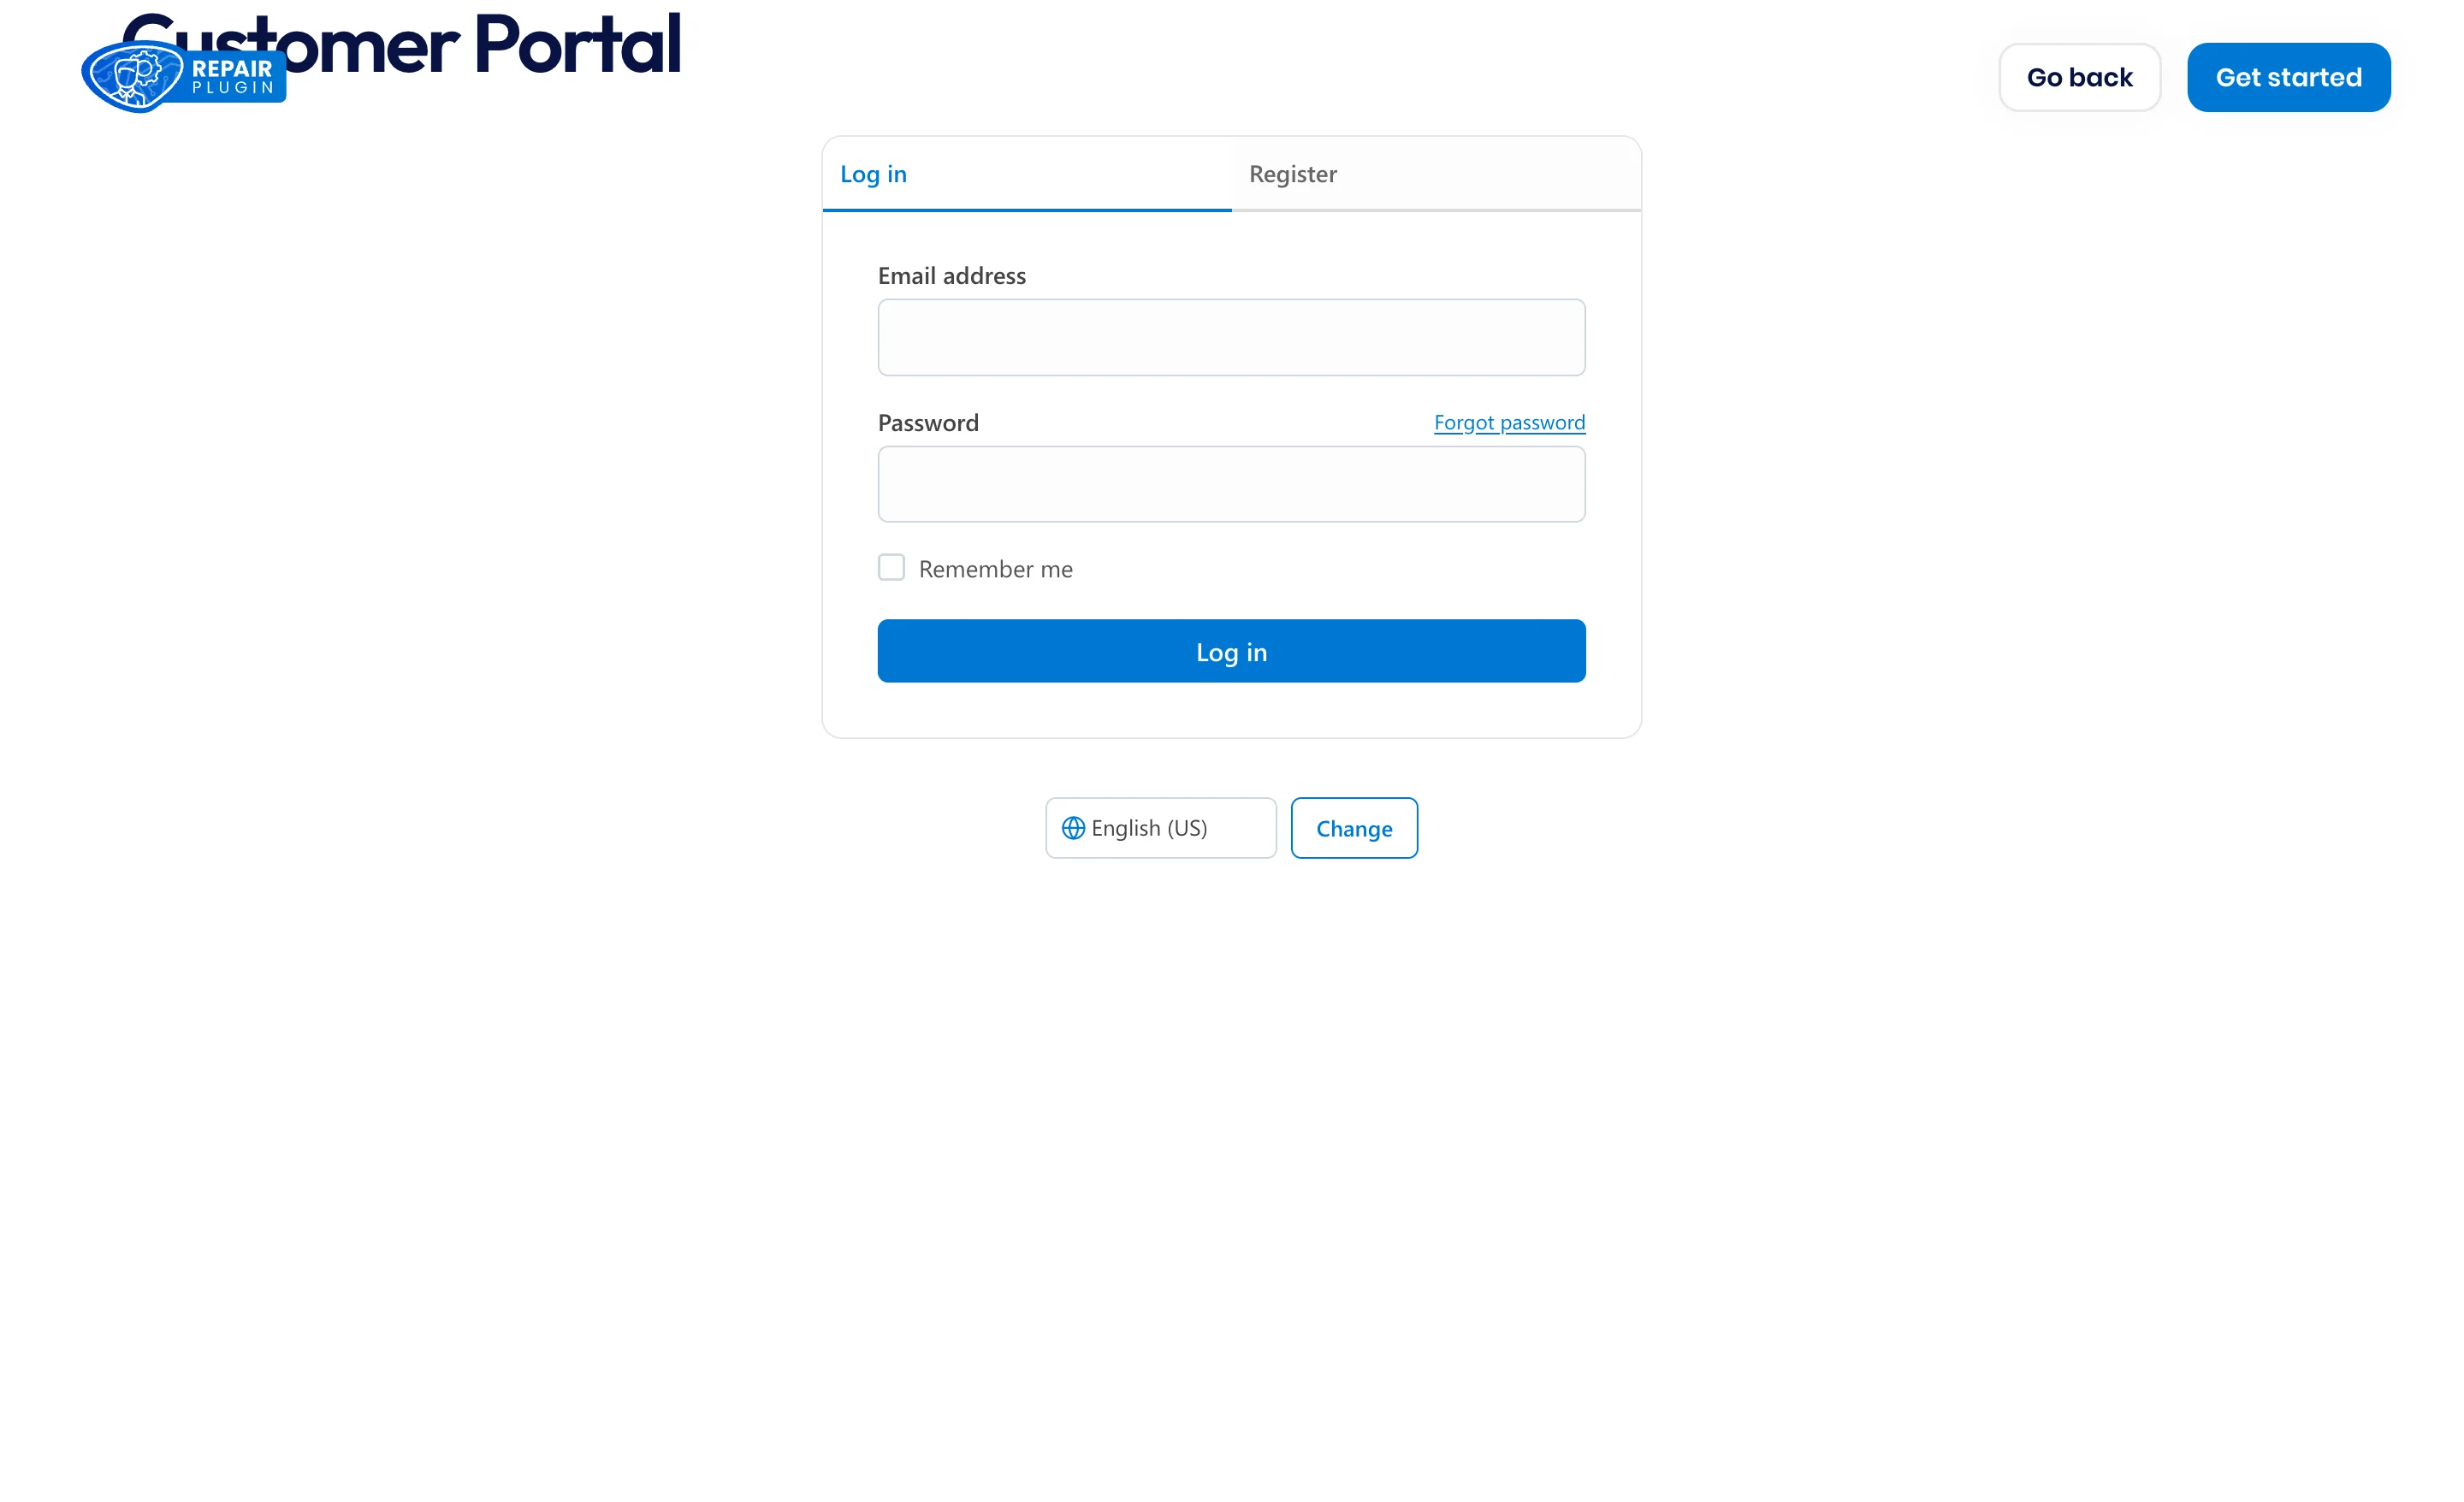
[Repair_Portal]shortcode onto that page and publish it. - Visitors who aren't logged in see a Log in / Register card with a forgot-password option. Logged-in customers see their dashboard.
Point the password emails to the right page
The registration and password-reset emails contain links back to your portal page. Tell RepairPlugin where that page is:
- In the Customer Portal Shortcode section, find the Base URL dropdown.
- Keep Find It Automatically to let RepairPlugin detect the page that holds
[Repair_Portal]. - Or choose Use My Custom Link and paste the exact page URL.
The New booking button in the portal works separately: it sends customers to your booking page (the page with [Repair_All]), using the Base URL setting at the top of the same page -- see Shortcodes.
Let customers create an account
Customers register right on the portal page -- all they enter is their email address:
- In WordPress admin, go to Settings > General and turn on Membership: Anyone can register. Without it, the Register tab tells visitors that registration is closed.
- A new customer opens the Register tab, enters their email, and clicks Create account.
- RepairPlugin emails them a link to set their password (the Portal Register email -- see Email Notifications). You get WordPress's standard new-user email.
- After setting a password, they log in with their email address.
Every new registration automatically gets the RepairPlugin Customer WordPress role (repairplugin_customer) next to your site's default role. Customers with only that role can't enter your WordPress admin -- see Permissions & Roles.
On registration, RepairPlugin matches the email against your Customer Database. When there's a match, the portal pre-fills the customer's details and shows their full booking history -- across all your locations. If the same email exists on more than one customer record, the portal combines them into one history. No match? The portal starts empty and fills up as they book.
Show customers their appointments
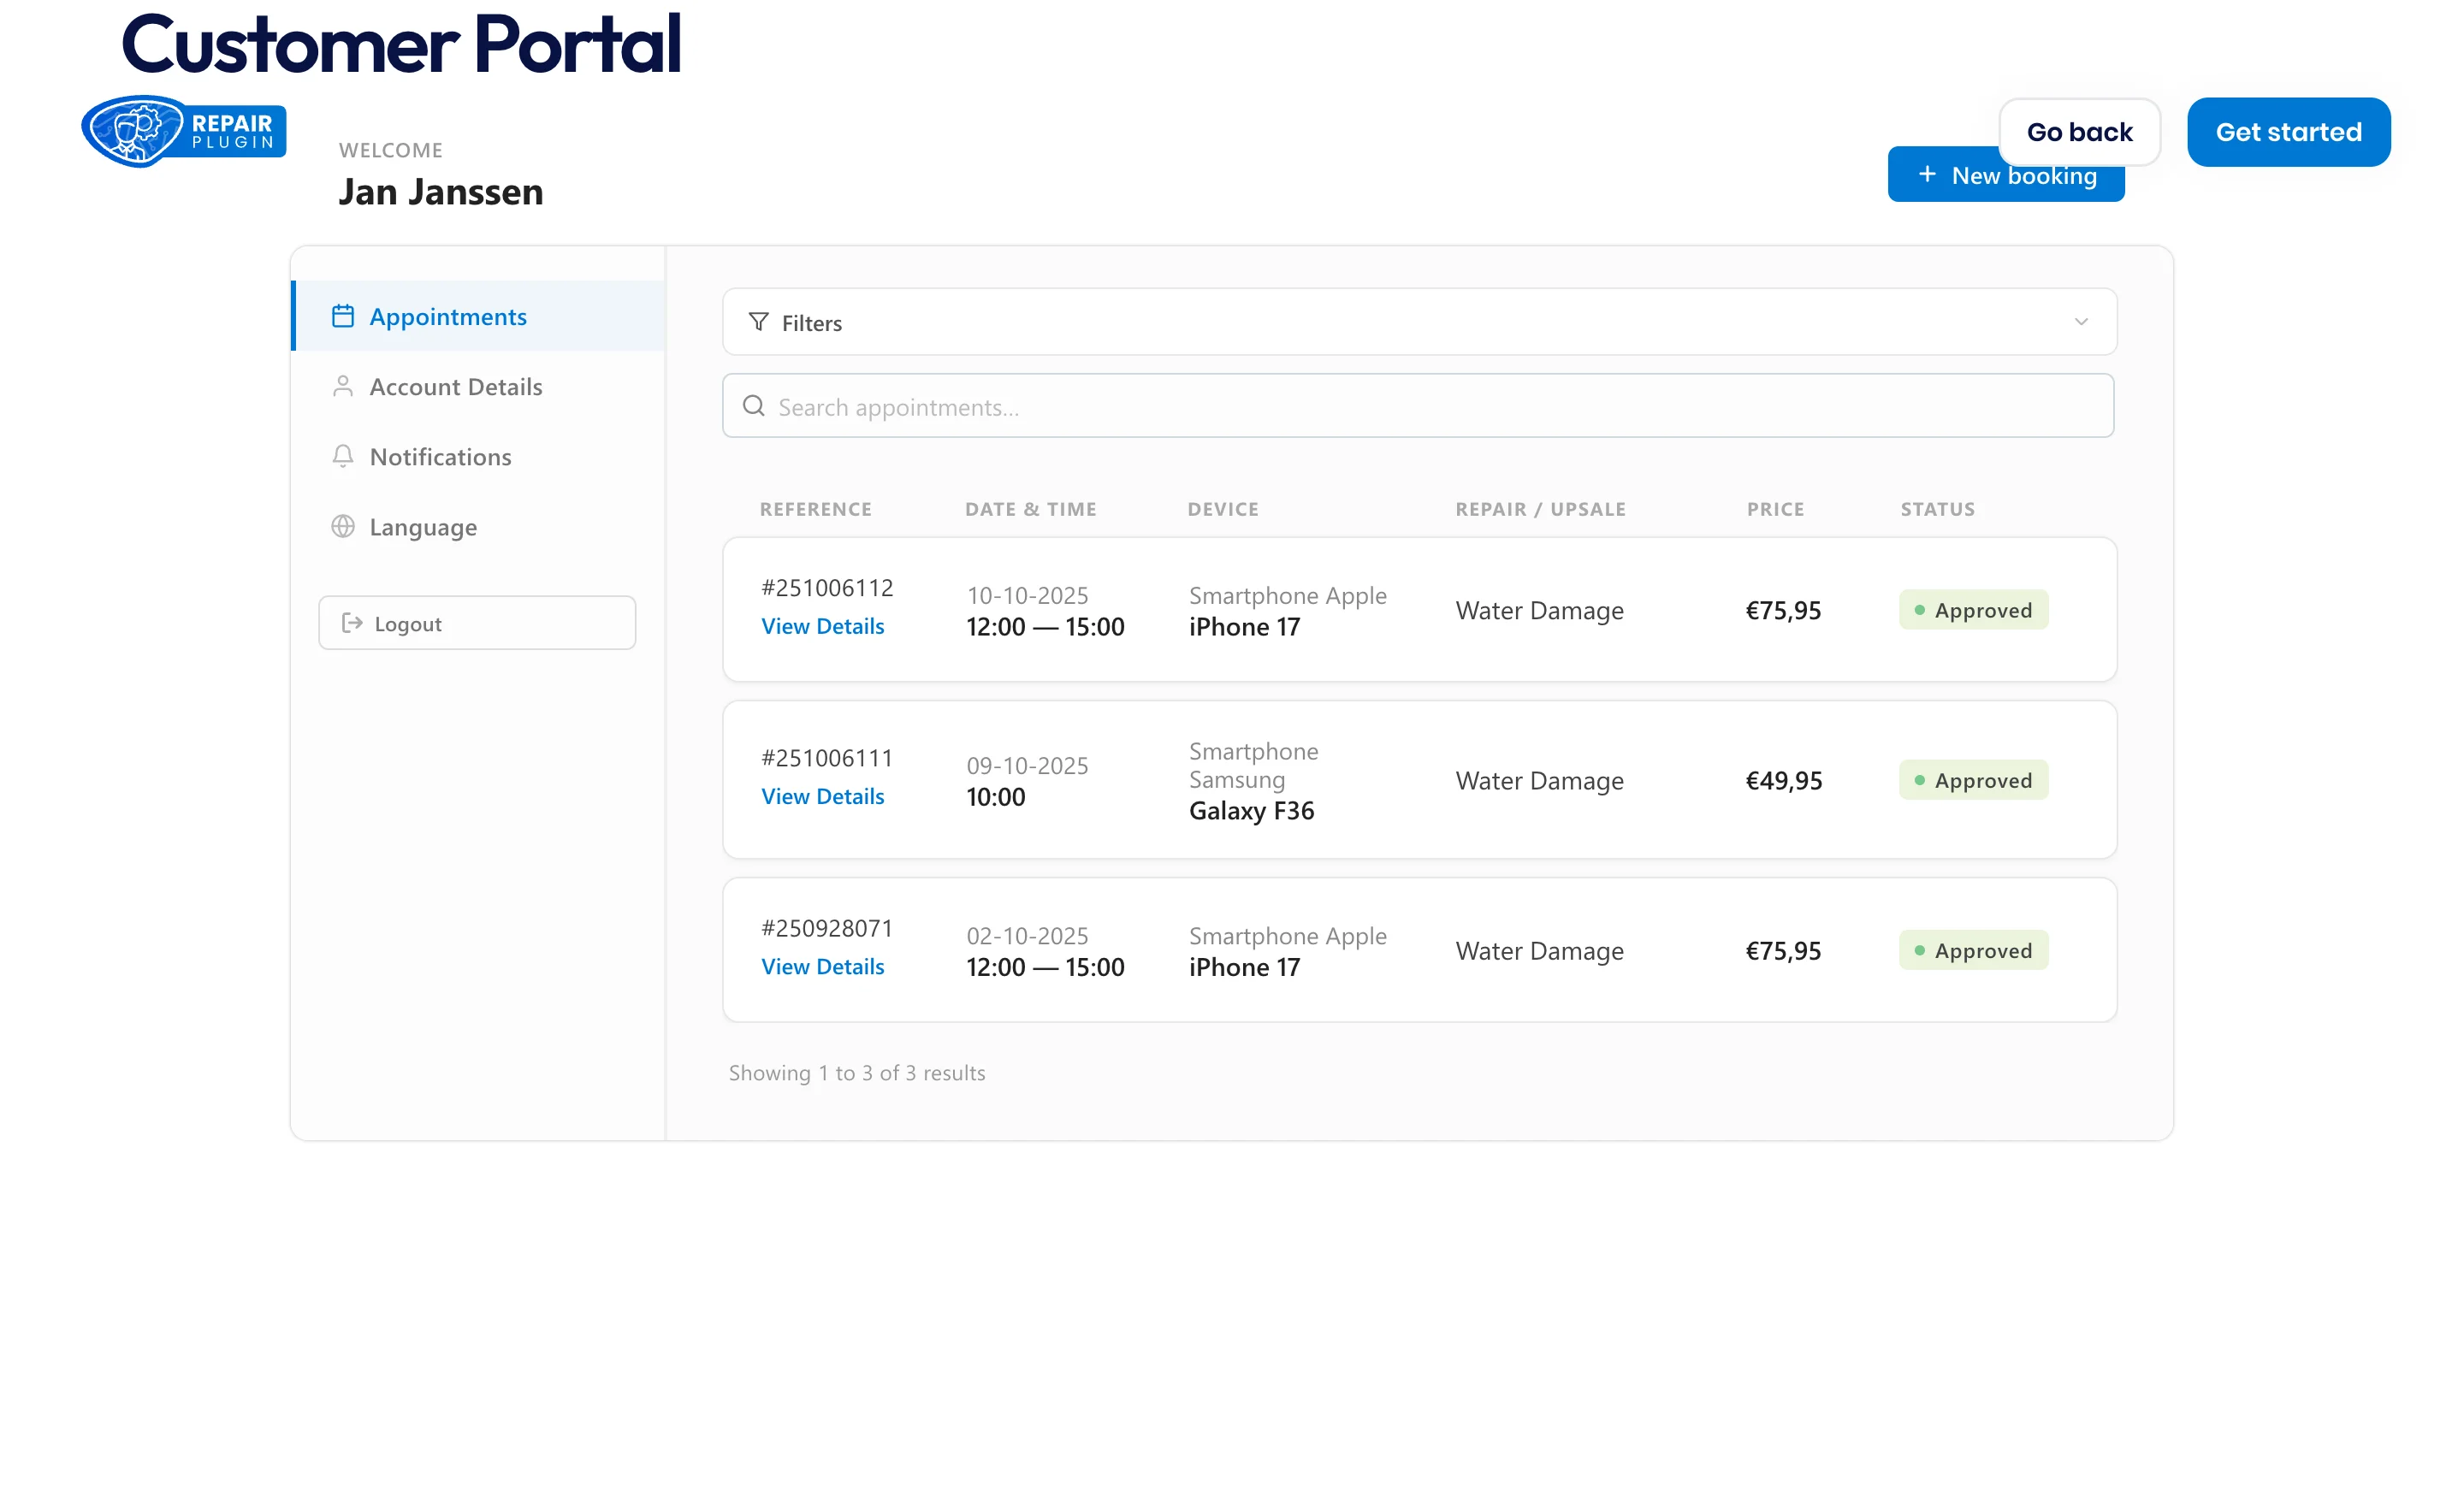
The Appointments tab is the portal's home screen. Customers see every booking with its reference, date, device, repair, price, and status -- and can filter by date, location, status, or service method.
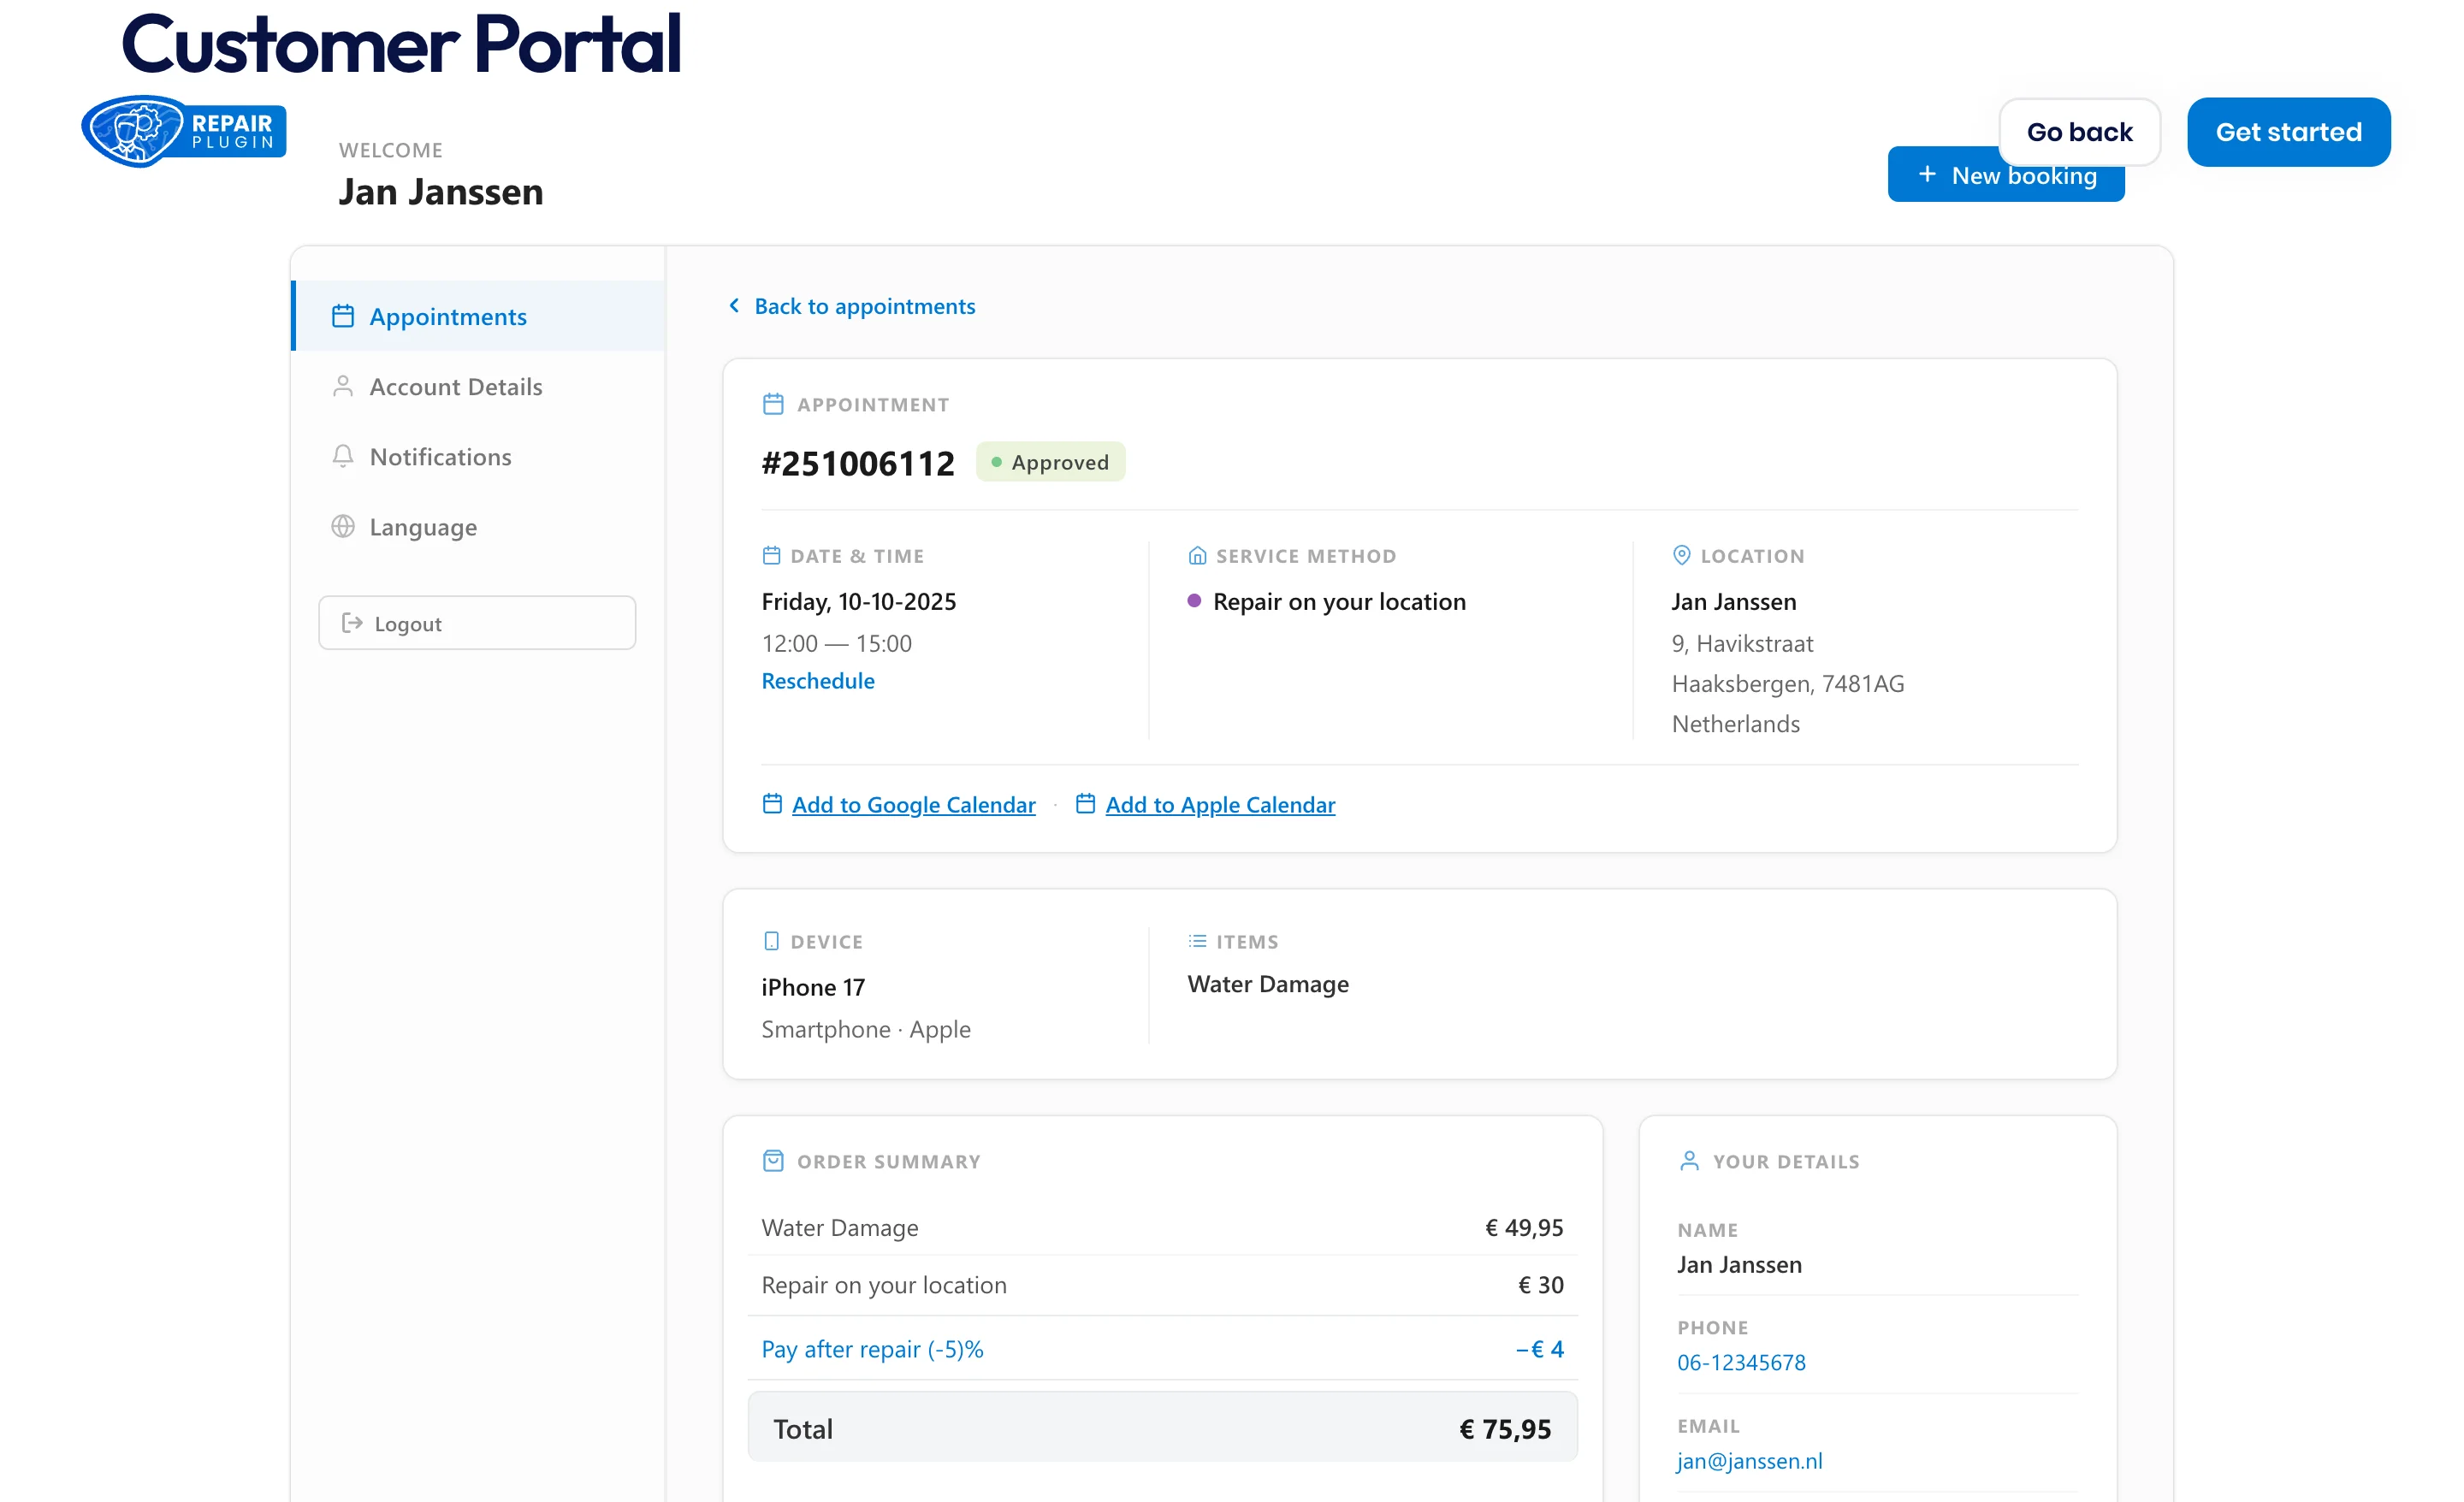
Clicking View Details opens the full appointment: date and time, service method, location, calendar links (Google and Apple), the order summary, repair notes your team shared, and the repair activity log. From here customers can Reschedule or Cancel the appointment (except when it's already canceled or completed), or finalize an open quote.
Give a customer an automatic discount
- Go to RepairPlugin > Settings > Promotions and edit a coupon.
- In the Assigned Customers section, search for and select one or more customers.
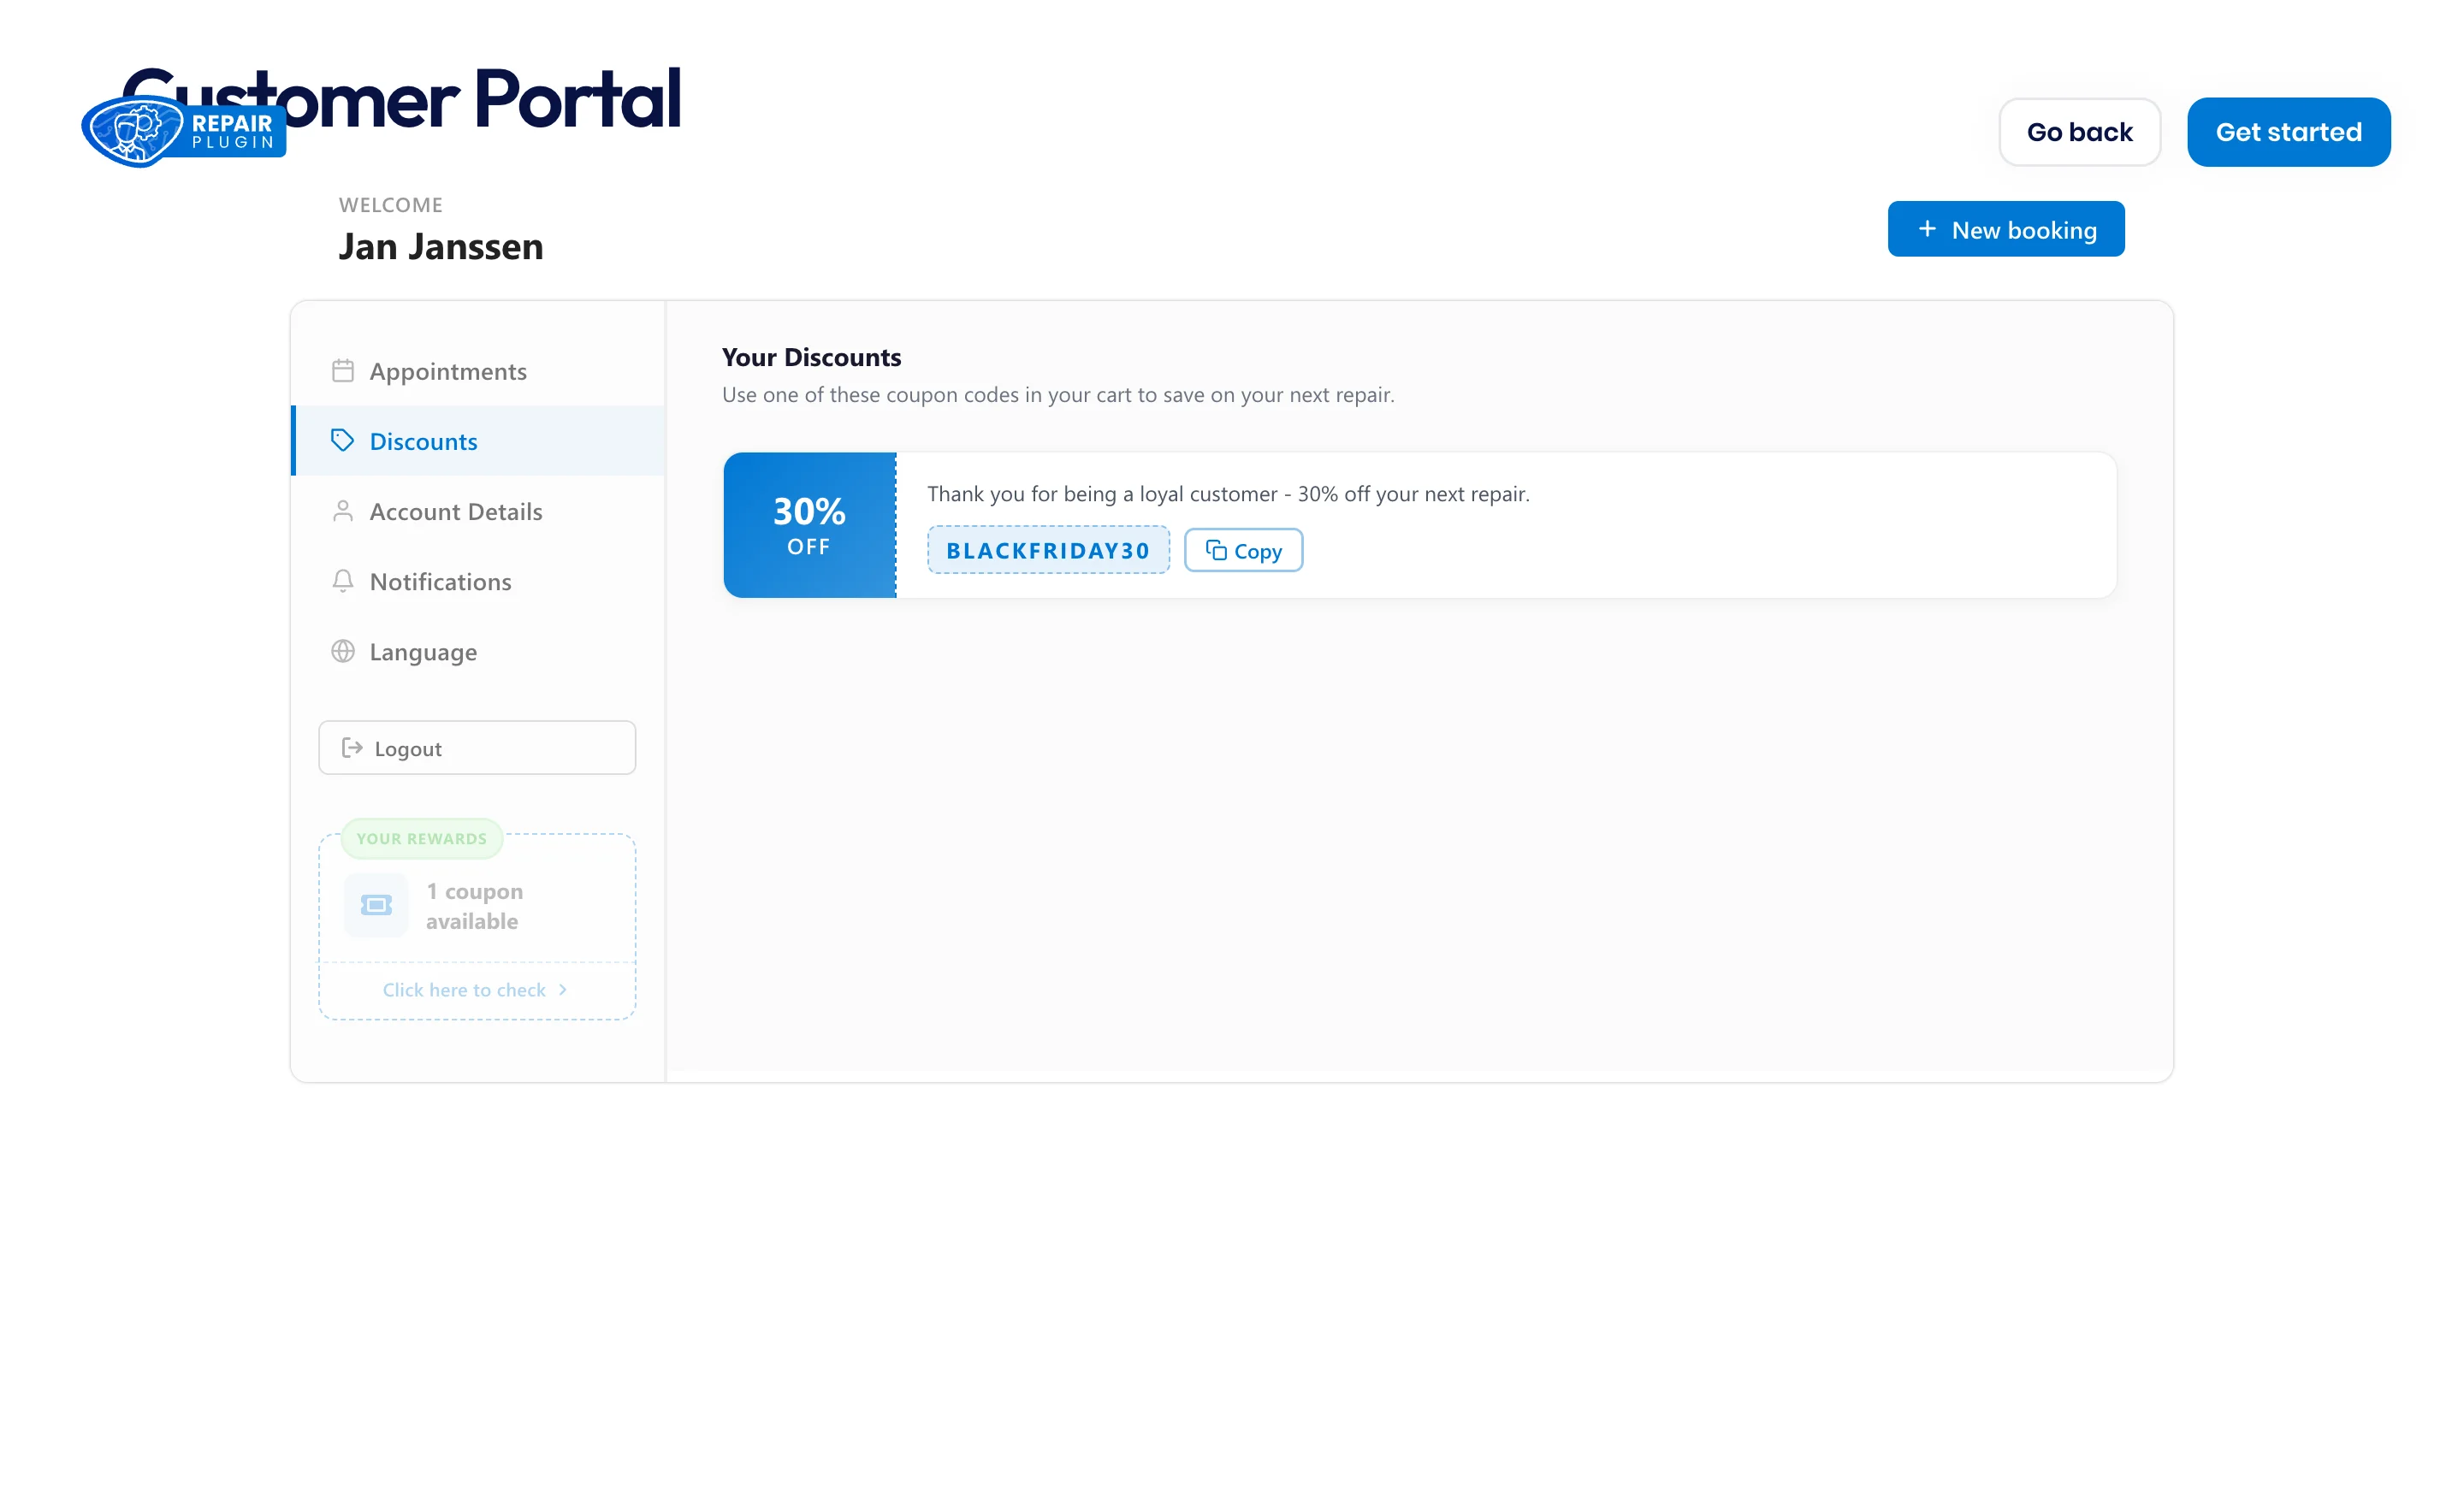
- Save. The coupon now shows in that customer's Discounts tab, with your coupon description and a copy button. When a customer has exactly one assigned coupon, it applies automatically when they book; with more than one, they copy the code they want to use. See Coupon Codes for all the options.
Let customers manage their own details
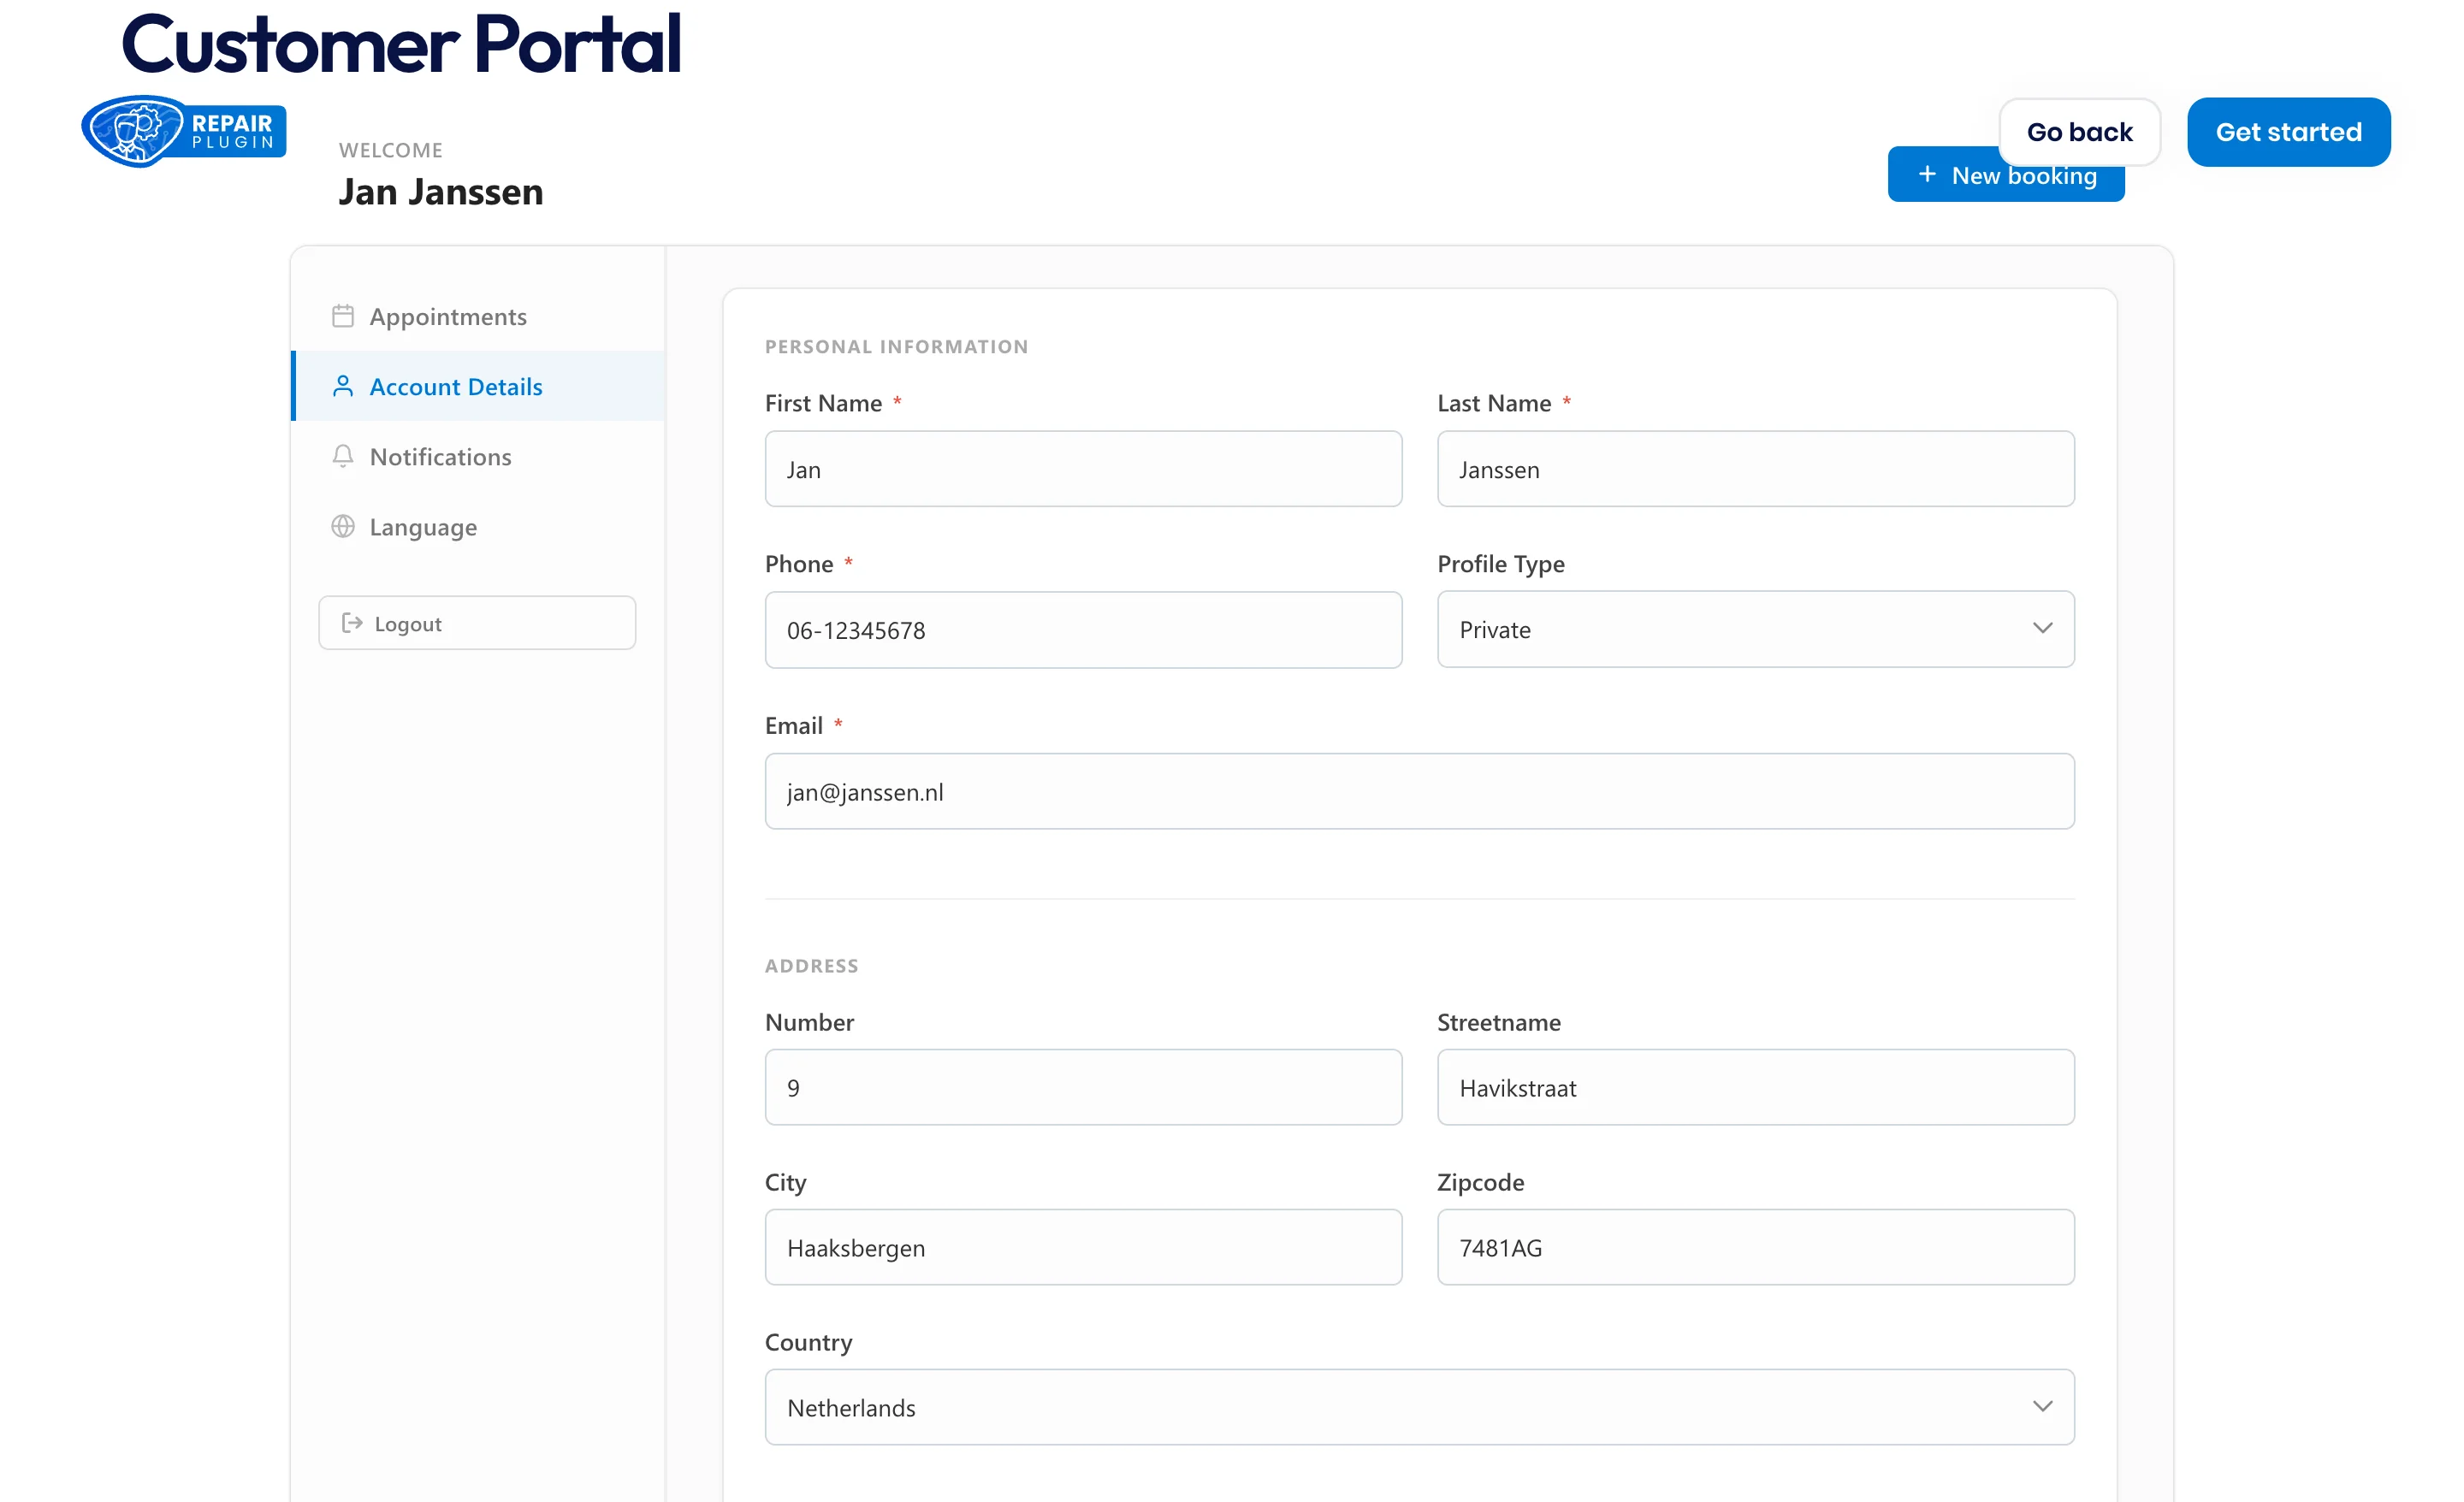
In the Account Details tab, customers can edit their name, phone number, email, profile type (private or business), and address -- and change their password. Changes sync back to their WordPress account.
Let customers pick their notification channel
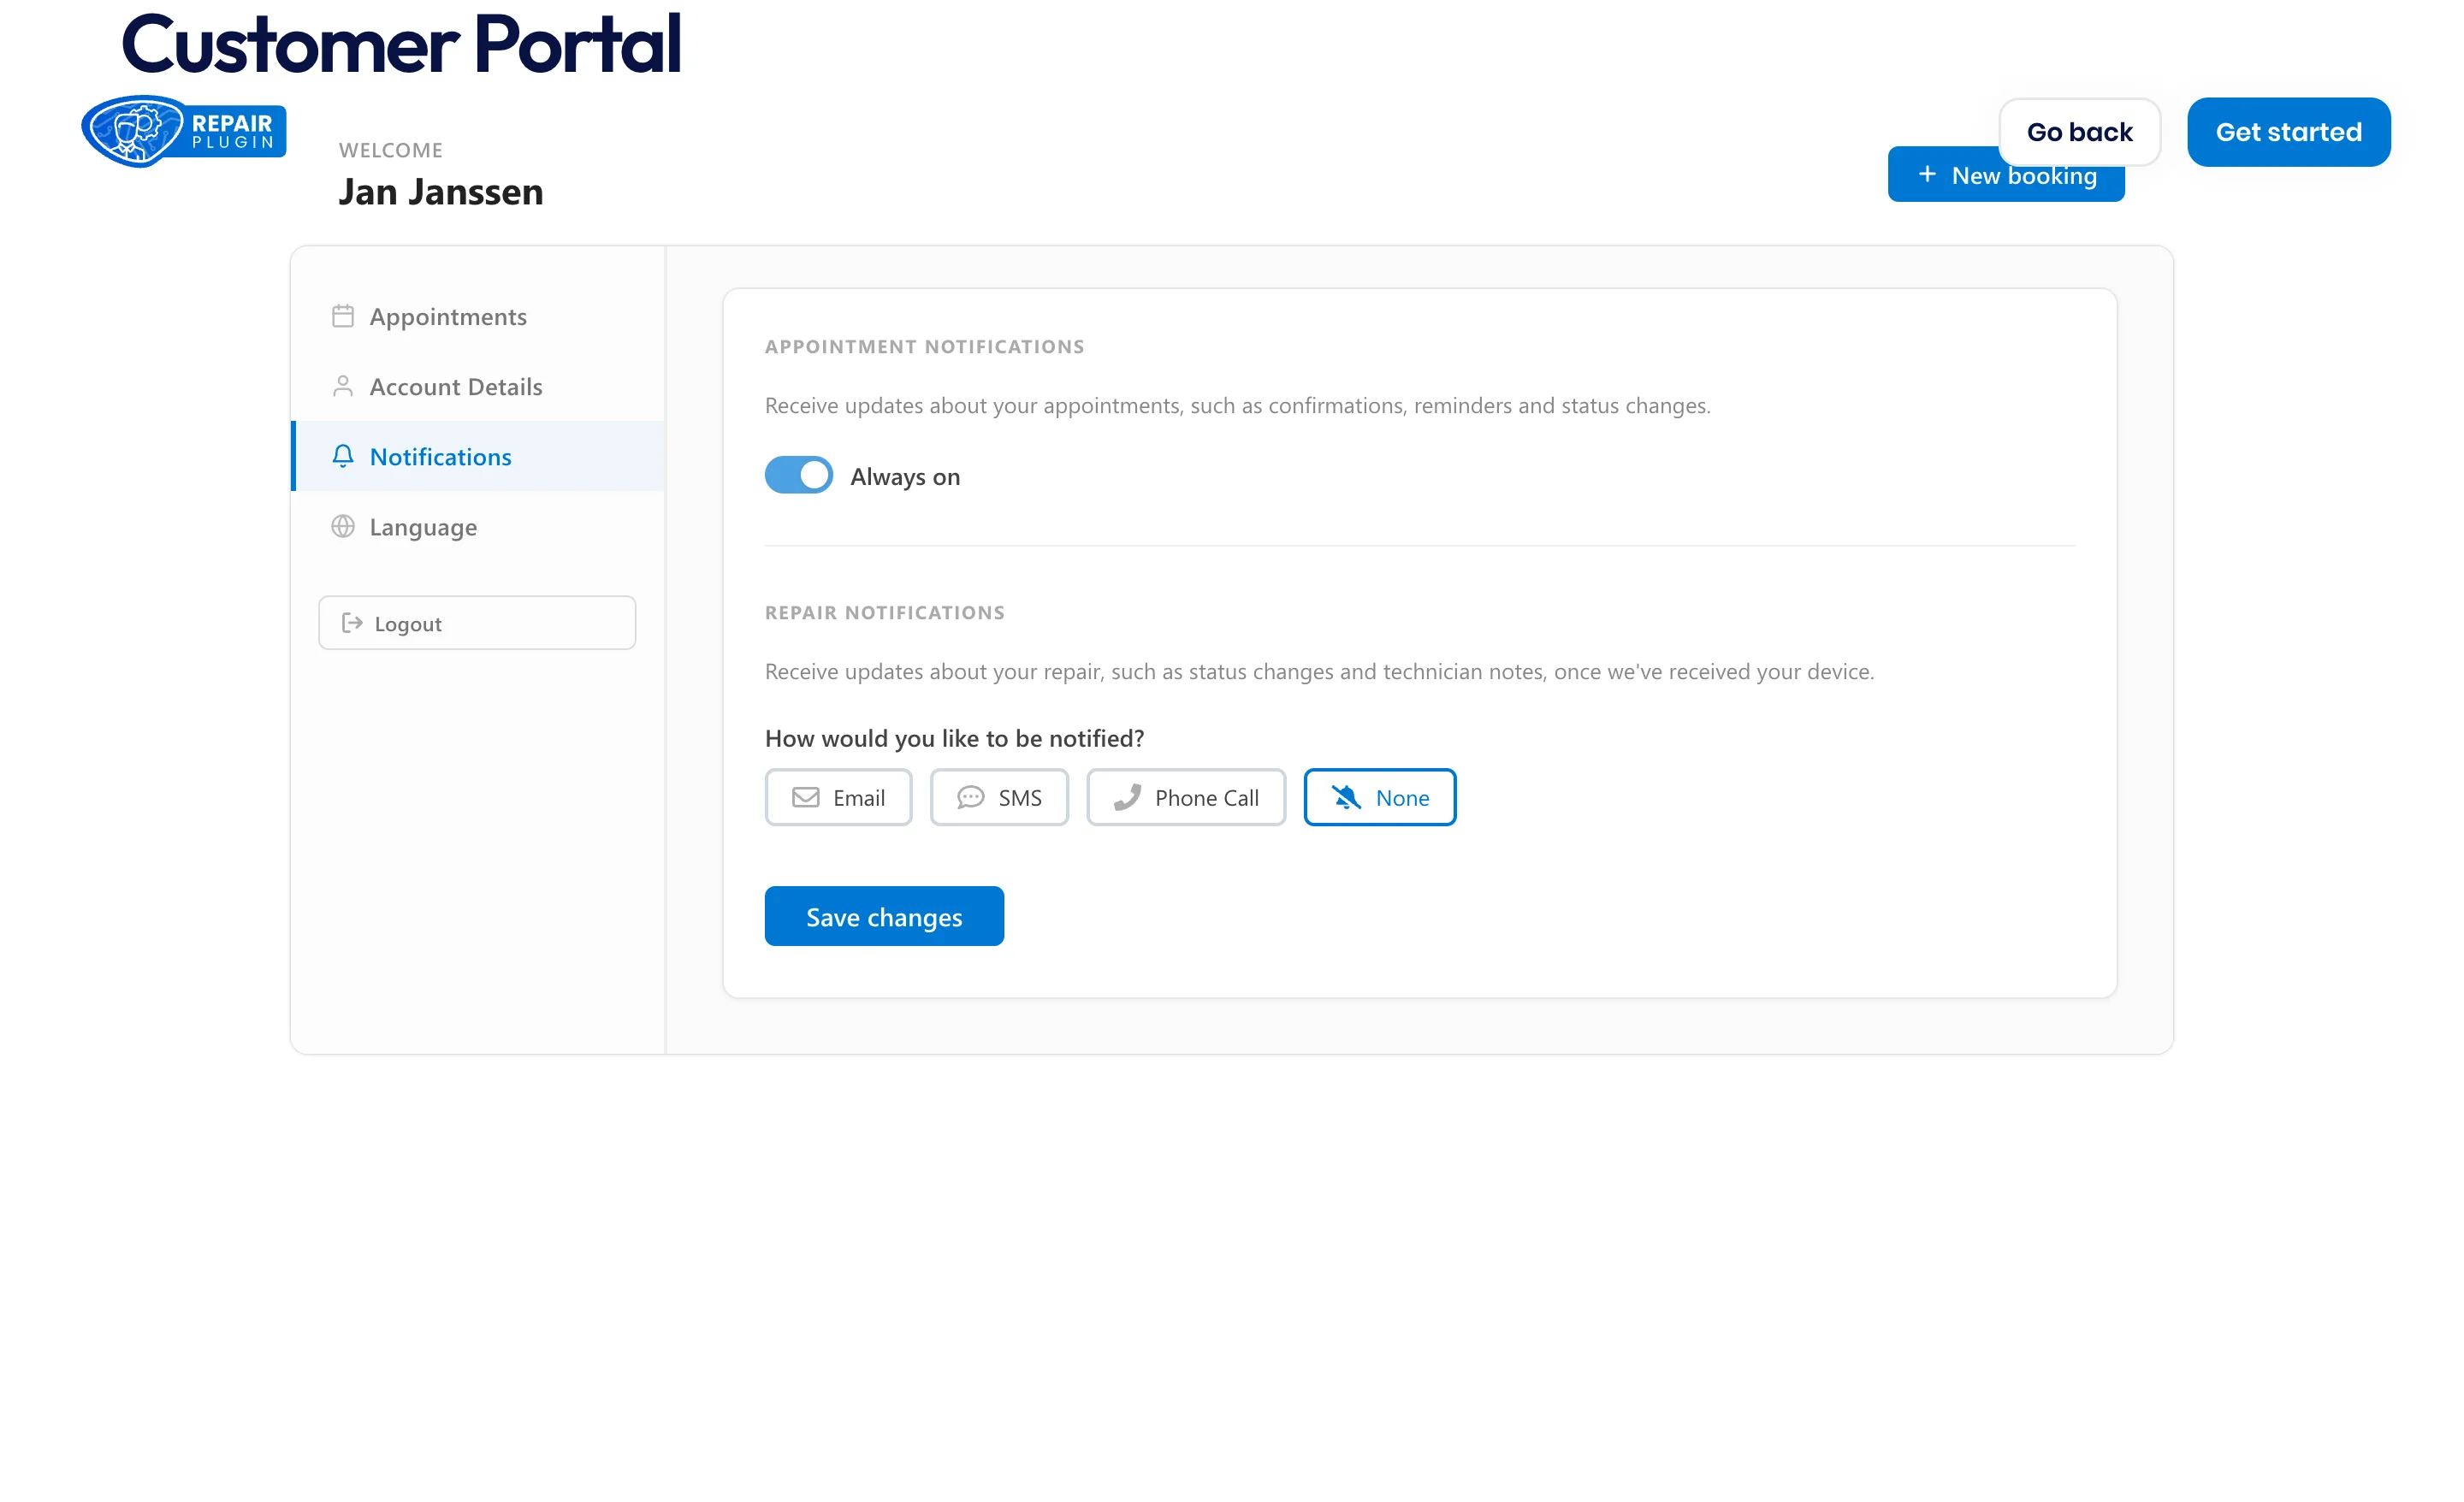
When the Repairs Workflow addon is active, the portal shows a Notifications tab. Appointment emails are always on; for repair updates, customers choose Email, SMS, Phone Call, or None. Your team sees this choice in the Repairs Workflow and gets a warning when they pick a different channel.
Serve customers in their own language
When you've enabled more than one language (see Managing Languages), the portal shows a language selector -- below the login card for visitors, and as a Language tab for logged-in customers. A customer's choice is saved as their preferred language and used for their order emails. The portal's own texts are fully translatable under the Customer Portal category in Settings > Localization, and ship in English and Dutch out of the box.
Settings reference
Customer Portal Shortcode (RepairPlugin > Settings > Plugin Shortcode)
| Setting | Description | Default | Customers see |
|---|---|---|---|
| Customer Portal Shortcode | The shortcode you place on a page to show the portal. It's read-only -- copy it as-is. Tip: put it on a page that's easy to find from your main menu. | [Repair_Portal] | The portal: a login/register card when logged out, or their dashboard when logged in. |
| Base URL | Tells RepairPlugin which page holds [Repair_Portal]. This URL is used to build the Set Password (after registration) and Reset Password (forgot password) links in portal emails. | Find It Automatically | The password links in their emails bring them back to your portal page. |
| Custom Link | The portal-page URL used when Base URL is set to "Use My Custom Link". Tip: use this when automatic detection doesn't find the right page. | (empty) | — |
Portal emails (RepairPlugin > Settings > Notifications & Quotes)
| Setting | Description | Default | Customers see |
|---|---|---|---|
| Portal Register | The email sent when a customer registers on the portal. It contains their set-password link. Subject and message are editable, with variables like the set-password link and site name. You can also add your location name, address, and zip code + city to the message. | On | An email "Set your password for [your site name]" right after registering. |
| Portal Forgot Password | The email sent when a customer uses "Forgot password" on the portal. It contains their reset-password link. You can add your location name, address, and zip code + city to this message too. | On | An email "Password Reset for [your site name]". |
These two emails don't have a Send Duplicate option -- you always receive WordPress's standard new-user email when someone registers.
The location variables ($LocationName$, $LocationAddress$, and $LocationZipcodeCity$) always use your main location -- the first location you created. See Email Templates for the full list of portal email variables.
Customer accounts
| Setting | Description | Default | Customers see |
|---|---|---|---|
| Anyone can register (WordPress: Settings > General) | WordPress's own registration switch. It must be on for portal registration to work. RepairPlugin never changes this setting for you. | Off | With it off, the Register tab says registration is currently closed. |
| Customer role | Every new WordPress registration gets the extra role repairplugin_customer ("RepairPlugin Customer"). Users with only this role can't open your WordPress admin. Any logged-in WordPress user can open the portal. | added automatically | Access to the portal dashboard -- and nothing else in WordPress. |
| Repair notifications preference | The channel for repair status updates, chosen by the customer in the portal's Notifications tab: Email, SMS, Phone Call, or None. Only shown when Repairs Workflow is active. | None | Their choice in the Notifications tab; your team sees it when sending workflow updates. |
Frequently asked questions
Do my customers need a WordPress account?
Yes, but they never see your WordPress admin. They register on the portal page itself with just their email address, get an email to set a password, and log in on the same page. RepairPlugin creates the WordPress account behind the scenes.
Can customers cancel or reschedule from the portal?
Yes. The appointment detail view has Reschedule and Cancel links that take them through the same flow as the links in their booking emails. Both disappear once an appointment is canceled or completed.
Is this only for business customers?
No, any customer can use it. It's positioned mainly for B2B, because assigning loyalty coupons to recurring business clients is where it shines, but private customers can track their repairs and rebook the same way.
What if a customer has more than one record with the same email?
The portal shows all of those records together as a single history, so the customer sees everything in one place. You can clean up duplicate records separately in the Customer Database.