
Banners
Create promotional banners in RepairPlugin that display on the repair selection page — with optional model targeting, expiration dates, and priority ordering.
What can you do with this?
- Promote offers visually -- upload banner images that appear on the repair selection page, catching your customer's attention at the moment they're choosing repairs.
- Upsell accessories or services -- show targeted offers (e.g., screen protectors, extended warranty, premium quality parts) right next to the repair the customer is selecting.
- Target specific devices -- show a banner only for certain brands or models (e.g., a screen protector deal just for iPhone 16 customers).
- Schedule campaigns -- set start and end dates so banners activate and expire automatically without manual intervention.
- Control display order -- drag banners into your preferred priority order to decide which promotion appears first.
- Manage multiple banners -- run several campaigns at once, each with its own image, targeting, and schedule.
Example: You're running a "Back to School" promotion on laptop screen repairs. Upload a banner image, target it to all laptop models, set it to expire at the end of September, and it shows automatically to every customer selecting a laptop repair.
Where to find it
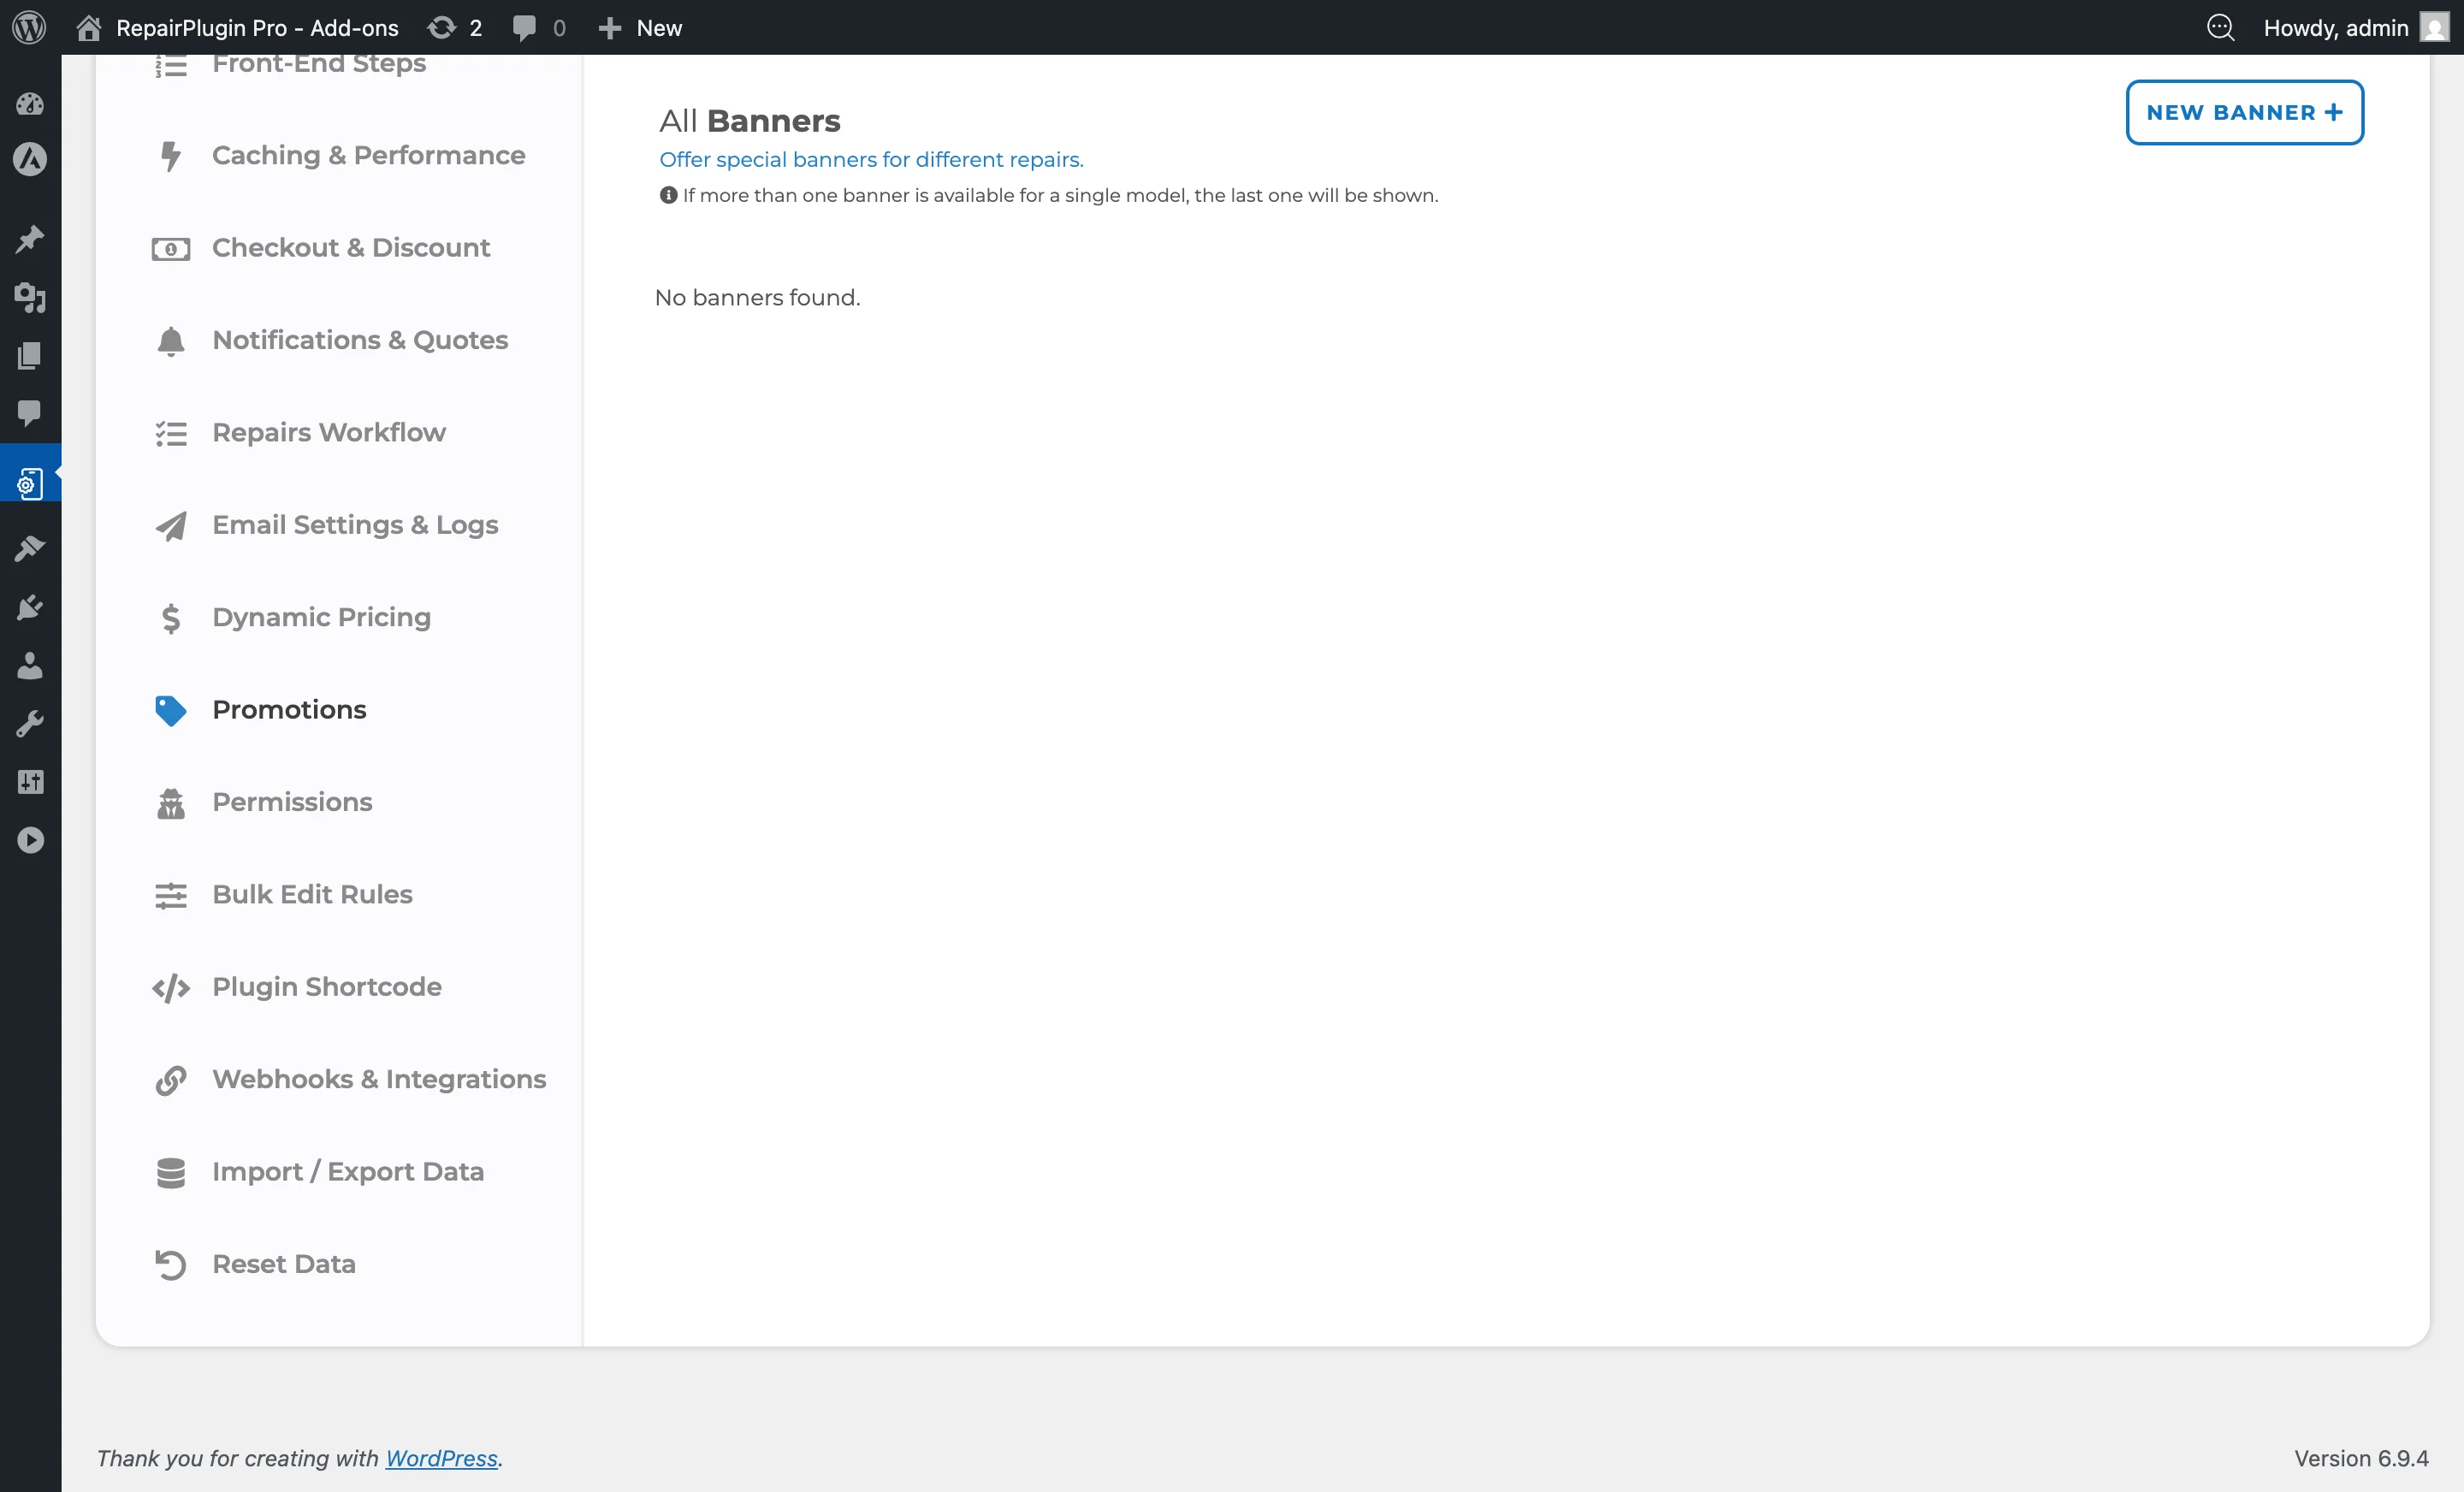
- In your WordPress admin, go to RepairPlugin in the left sidebar.
- Click Settings.
- In the settings sidebar, click Promotions.
- Scroll down past the Coupons section to the Banners section.
How to set it up
Create a new banner
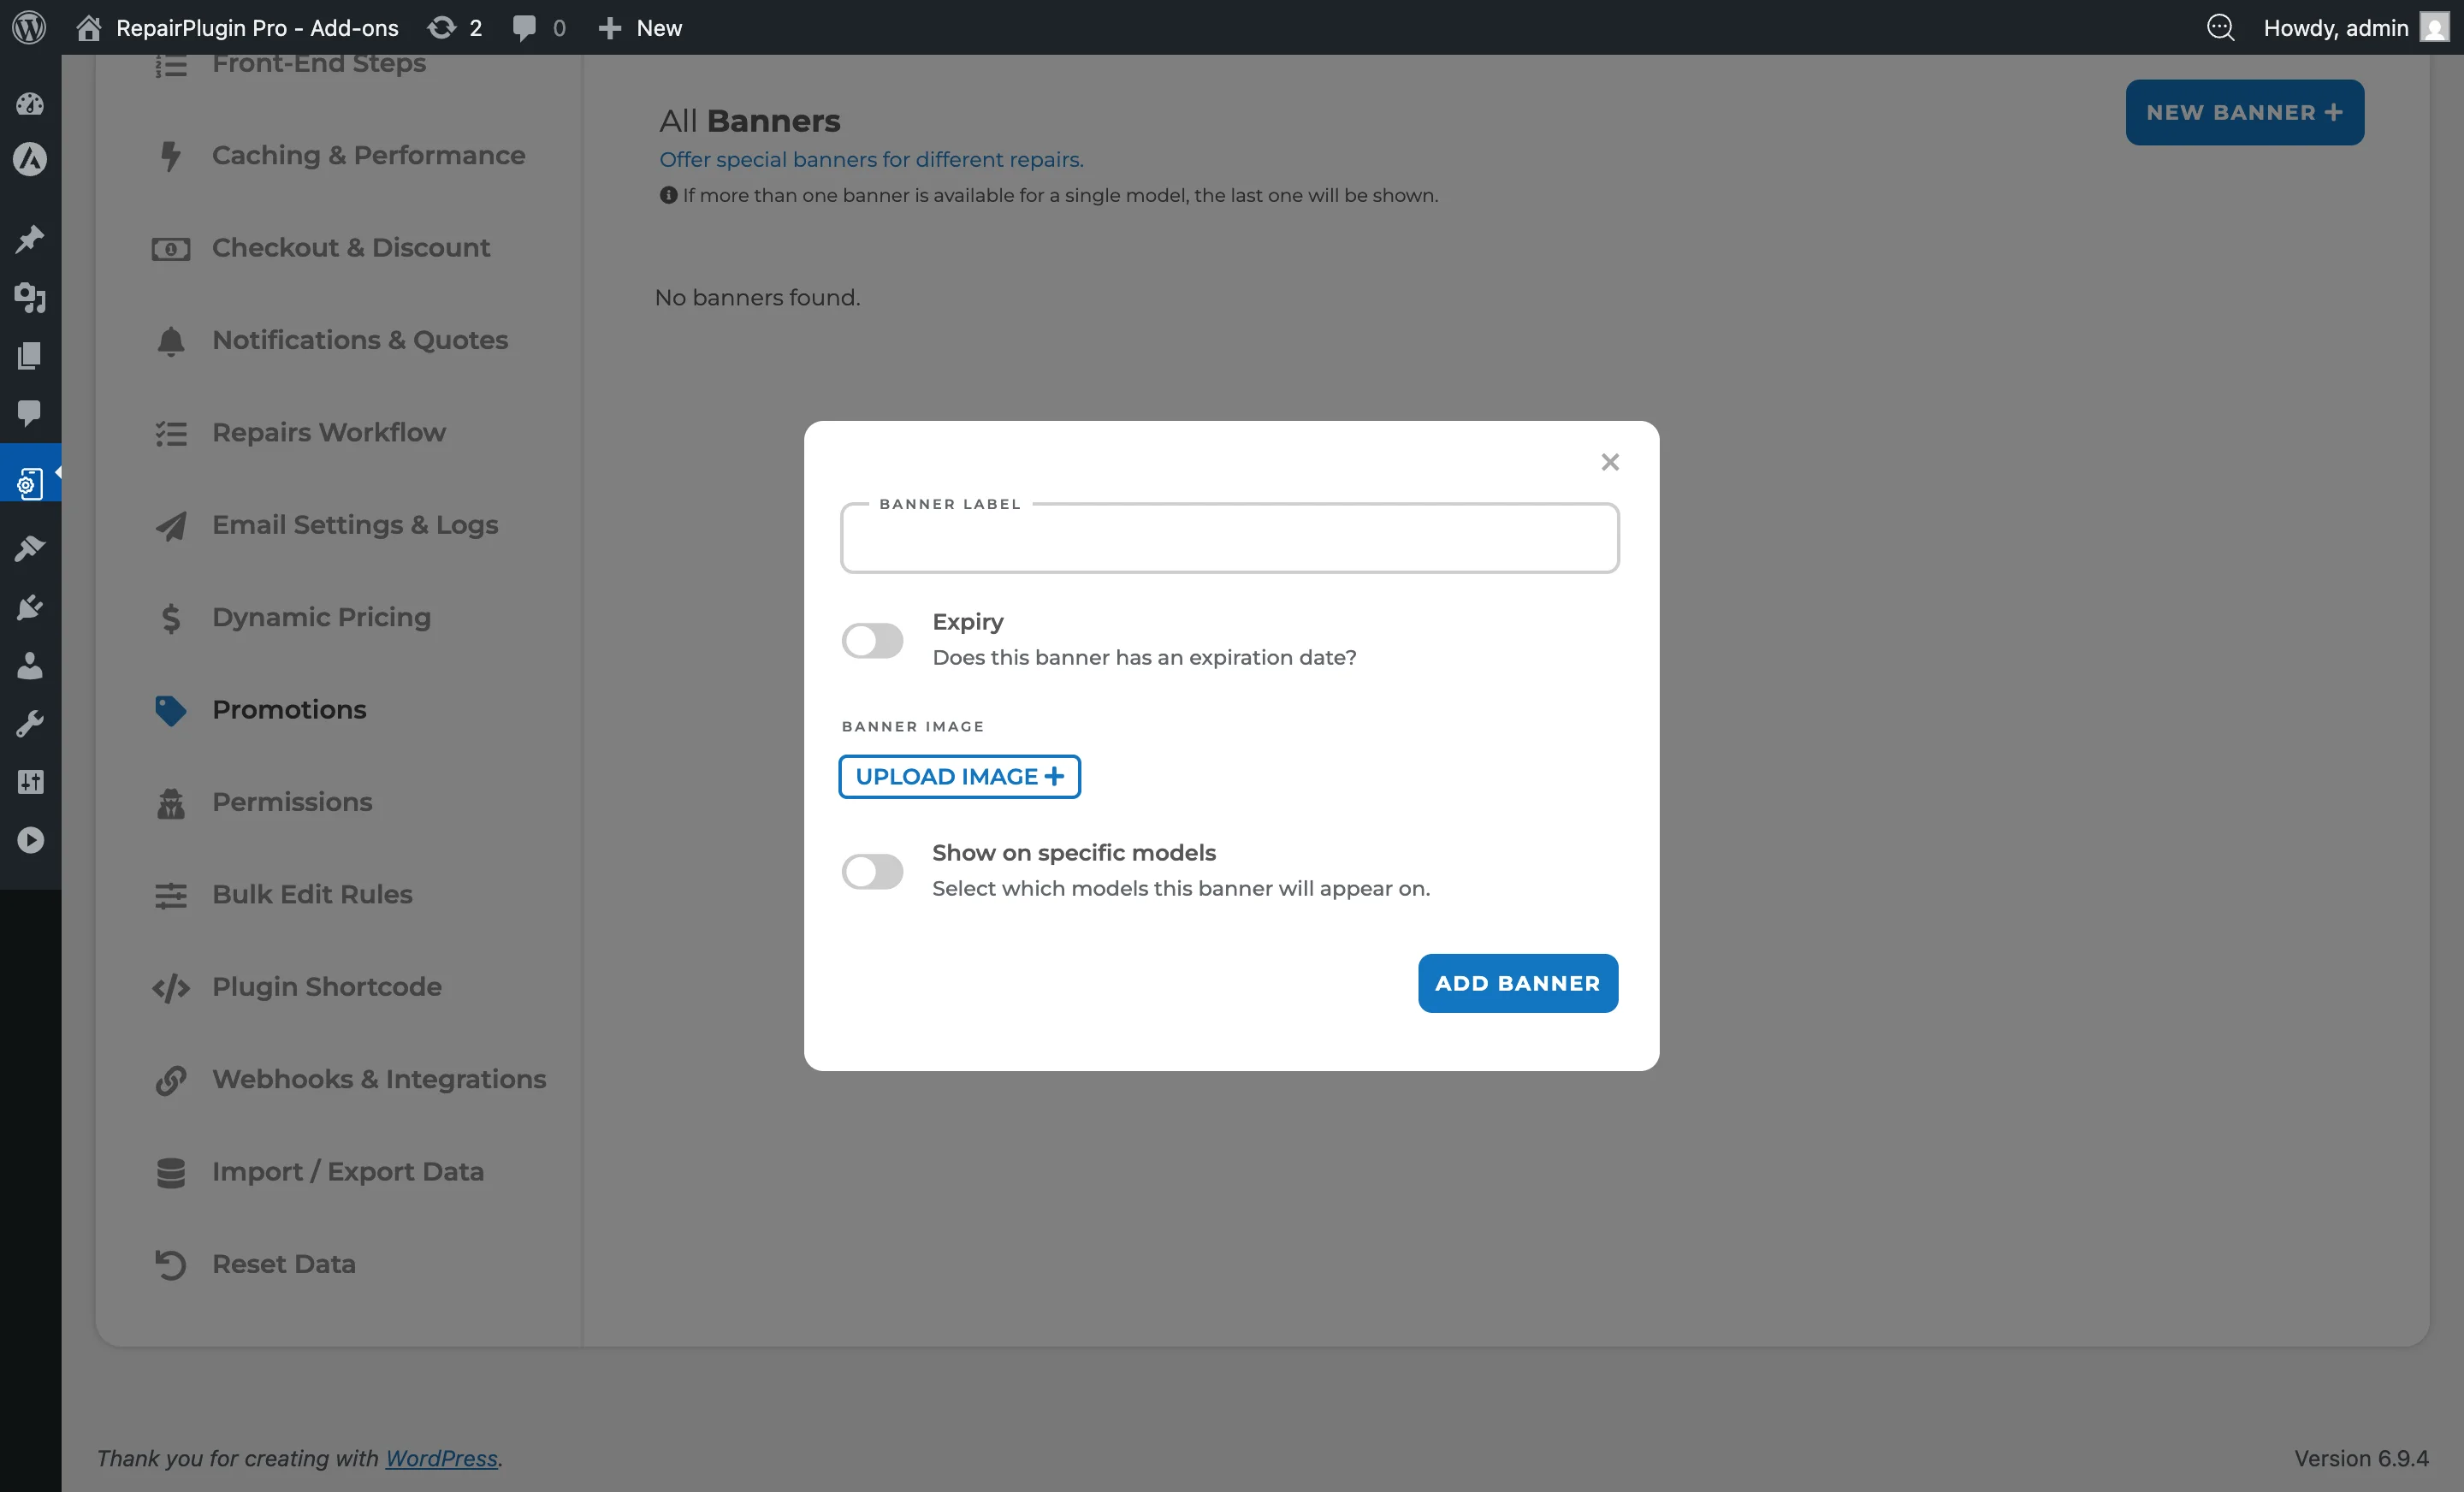
- In the Banners section, click Add New Banner.
- A modal opens with the following fields:
- Label -- an internal name for the banner (e.g., "Summer Screen Deal").
- Banner Image -- upload the promotional image. Click the upload area to select a file.
- Expiration -- switch on to set a start date and end date for the banner. Leave off for an always-active banner.
- Show on specific models -- switch on to restrict the banner to certain device models. A model selection tree appears with checkboxes organized by brand and model.
- If you've enabled model targeting, browse the tree and check the models where this banner should appear.
- Click Add Banner.
Edit an existing banner
- In the Banners list, click the banner you want to edit to expand its details panel.
- Update any fields:
- Change the Label or upload a new Banner Image.
- Adjust the Expiration dates or turn expiration on/off.
- Modify the model targeting by checking or unchecking models in the selection tree.
- The Selected Models table shows all currently linked models. Click the delete icon next to a model to remove it, or click Reset Selected to clear all model links.
- Click Update to save your changes.
Enable or disable a banner
Each banner in the list has an active toggle. Switch it on to display the banner on the frontend, or off to hide it. Click Save to apply the change.
Reorder banners
Banners display in priority order. To change the order:
- Drag banners into your preferred position using the drag handles.
- Click Save to apply the new order.
The first active banner matching the customer's selected model is shown on the repair selection page.
Delete a banner
Click the trash icon on the banner row. Confirm the deletion when prompted. This action is permanent.
Settings reference
| Setting | Description | Default | Customers see |
|---|---|---|---|
| Label | An internal name to identify the banner in the admin list | empty | Nothing -- this is for your internal organization only. |
| Banner Image | The promotional image displayed on the repair selection page. Recommended: use a wide, landscape-oriented image that fits the repair page layout | none | The banner image appears on the repair selection page above or alongside the repair list. |
| Active | Controls whether the banner is currently displayed on the frontend | on (for new banners) | When active, the banner appears on the repair selection page. When inactive, it's hidden. |
| Expiration | When enabled, shows Start Date and End Date fields. The banner only displays between these dates | off (no expiration -- always active) | The banner appears only during the scheduled period. Outside this window, it's hidden automatically. |
| Start Date | Sets when the banner becomes visible. Only shown when Expiration is enabled | empty | The banner starts appearing on this date. |
| End Date | Sets when the banner stops being visible. Only shown when Expiration is enabled | empty | The banner disappears after this date. |
| Show on specific models | When enabled, restricts the banner to selected device models. A brand/model checkbox tree lets you pick exactly which models see this banner. When disabled, the banner shows for all models | off (shows for all models) | The banner only appears when they select a targeted model. If their model isn't targeted, they don't see the banner. |
| Priority (display order) | Controls which banner appears first when multiple banners are active. Set by dragging banners in the list | order of creation | The highest-priority matching banner is displayed. |
Frequently asked questions
Can I show multiple banners at the same time?
You can have multiple active banners, but display depends on model targeting and priority. The banner system shows banners based on their priority order and whether they match the customer's selected device model.
What image size should I use for banners?
Use a wide, landscape-oriented image. The exact dimensions depend on your theme layout, but a 4:1 or 3:1 aspect ratio (e.g., 1200 x 300 pixels) typically works well. Test with your live site to find the best fit.
Do banners affect page load speed?
Banner images are loaded only when a matching banner is active and the customer's selected model qualifies. Optimize your images (compress and resize) before uploading to keep page load times fast.