Models & Repairs
Manage device models and repair prices in RepairPlugin — adjust pricing, add sub-repairs, configure colors, and control visibility per model.
modelsrepairspricingsub-repairsdevice management
What can you do with this?
- Fine-tune prices per model — override default repair prices for specific devices that need different pricing (e.g., charge more for a premium model's screen repair).
- Add new devices — manually add models that aren't in the database yet, complete with image, release date, and model code.
- Manage device colors — add or remove the selectable colors customers see during booking.
- Offer quality options per model — add sub-repairs like "Original" or "OEM" with different price points under a single repair.
- Control visibility — turn individual models or repairs on and off without deleting anything.
Where to find it
- In the WordPress admin sidebar, click RepairPlugin.
- Click Models & Repairs in the submenu.
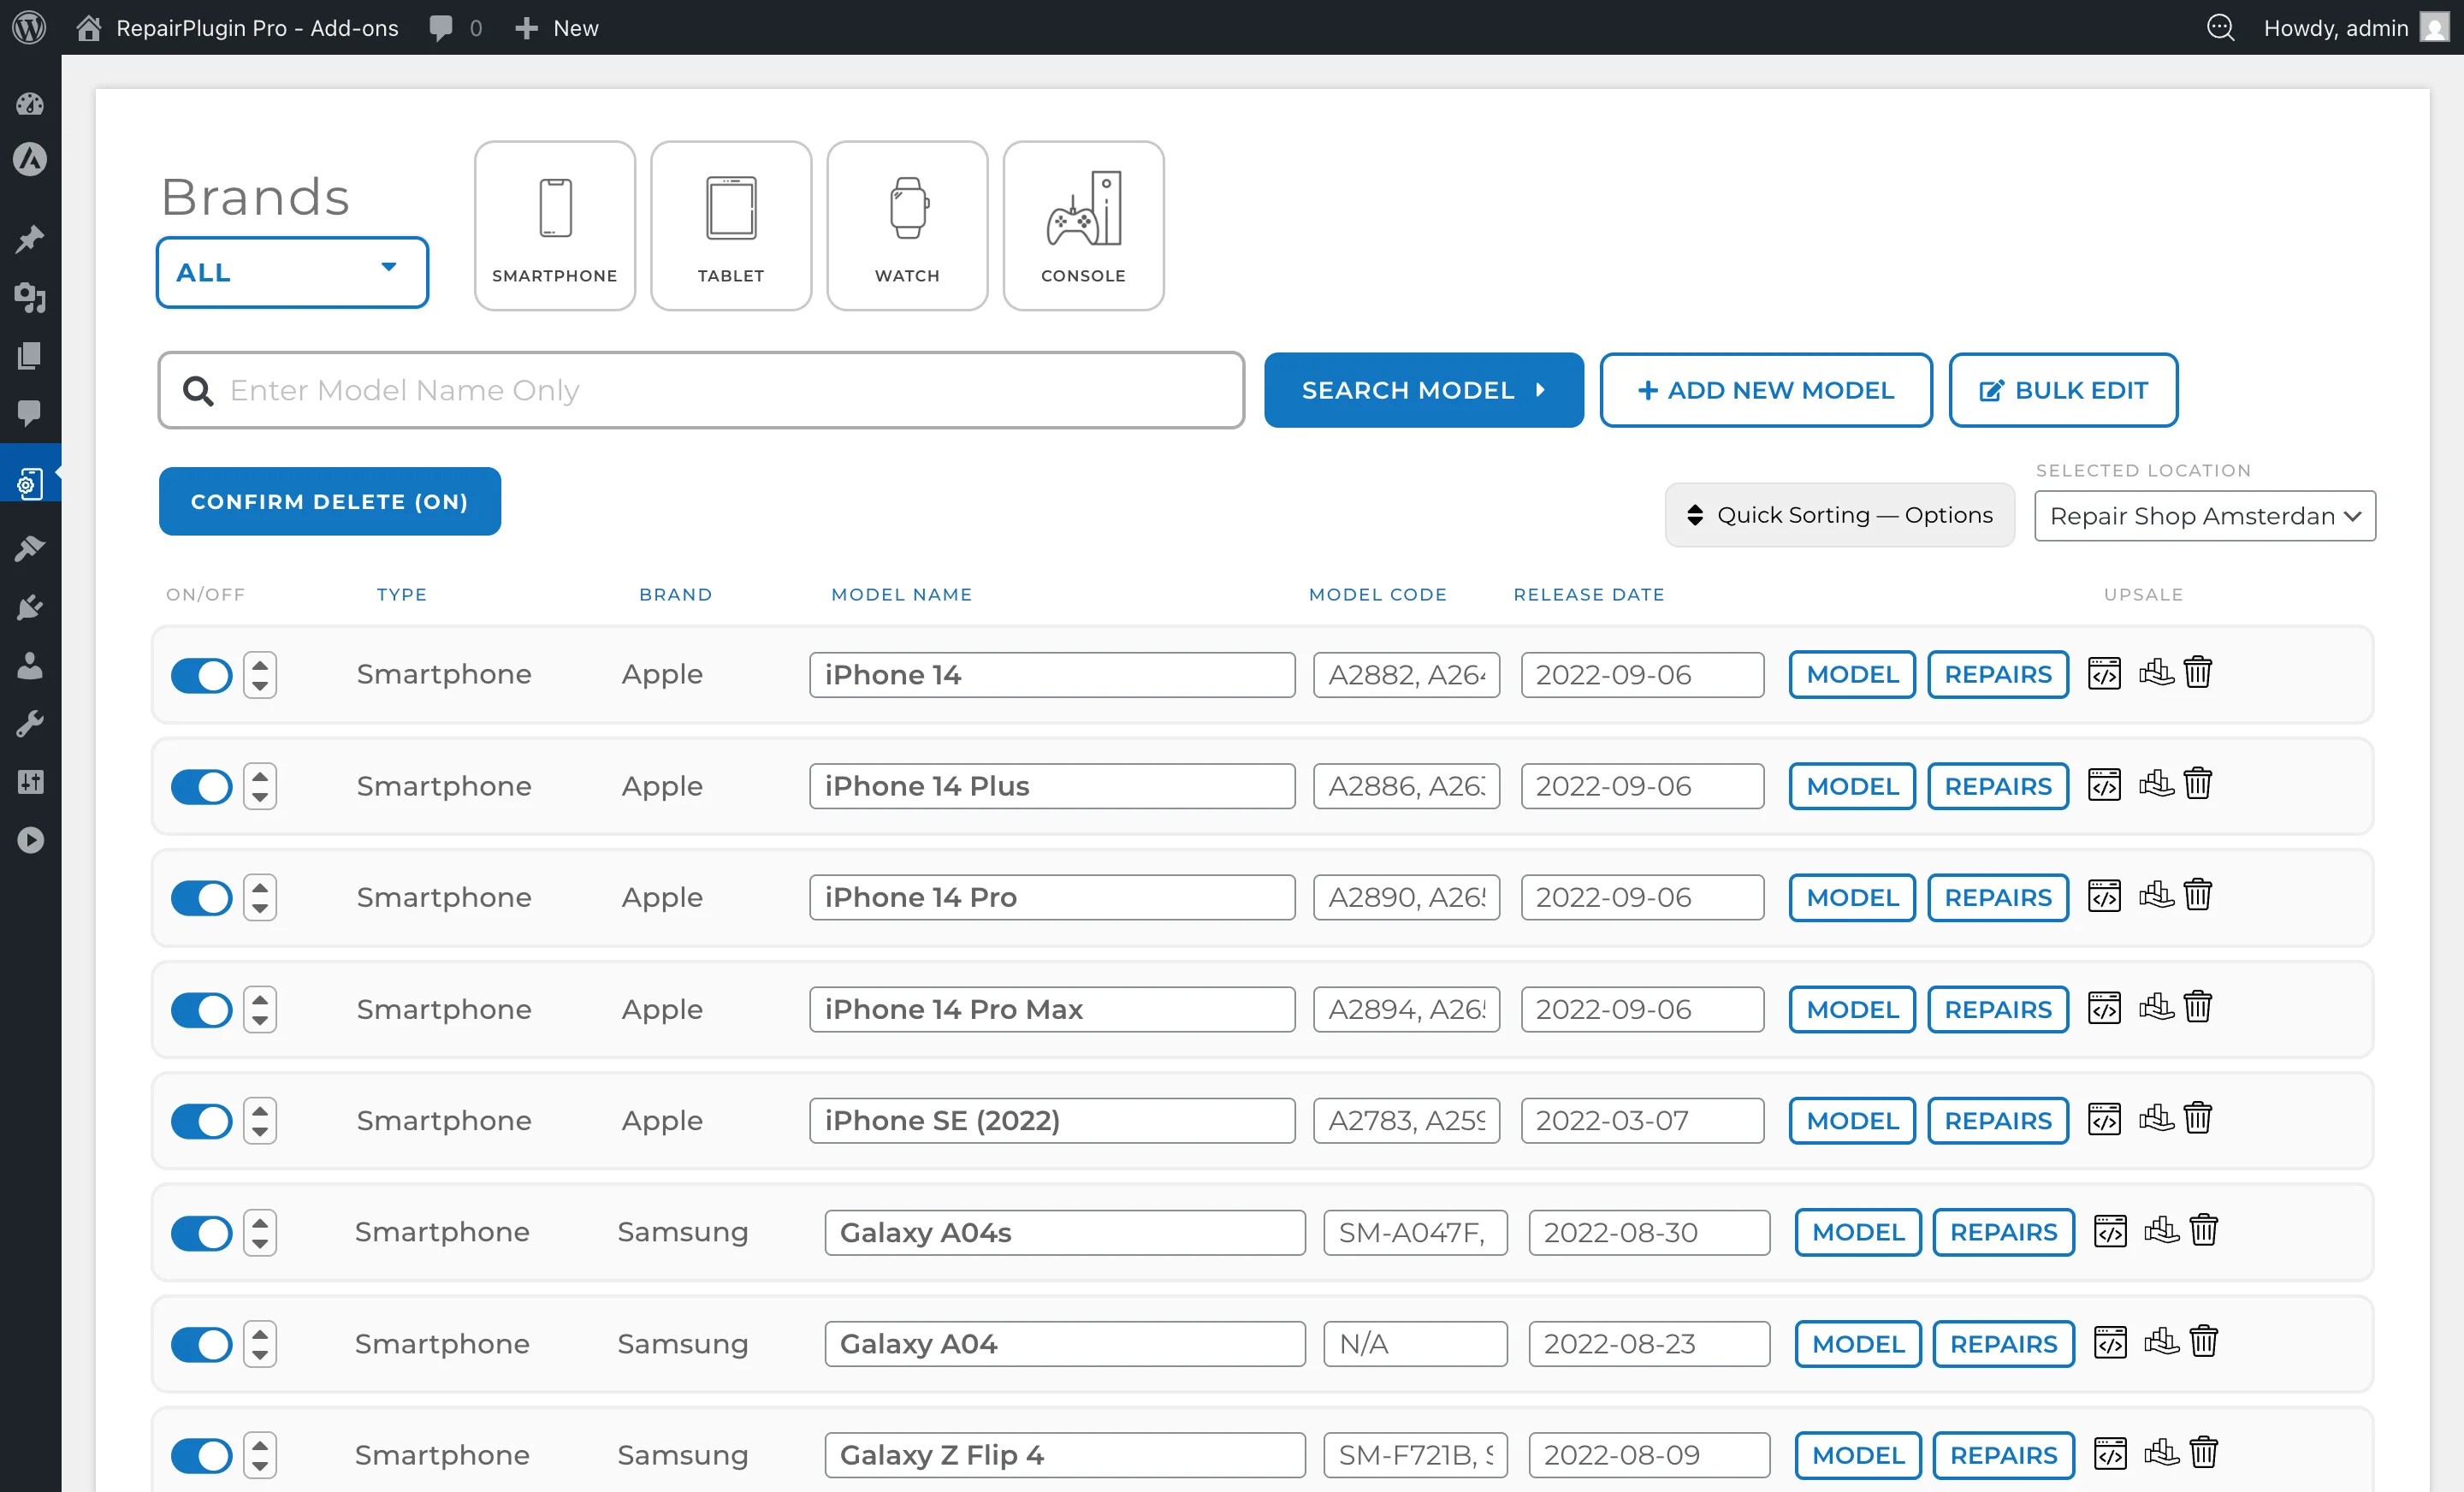
- The page opens showing a paginated list of all models (10 per page) with filters and a search bar at the top.
https://www.repairplugin.com/wp-admin/admin.php?page=wp_repair_manage_models
How to set it up
Find a model
The page offers several ways to locate a specific model:
- Search bar — type a model name or model code to search. This is the fastest method.
- Filter by Brand — use the brand dropdown to filter models by a specific brand.
- Filter by Category — use the category dropdown to filter models by device type.
- Sort columns — click column headers (Model Name, Model Code, Brand, Category, Release Date) to sort ascending or descending.
- Browse — scroll through the paginated list.
Edit a model
- Find the model using search or filters.
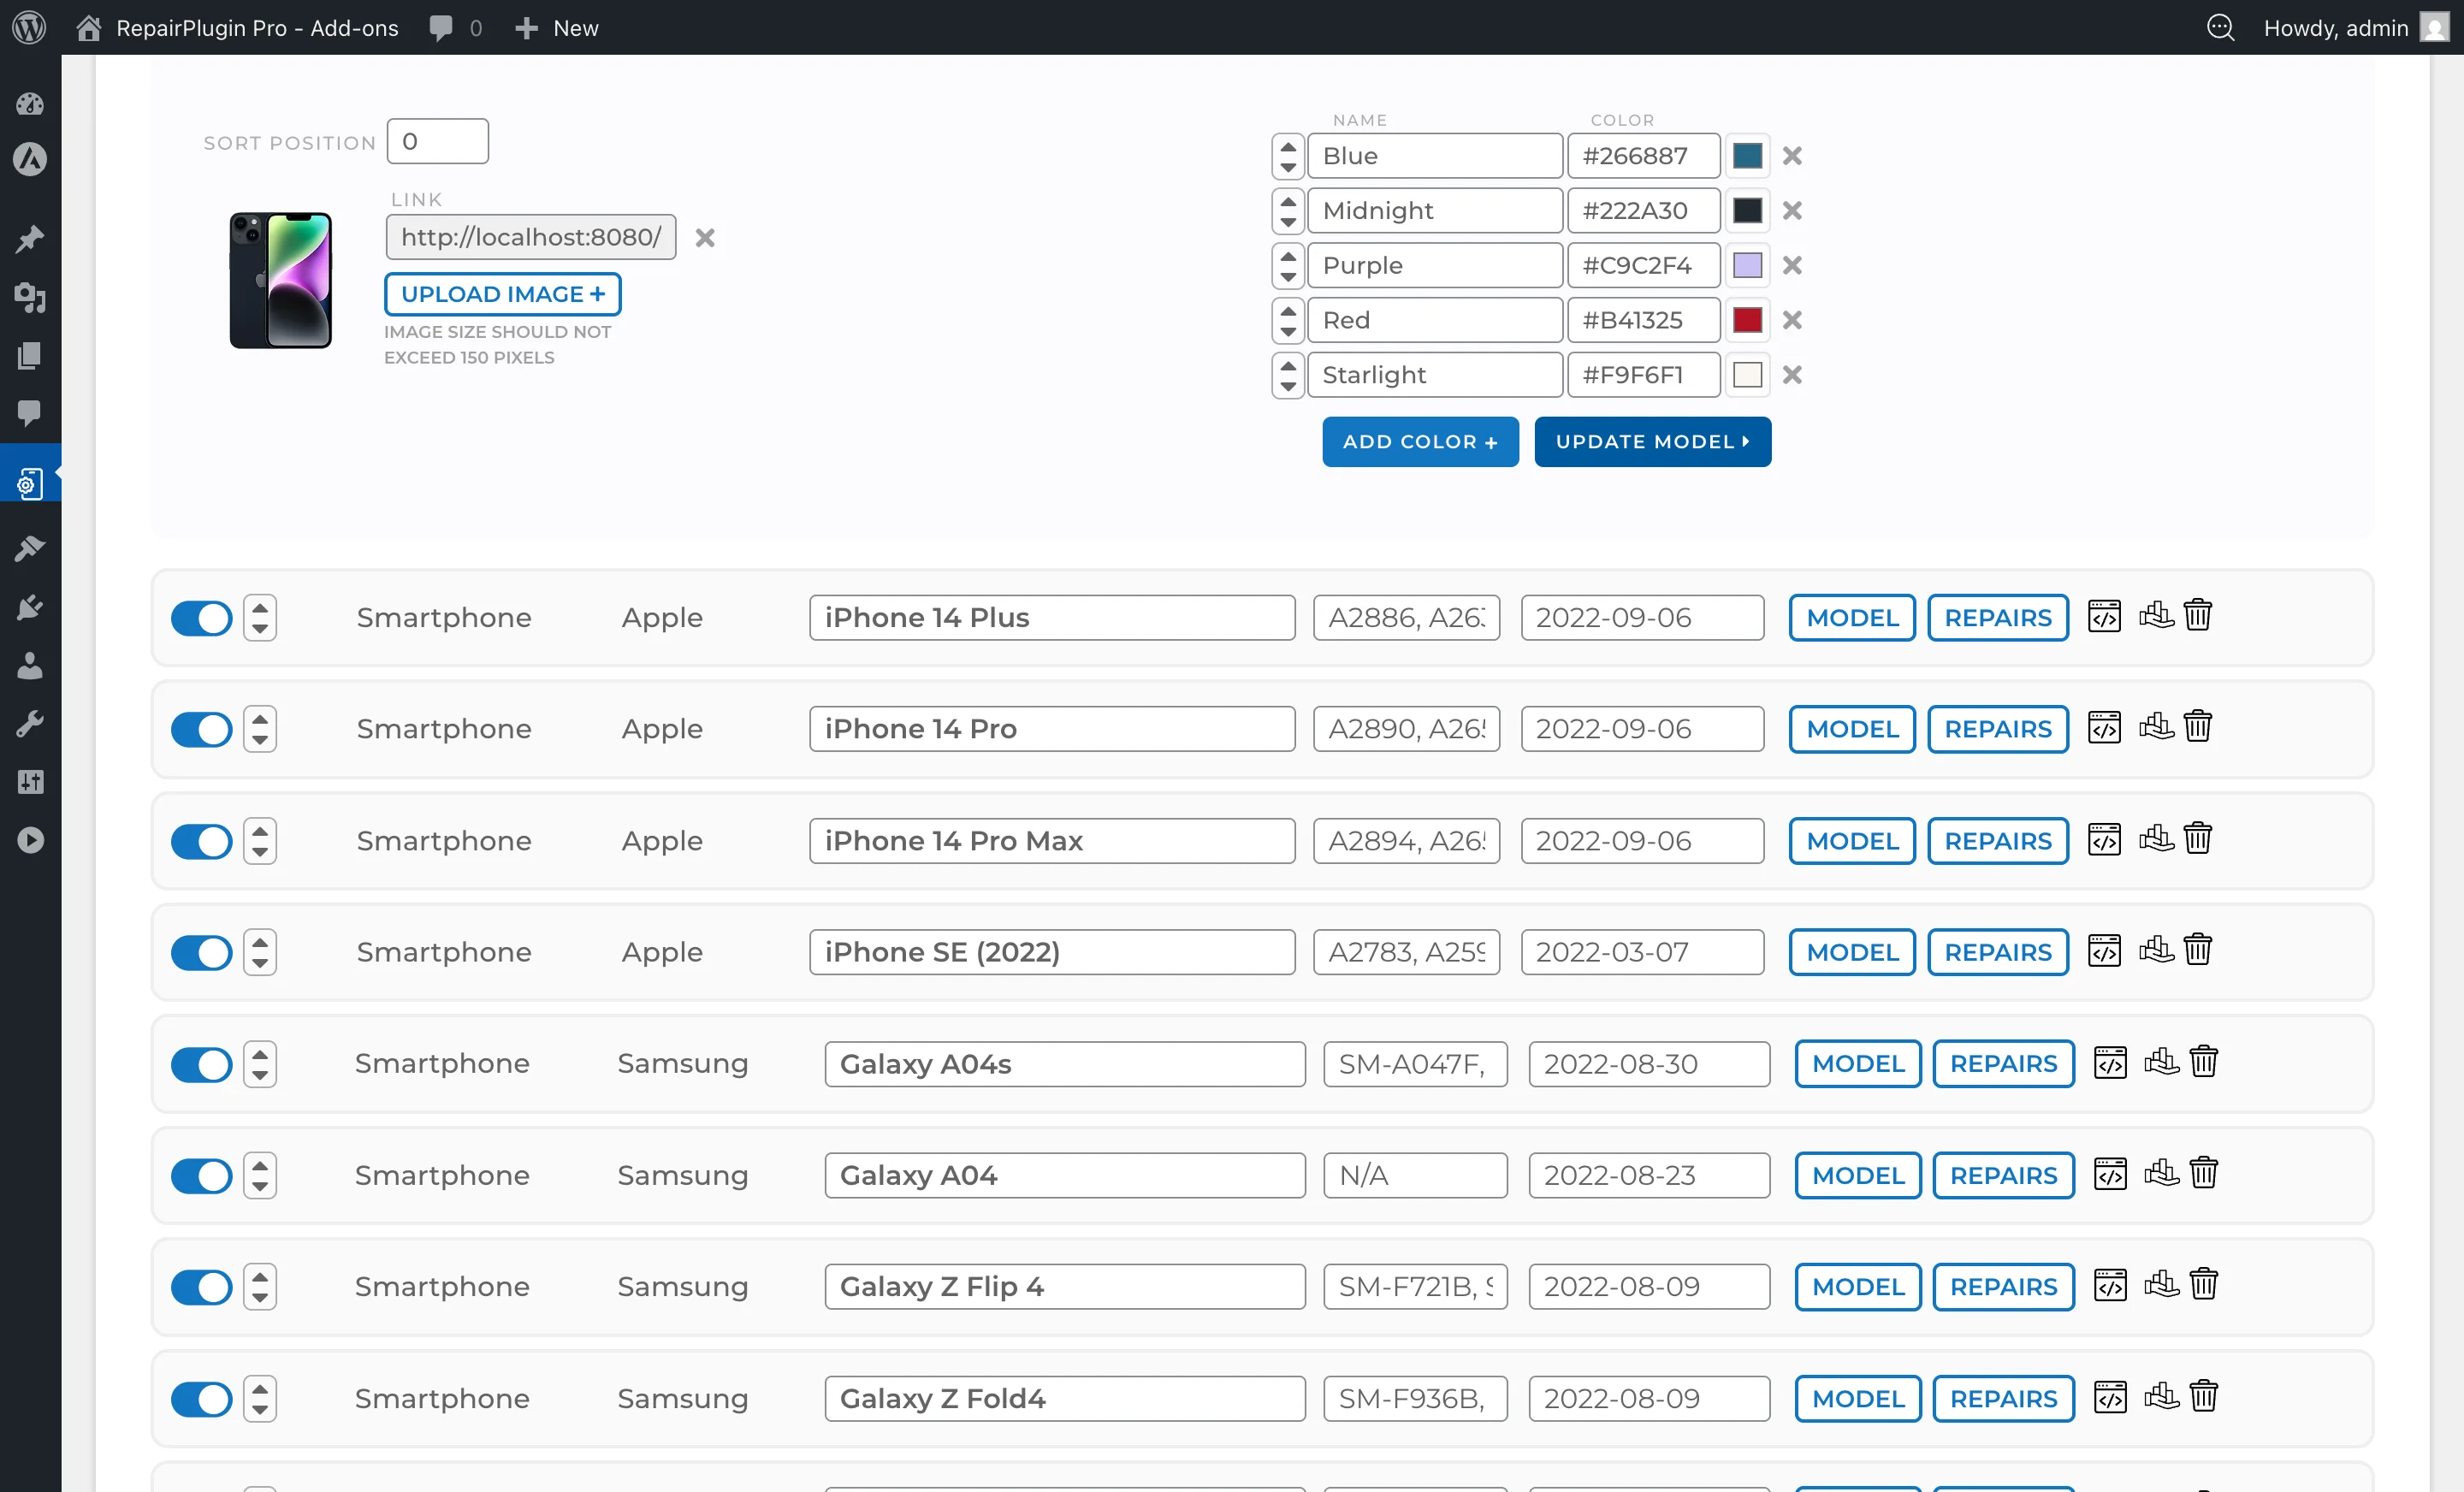
- Click the Model button on the model row to expand the model details panel.
- Adjust the desired fields:
- Model Name — the display name of the device.
- Model Code — the type or part number (e.g., "A2894").
- Release Date — the date the device was released.
- Model Image — upload or change the device image via the image upload button.
- To add a new color, click the Add color button and provide the color name and hex code.
- To delete a color, click the trash icon next to the color entry.
- Click Update model to save your changes.
https://www.repairplugin.com/wp-admin/admin.php?page=wp_repair_manage_models
Add a new model
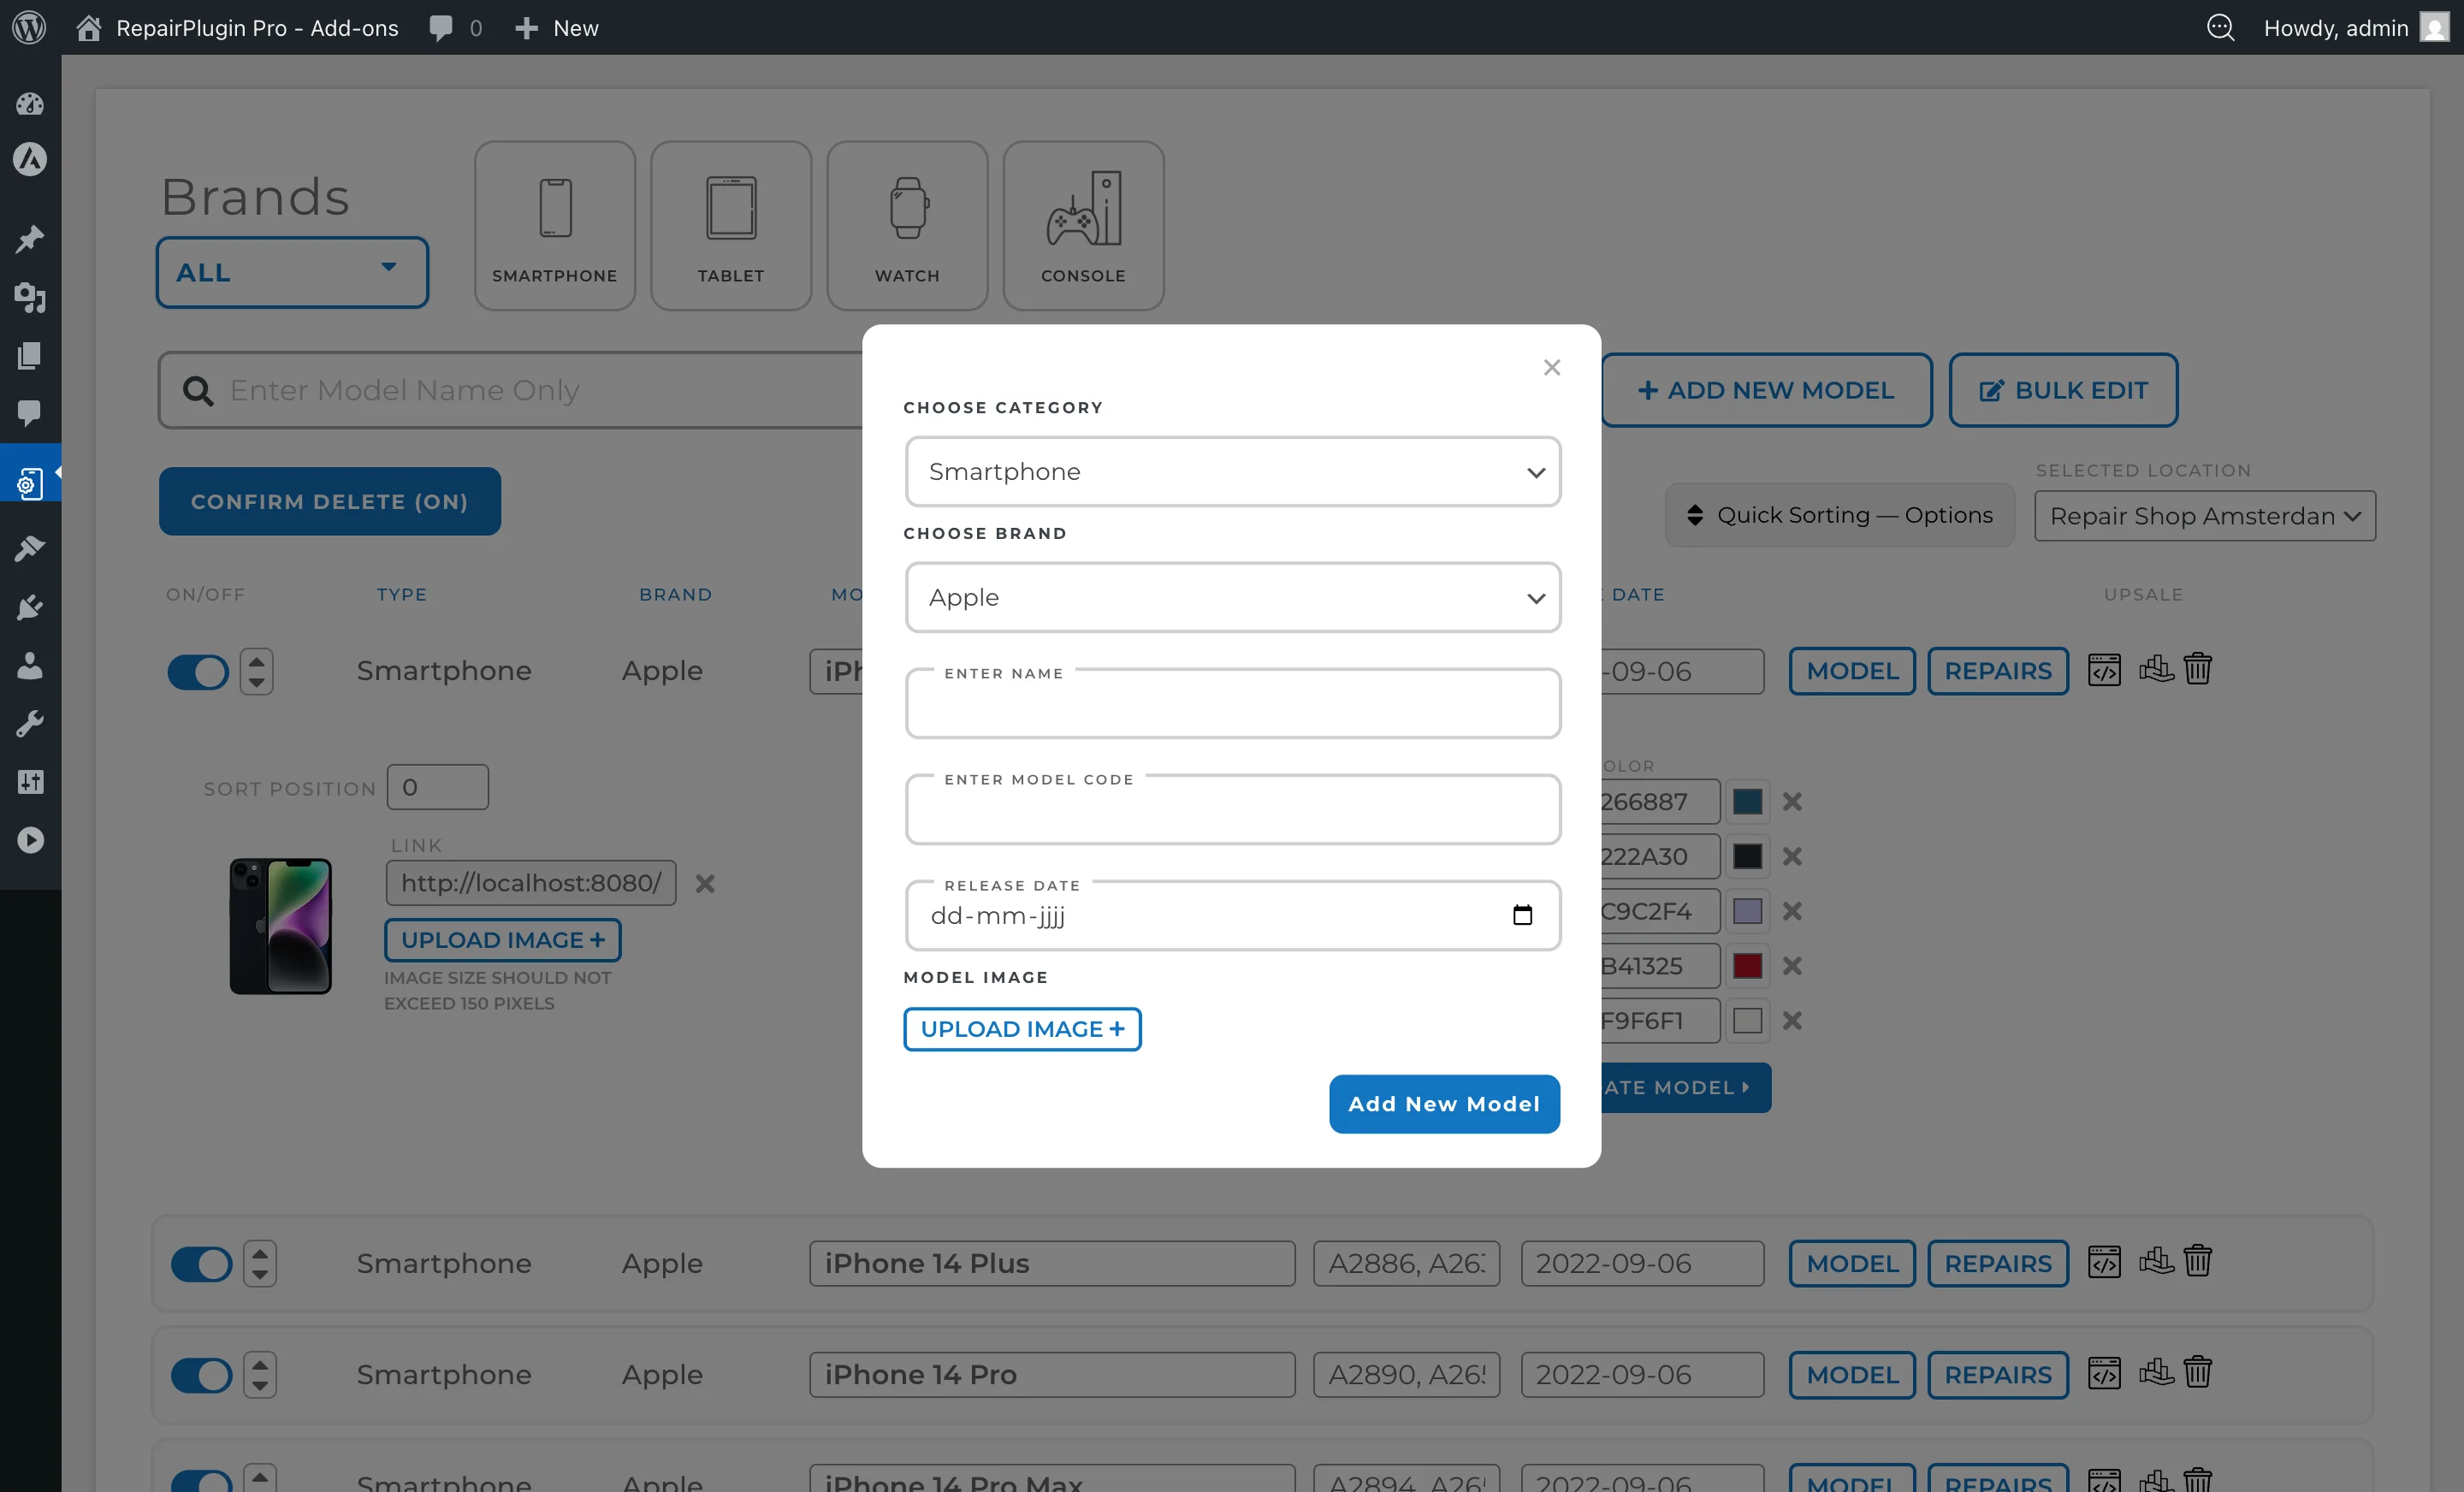
- Click the Add new model button at the top of the page.
- A dialog opens with the following fields:
- Model Name — the device name.
- Model Code — the type/part number.
- Release Date — the device release date.
- Category — select the device type category from the dropdown.
- Brand — select the brand (options update based on selected category).
- Model Image — upload a device image.
- Click Add Model to save. The new model automatically inherits the default repair list from its category.
https://www.repairplugin.com/wp-admin/admin.php?page=wp_repair_manage_models
Enable or disable a model
- Use the switch on the model row to turn it on or off.
- Save your changes. Disabled models don't appear on the booking form.
Delete a model
- Click the trash icon on the model row.
- Confirm the deletion when prompted.
- Warning: Deleting a model removes all associated repairs, colors, and related booking data. This action can't be undone.
Edit repairs for a model
- Find the model and click the Repairs button on the model row.
- The repair editor expands, showing all repairs inherited from the Default Repairs list plus any model-specific additions.
- For each repair, you can:
- Set the price — enter the repair price in the price field. Press TAB to quickly move to the next price field.
- Turn a repair on or off — use the blue switch on the left side of each repair row.
- Add a sub-repair (quality option) — click the blue plus (+) button on the right side to add options such as "Original", "OEM", or "Refurbished". Each sub-repair has its own name and price.
- Reorder repairs — use the sort arrows on the left side to move repairs up or down.
- Set repair duration — enter the estimated time and choose the unit (minutes, hours, or days).
- Add a repair badge — enter a short label (e.g., "Popular", "New") shown on your website.
- Set description — add a repair description shown to customers.
- To add a new repair specific to this model, click the Add repair button at the bottom of the repair list.
- Click Update repair at the bottom to save all changes.
- To reset repairs back to defaults, click the Reset Repair button. Warning: This resets all manually entered repair data for this model back to the default values and can't be undone.
https://www.repairplugin.com/wp-admin/admin.php?page=wp_repair_manage_models

Copy a model shortcode
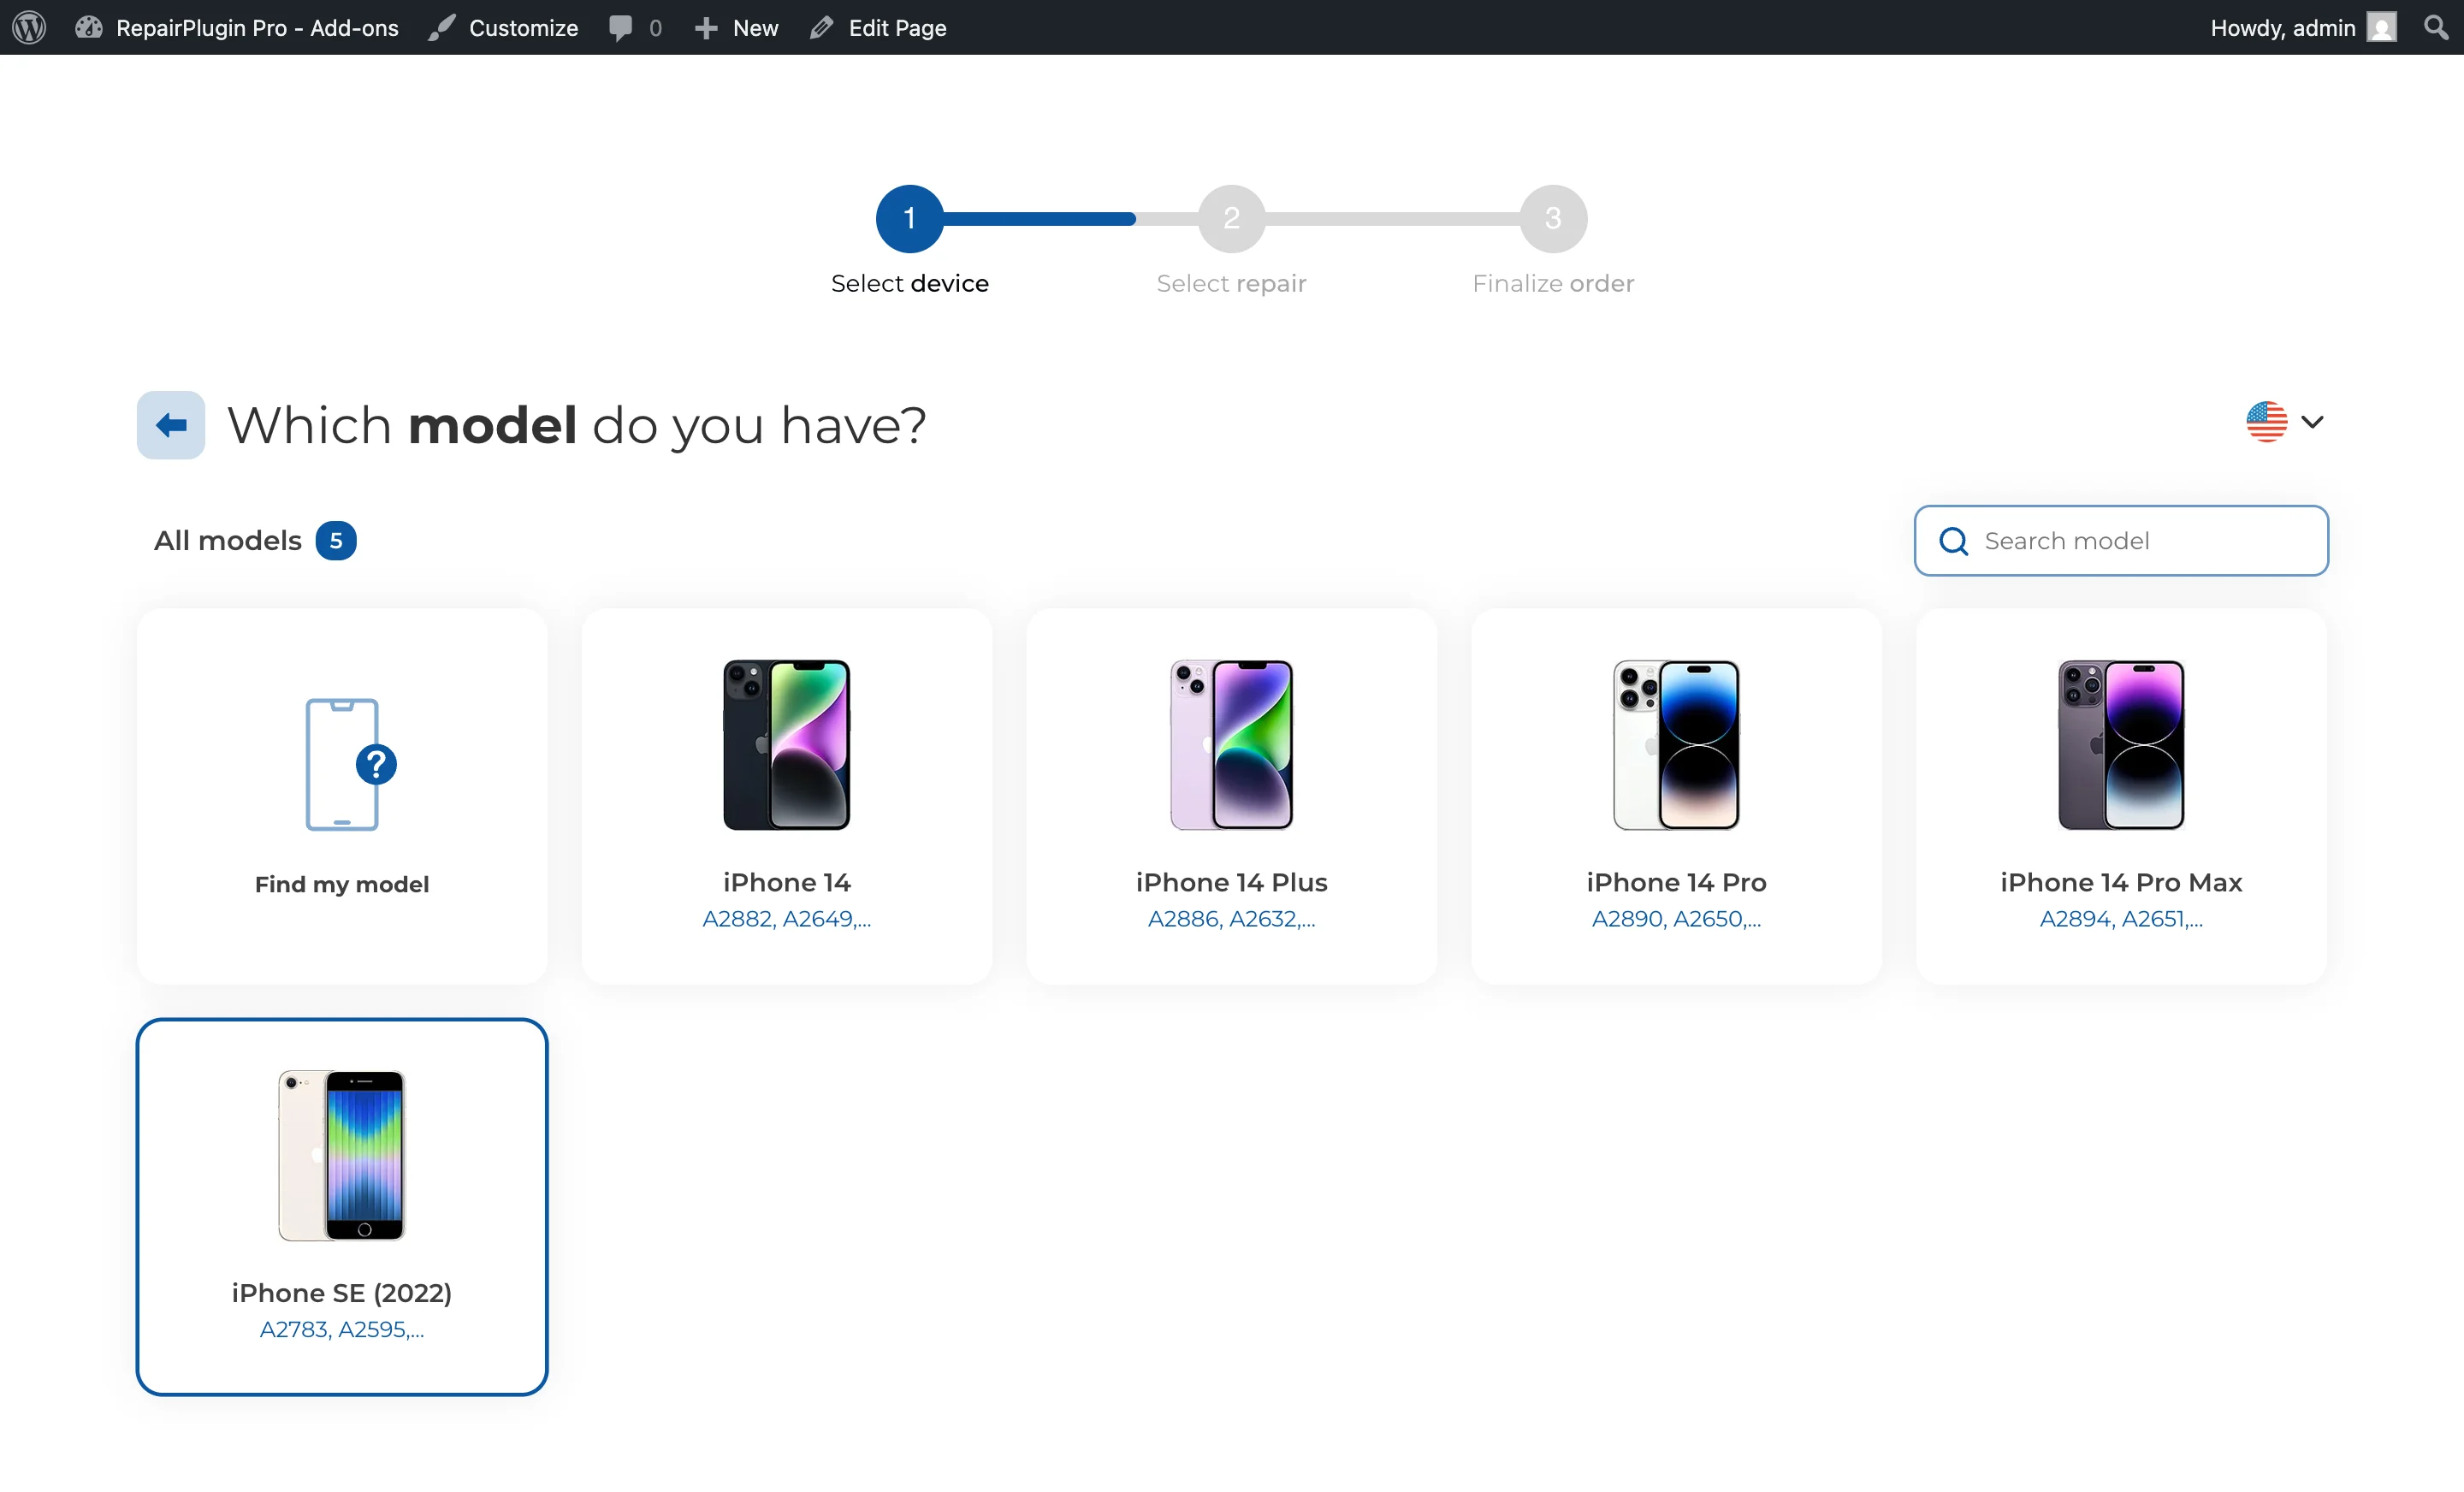
Click the shortcode button (code icon) on the model row to copy a model-specific shortcode. Place this shortcode on any WordPress page to display the booking form pre-filtered to that specific model.
https://www.repairplugin.com/book-a-repair#models
Settings reference
| Setting | Description | Default | Customers see |
|---|---|---|---|
| Model Name | Sets the display name for the device model | imported from database or entered manually | The model name appears on the model selection step of the booking form and in appointment confirmations. |
| Model Code | Stores the manufacturer type or part number. Used for search matching in the admin and displayed as badges on the repair selection page and in appointment details when Display Model Codes is enabled in Repair Box Styling | imported from database or empty | When Display Model Codes is enabled in Repair Box Styling, model code badges appear on the repair selection page. Also shown as badges in the appointment detail panel for staff. |
| Release Date | Records when the device was released. Can be used for sorting the model list | imported from database or empty | Not shown to customers by default. |
| Model Image | Associates an image with the model for visual identification | imported from database or none | The device image appears alongside the model name on the booking form. |
| Model Active | Controls whether the model is visible on your website | on | When turned off, the model is hidden from the booking form. |
| Color Name / Color Code | Defines selectable device colors for this model | imported from database or added manually | A list of color options to choose from during the booking process. |
| Repair Price | Sets the price for a specific repair on this specific model. A value of 0 shows "Price on Request." Tip: Press TAB to jump from one price field to the next — it's the fastest way to enter prices for multiple repairs. | inherited from Default Repairs or 0 | The repair price on the booking form. This overrides the default repair price for this model. |
| Repair Active | Turns a specific repair on or off for this model | on | Disabled repairs aren't shown on the booking form for this model. |
| Sub-Repair (Quality Option) | Adds quality or variant options under a parent repair (e.g., "Original Screen" at one price, "OEM Screen" at another) | inherited from default repair or added manually | Expandable sub-options appear under the parent repair on the booking form, each with its own price. |
| Repair Duration | Sets the estimated time to complete the repair | inherited from default repair or 0 | The estimated repair time shown alongside the repair details. |
| Repair Badge | Adds a small label next to the repair name | empty | A visual badge (e.g., "Popular", "Sale") shown next to the repair on the booking form. |
Frequently asked questions
Does a new model automatically get all the repairs from my default list?
Yes. When you add a new model, it inherits the complete default repair list from its category. You can then override individual prices or turn specific repairs on or off as needed.
What happens if I reset repairs for a model?
All manually entered repair data for that model goes back to the default values from the Default Repairs list. This action can't be undone, so use it carefully.