Default Repairs
Set up default repair types, prices, and durations per device category in RepairPlugin — apply them to all models automatically.
What can you do with this?
- Manage repairs in bulk — create a master repair list for an entire category (e.g., all smartphones) instead of editing each model one by one.
- Keep pricing consistent — set a baseline price for every repair so all models in a category start with the same rates.
- Organize repairs into groups — use repair categories like "Screen Repairs" or "Battery Repairs" to keep your repair list clean and easy to browse.
- Offer quality options — add sub-repairs like "Original", "OEM", or "Refurbished" under a single repair so customers can pick the option that fits their budget.
- Override when needed — fine-tune individual model prices on the Models & Repairs page without losing your defaults.
Where to find it
- In the WordPress admin sidebar, click RepairPlugin.
- Click Default Repairs in the submenu.
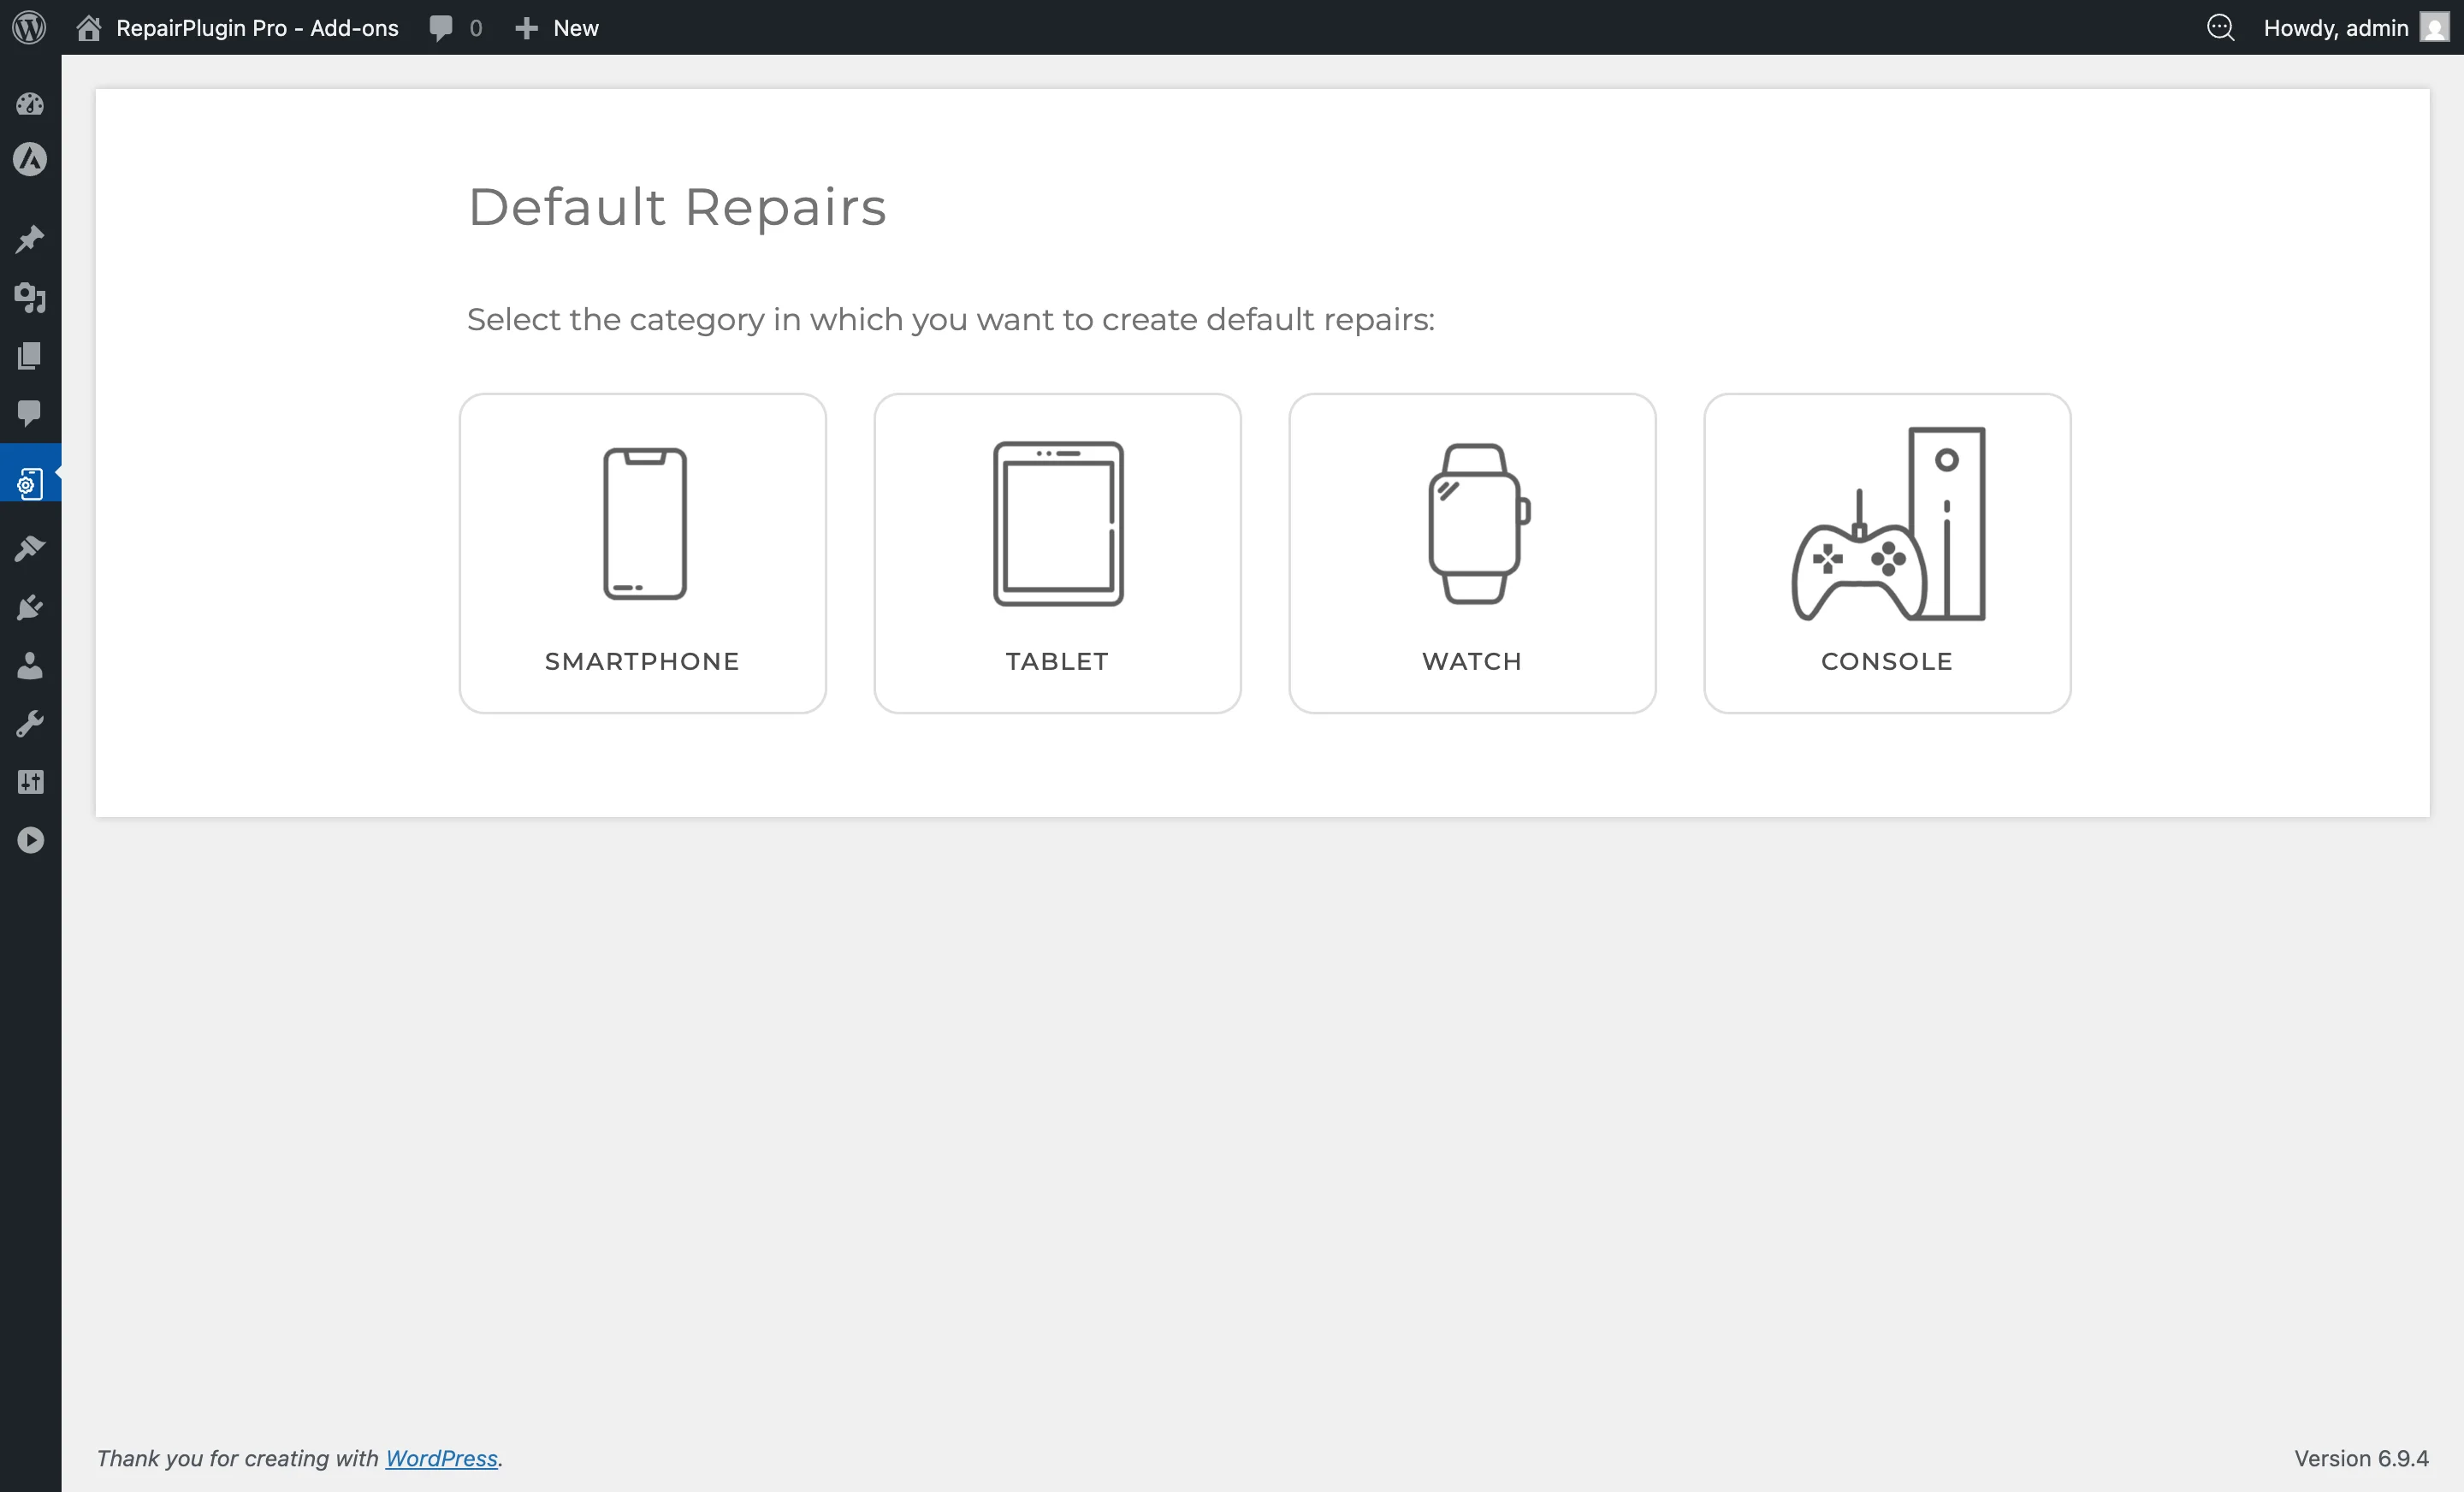
- A category selection screen appears showing all your device categories (e.g., Smartphone, Tablet, Laptop) as clickable tiles with images.
- Click the category you want to manage. The default repairs editor opens for that category.
Note: If no categories exist yet, the page displays a message prompting you to either create a category via Managing Categories or import models via the Download Libraries feature.
How to set it up
Select a category
- On the Default Repairs landing page, click the device category tile you want to configure.
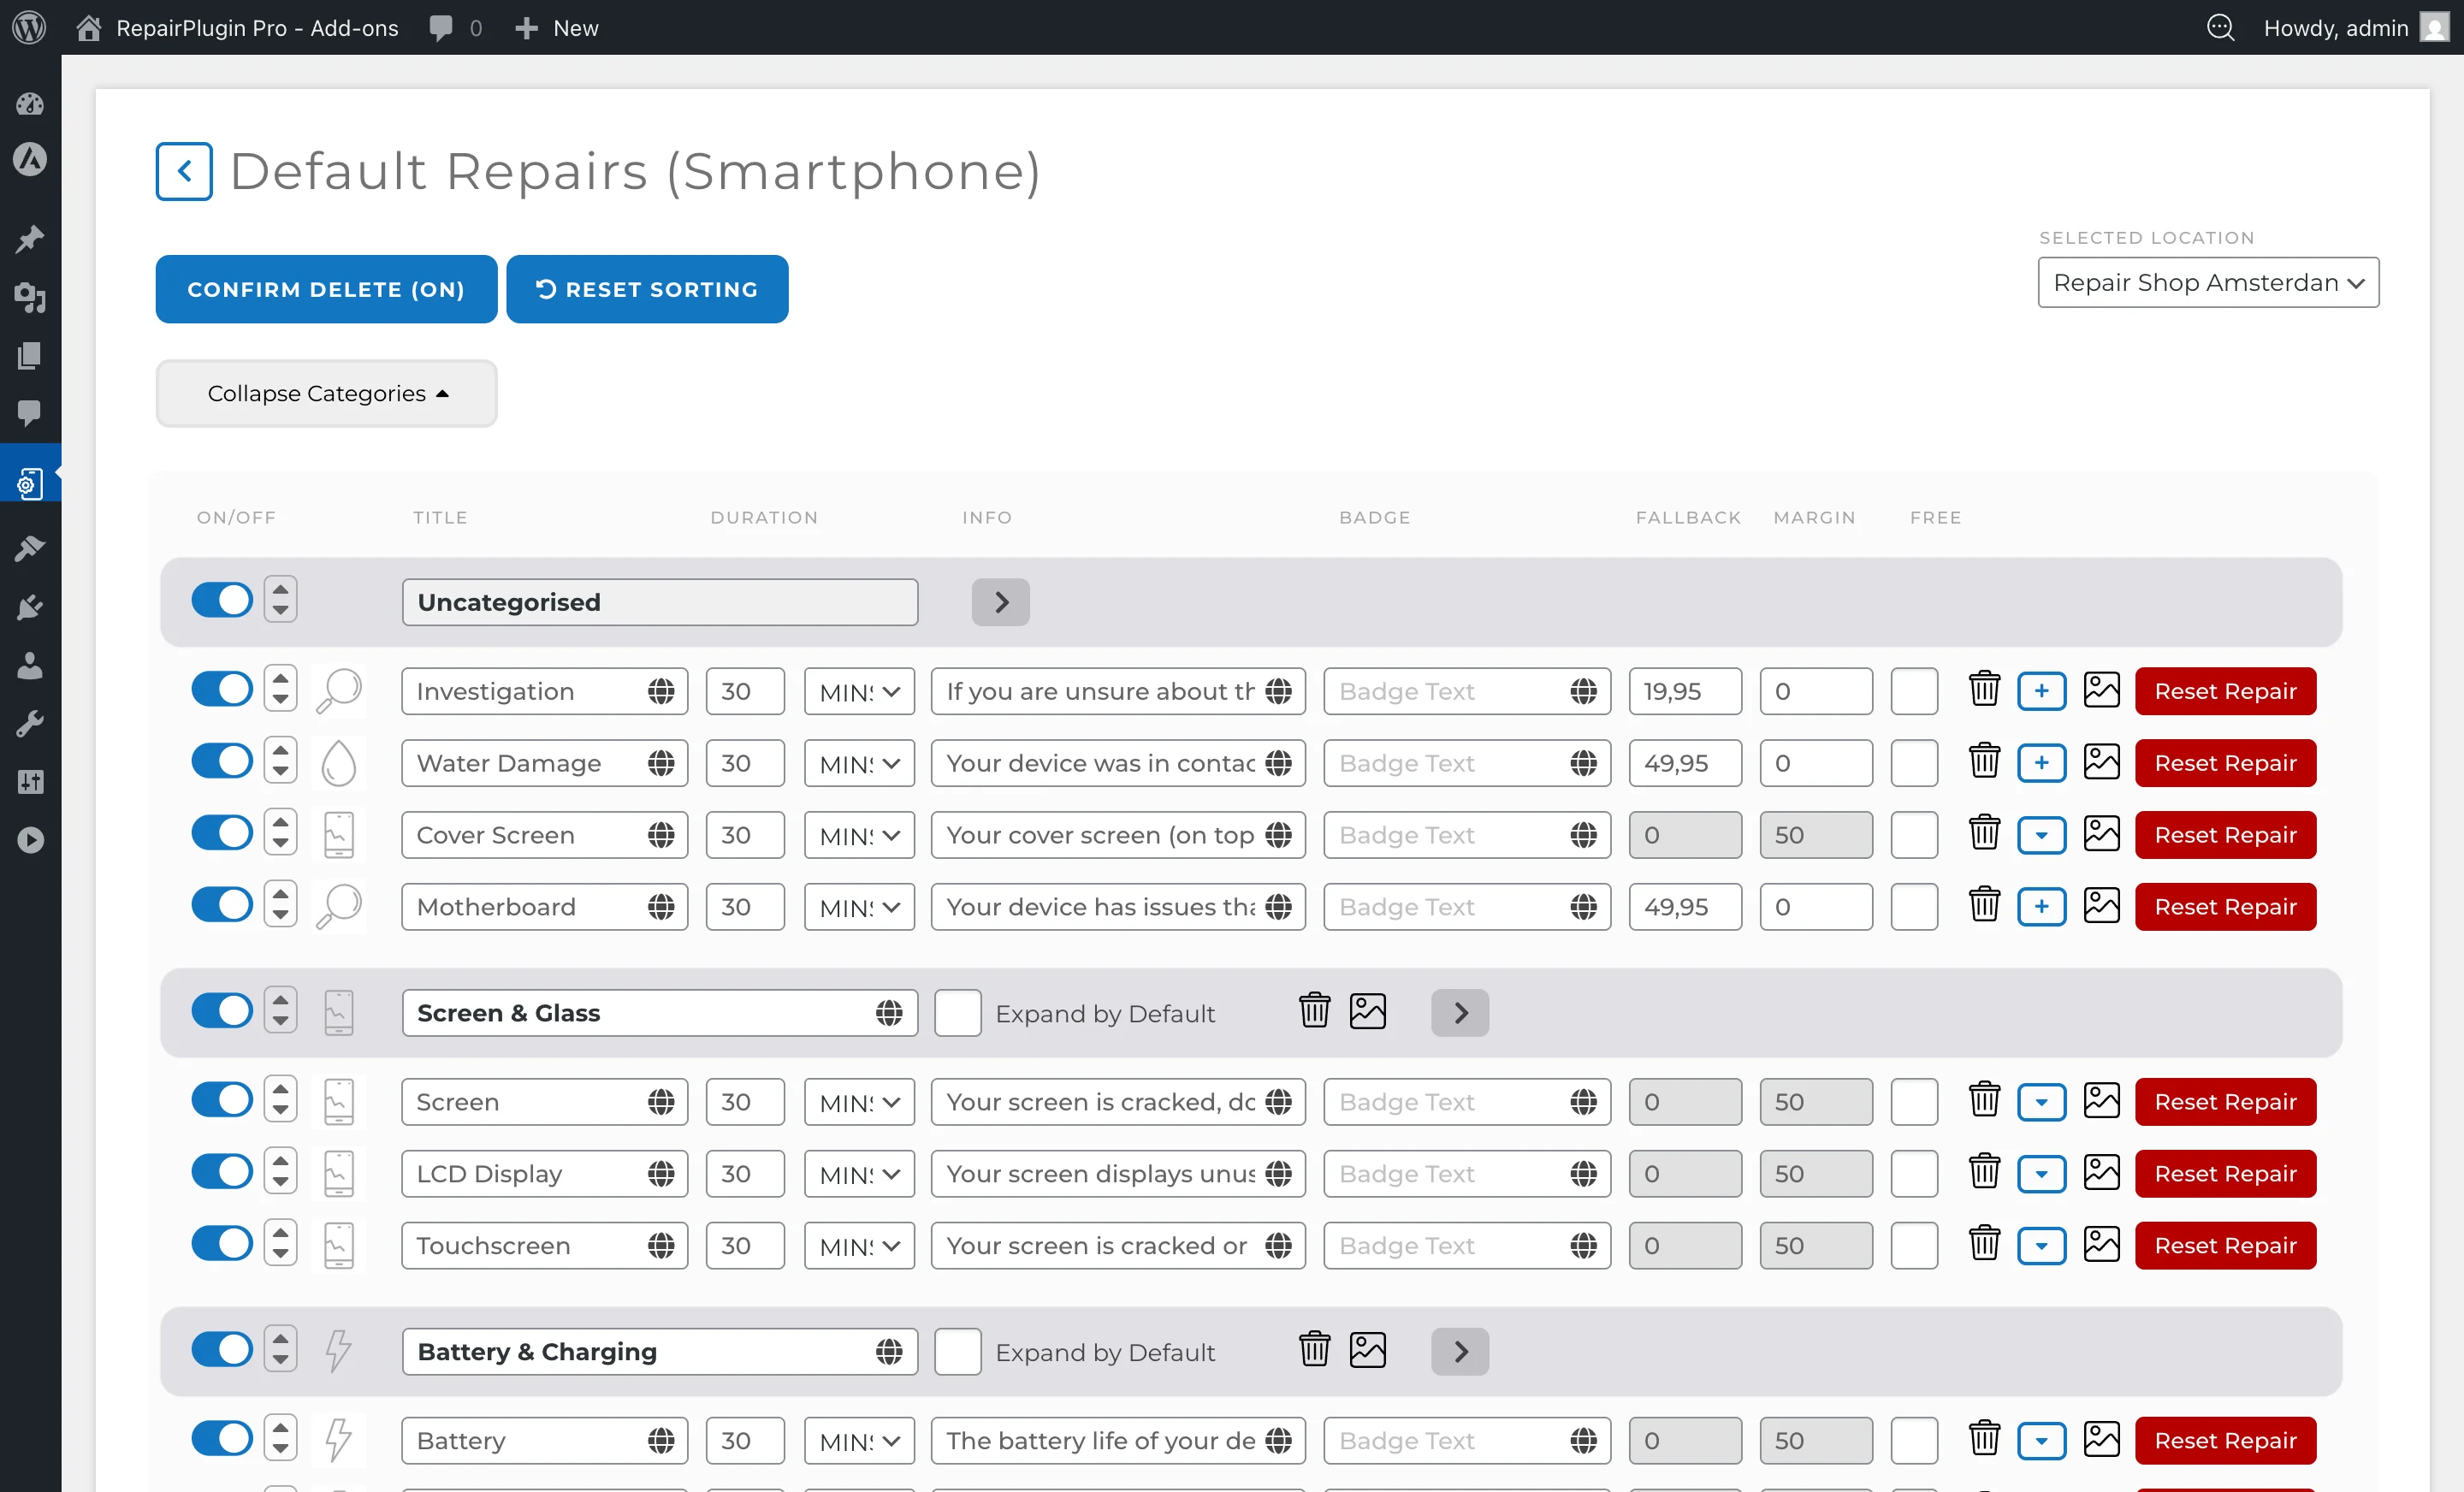
- The page reloads showing the full repair editor for that category, including all existing default repairs, repair categories, and sub-repairs.
Add a new default repair
- Inside the repair editor, click the Add repair button at the bottom of the repair list.
- A new repair row appears with the following fields:
- Repair Name — enter the name (e.g., "Screen Replacement", "Battery Replacement").
- Price — enter the default price. Set to 0 to show "Price on Request" for all models.
- Duration — enter the estimated repair time.
- Duration Measure — select the unit: minutes, hours, or days.
- Description — optional description shown to customers.
- Badge — optional short label (e.g., "Popular").
- Image — upload a repair icon or image.
- Click the Update button to save.
Add repair categories (groupings)
Repair categories let you visually group repairs under collapsible headers (e.g., "Screen Repairs", "Internal Repairs"):
- Click the Add Repair Category button.
- Enter the category title.
- Optionally upload a category image.
- Use the Expand by Default checkbox to control whether the group is expanded or collapsed when customers first see the repair list.
- Drag repairs under the appropriate category heading to organize them.
- Save your changes.
Add sub-repairs (quality options)
Sub-repairs let you offer different quality levels or variants under a single repair:
- Click the blue plus (+) button on the right side of a repair row.
- A sub-repair row appears beneath the parent repair.
- Enter the sub-repair name (e.g., "Original", "OEM", "Refurbished") and price.
- Add as many sub-repairs as needed.
- Turn individual sub-repairs on or off with the switch.
- Save your changes.
Edit an existing default repair
- Find the repair in the list.
- Change any field directly (name, price, duration, description, badge).
- Click Update to save.
Enable or disable a default repair
- Use the switch on the left side of the repair row to turn it on or off.
- Save your changes. Disabled default repairs are hidden from all models in this category (unless individually overridden).
Reorder default repairs
- Use the sort arrows on the left side of each repair row to move repairs up or down.
- Alternatively, drag and drop repair rows to reorder.
- The "Hide under show all ... repairs button" divider lets you define how many repairs are immediately visible before a "Show all" button appears.
- Save your changes.
Reset a default repair
- Click the Reset Repair button on a specific repair row.
- This resets all individually modified repair data for this repair across all models back to the default values.
- Warning: This action can't be undone. The total number of affected models is shown in the confirmation dialog.
Delete a default repair
- Click the trash icon on the repair row.
- Confirm the deletion.
- Warning: Deleting a default repair removes it from all models in the category. This action can't be undone.
Filter and search models
Within the default repairs editor, you can filter models by brand and search by model name to verify which models are affected by your changes.
Settings reference
| Setting | Description | Default | Customers see |
|---|---|---|---|
| Repair Name | Sets the display name for this repair across all models in the category | empty | The repair name appears as the label on the booking form for every model in this category, unless you've overridden it on a specific model. |
| Repair Price | Sets the baseline price for this repair. A value of 0 shows "Price on Request" instead of a number | 0 | The repair price on the booking form. Models with manually set prices on the Models & Repairs page use their own price instead. |
| Repair Duration | Sets the estimated time to complete this repair | 0 | The expected repair time shown alongside the repair details. |
| Duration Measure | Sets the unit for the repair duration value | minutes | The unit displayed next to the duration number (e.g., "30 mins", "2 hrs", "1 days"). |
| Repair Description | Adds a short description or note to the repair | empty | The description appears below the repair name on the booking form. |
| Repair Badge | Adds a small label next to the repair name (e.g., "Popular", "New", "Sale") Tip: Use badges like "Popular" or "Most chosen" to draw attention to your best-selling repairs. | empty | A visual badge shown next to the repair on the booking form. |
| Repair Image | Associates an icon or image with the repair | none | The image appears next to the repair name on the booking form. |
| Repair Active | Controls whether this repair is visible across all models in the category | on | When turned off, the repair is hidden for all models (unless individually enabled on a specific model via Models & Repairs). |
| Is Free | Marks a repair as free of charge | off | A "Free" label appears instead of a price on the booking form. |
| Repair Category (Grouping) | Groups repairs under labeled sections for better organization | Uncategorised | Repairs appear grouped under collapsible headers on the booking form. Customers can expand or collapse each group. |
| Expand by Default | Controls whether a repair category group is expanded when the page loads | off | When turned on, the repair group is open by default. When turned off, customers need to click to expand it. |
| Repair Margin | Sets a profit margin value used with the Dynamic Pricing when location-based pricing is active | 0 | The margin affects the calculated price shown when dynamic pricing rules apply. |
 |
Frequently asked questions
Do changes to default repairs overwrite prices I've already set on individual models?
No. If you've manually entered a repair price, name, or description on a specific model via Models & Repairs, those values are protected. Default repair changes only affect models that are still using the default values.
What's the fastest way to update a repair price for all models at once?
Change the price in the Default Repairs list. Every model in that category that hasn't been manually overridden will pick up the new price immediately.