Booking Process
Learn how the RepairPlugin booking process guides customers through device selection, repair picking, and checkout in three clear steps.
What can you do with this?
- Give customers a clear, step-by-step path from device selection to confirmed booking
- Show a visual progress bar so customers always know where they are in the process
- Let customers search directly for their device model instead of browsing categories
- Collect all the information you need (contact details, delivery method, payment) in one smooth checkout
- Display a Thank You page with confirmation details and an optional preparation checklist
Where to find it
- In the WordPress admin, go to RepairPlugin in the left menu.
- Click Settings.
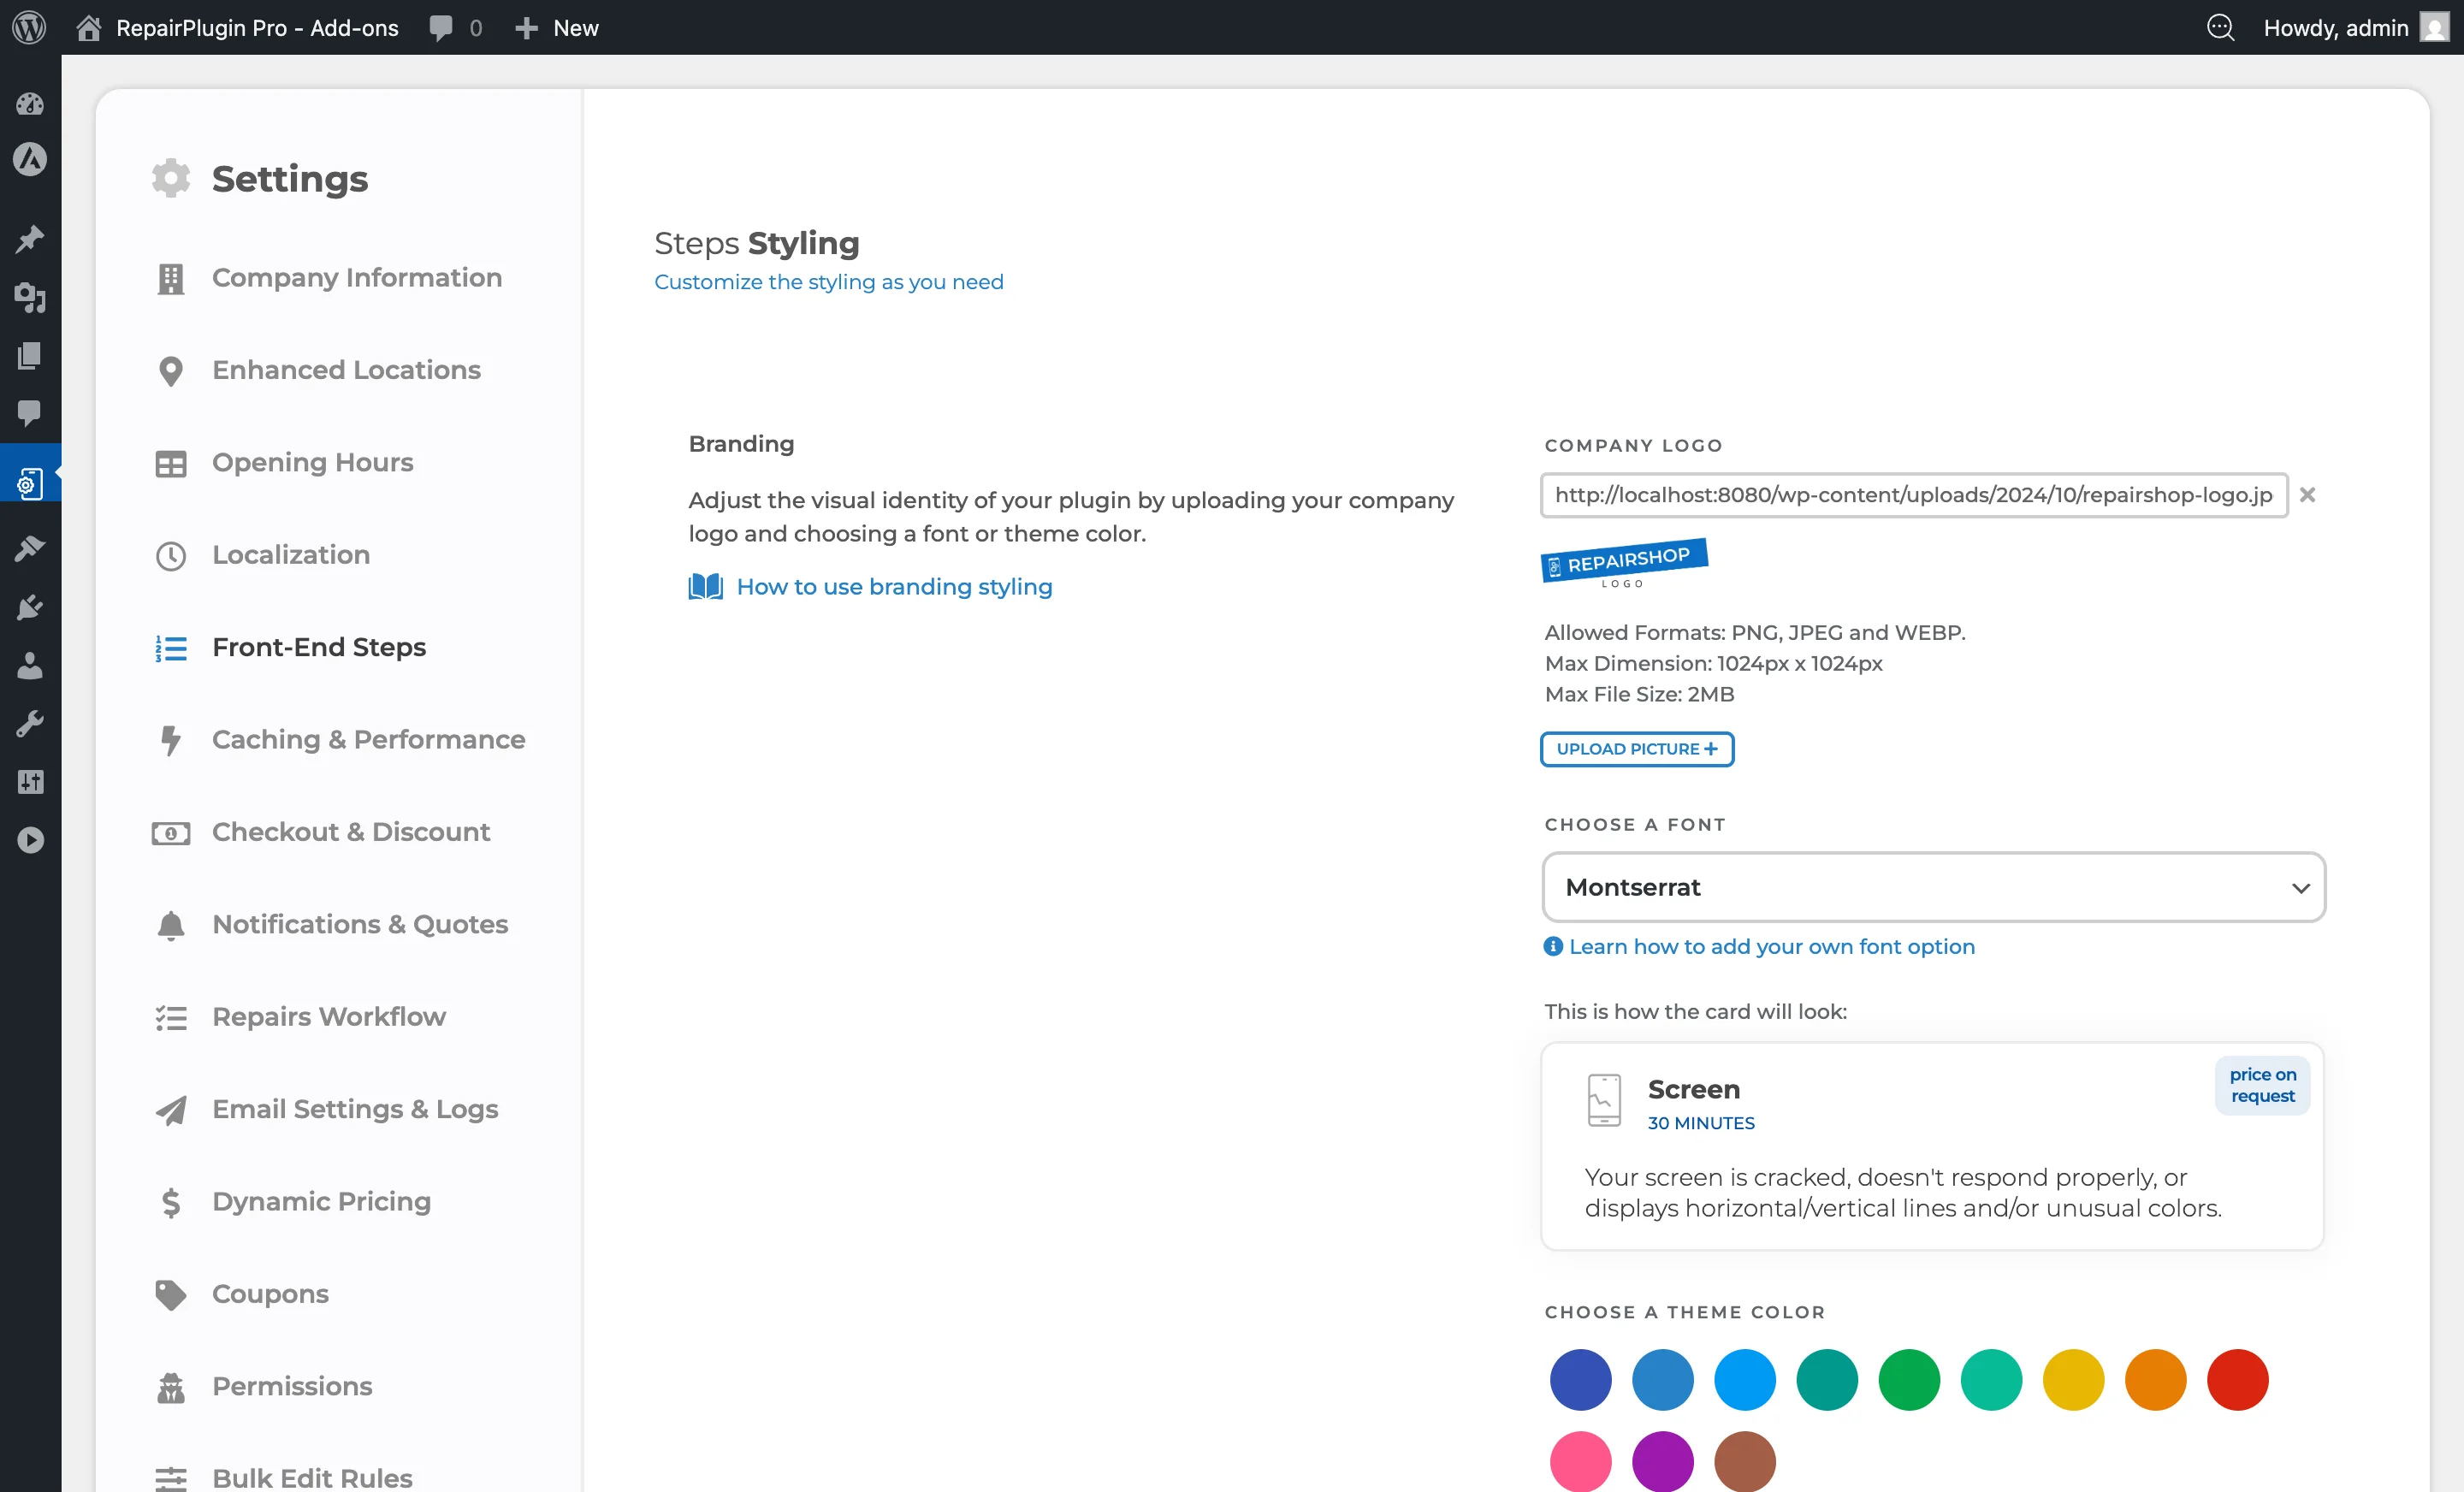
- In the settings sidebar, click Front-End Steps.
This settings page controls visual and behavioral aspects of the frontend booking form, including the progress bar, search bar, and pre-appointment checklist.
The booking form itself appears on whichever page contains the RepairPlugin shortcode (configured under Settings > Plugin Shortcode).
How to set it up
The booking process consists of three main steps, each made up of sub-pages:
Step 1: Select Device
This step has three sub-pages that the customer moves through:
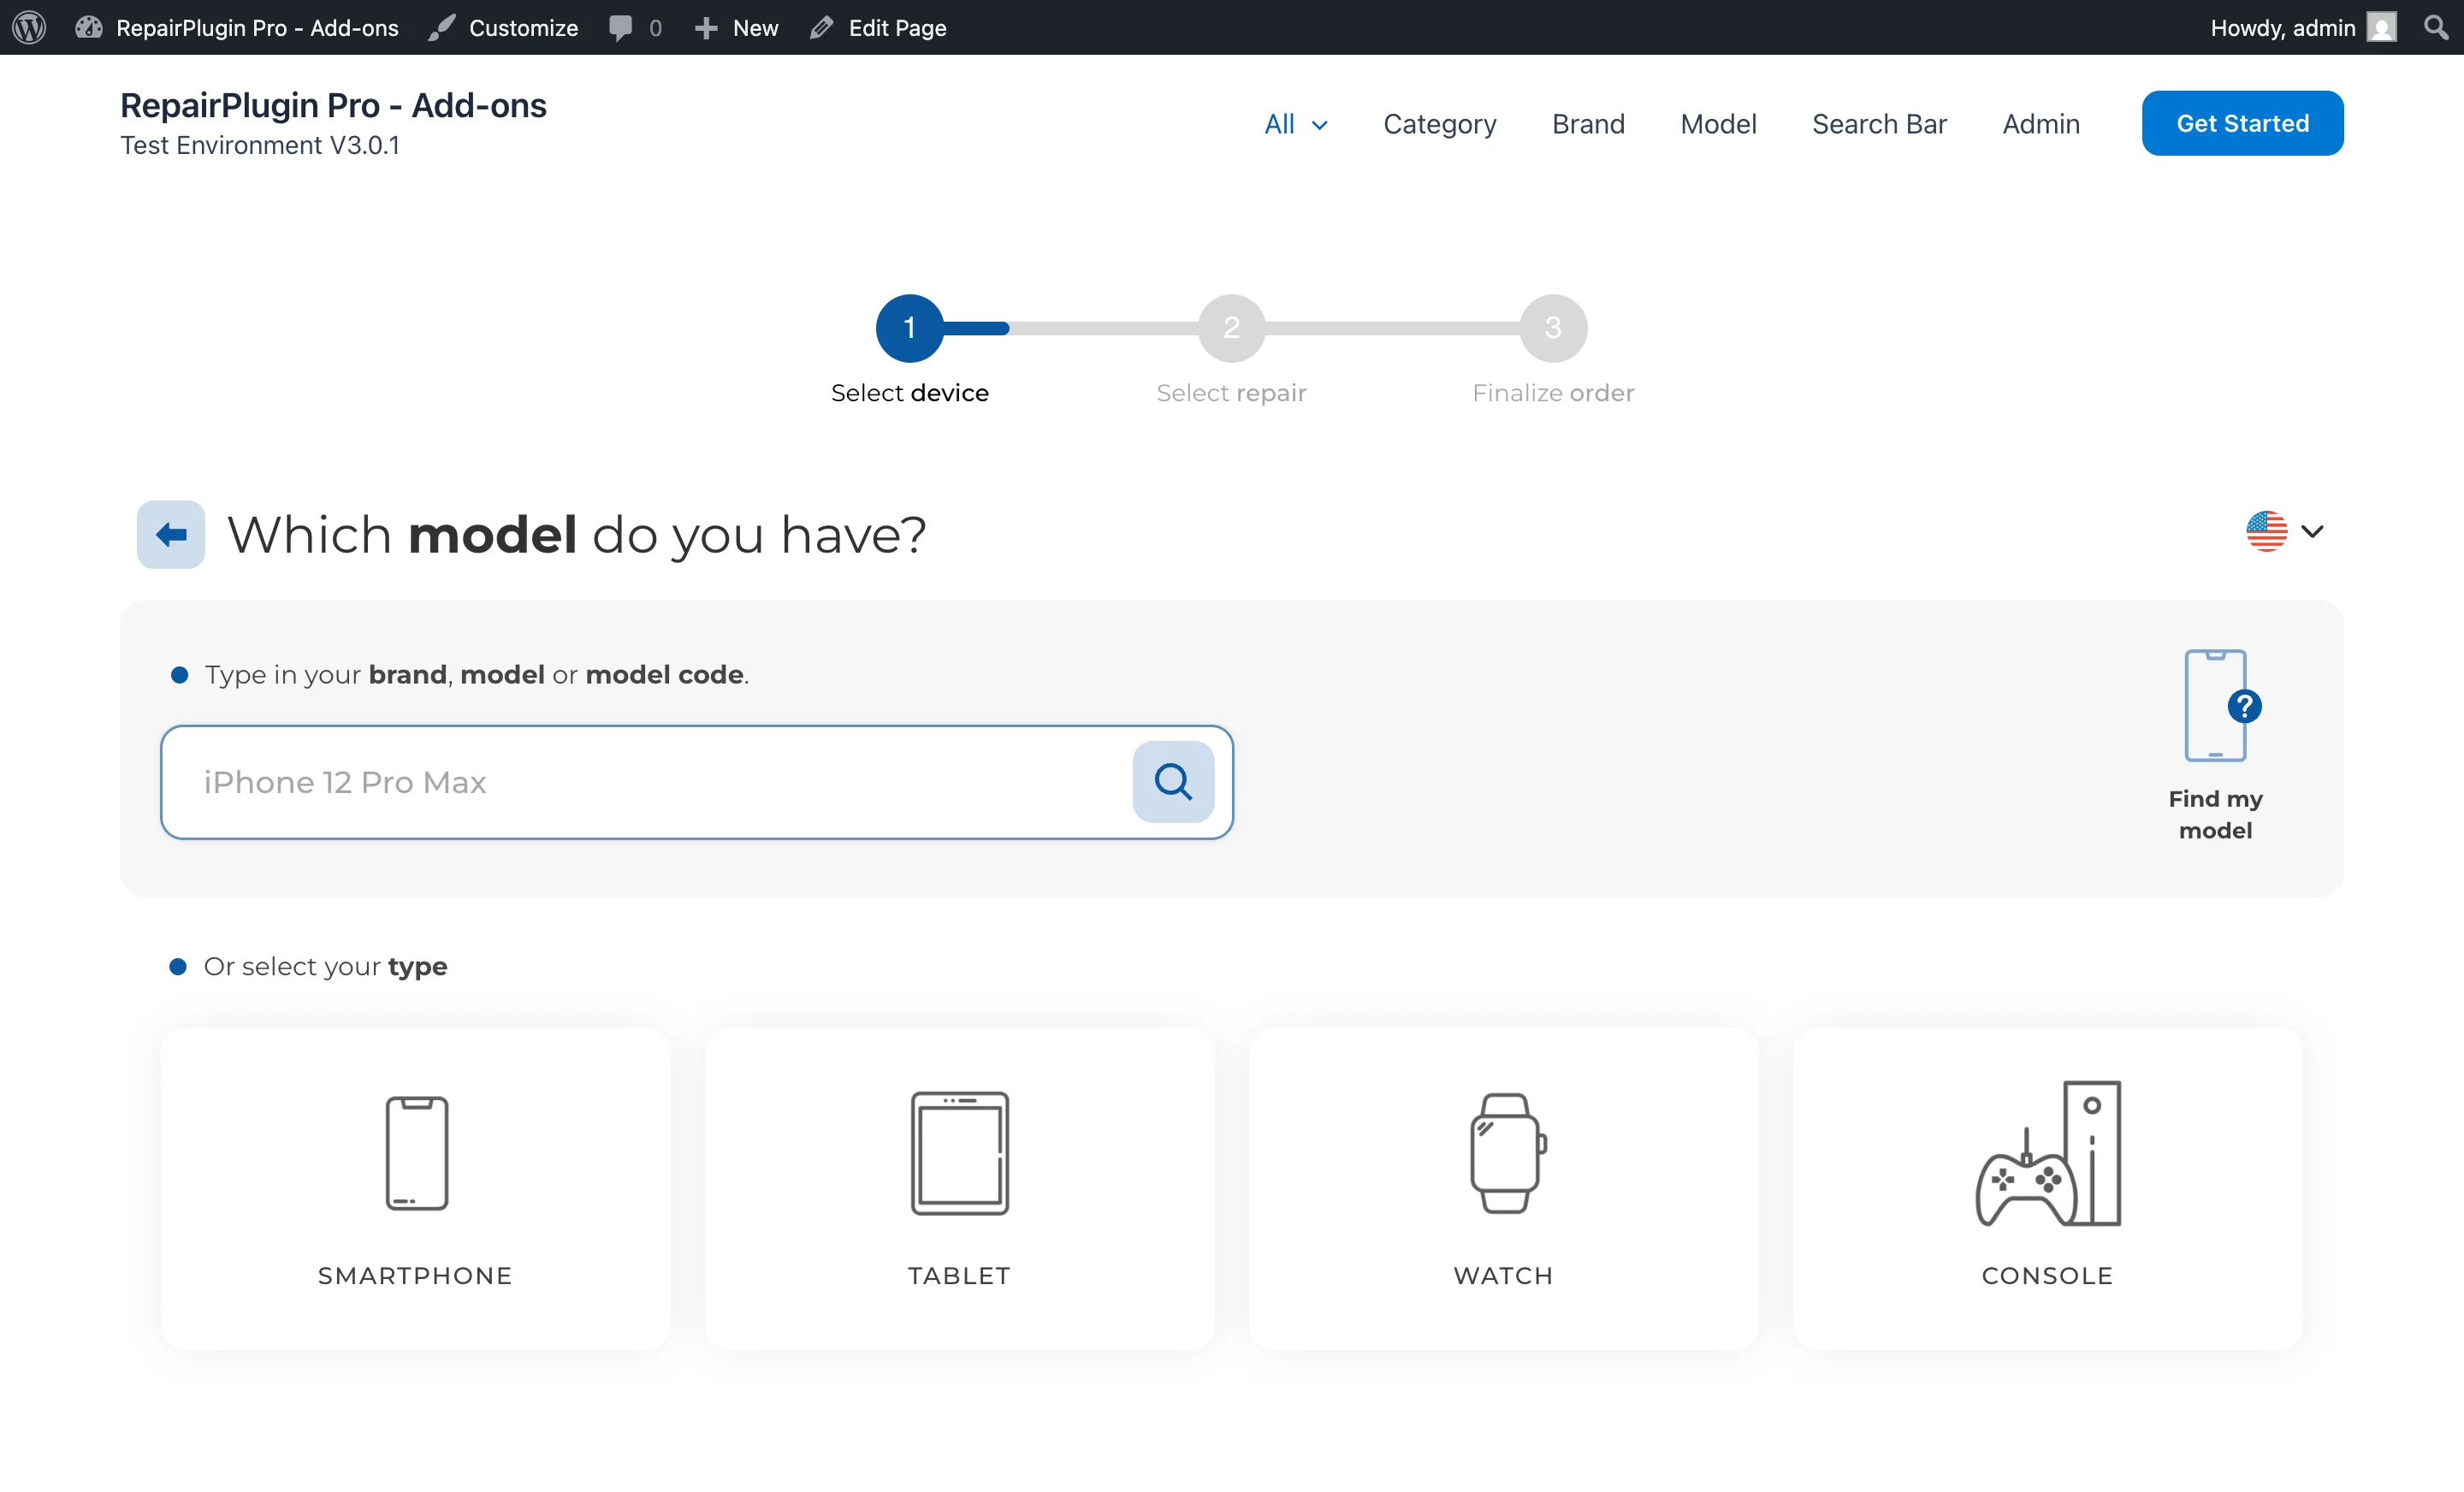
- Types (Categories) -- The customer selects a device category (e.g., Smartphones, Tablets, Laptops). Categories are managed under RepairPlugin > Manage Categories.
- Brands -- The customer picks a brand within the chosen category (e.g., Apple, Samsung). Brands are managed per category.
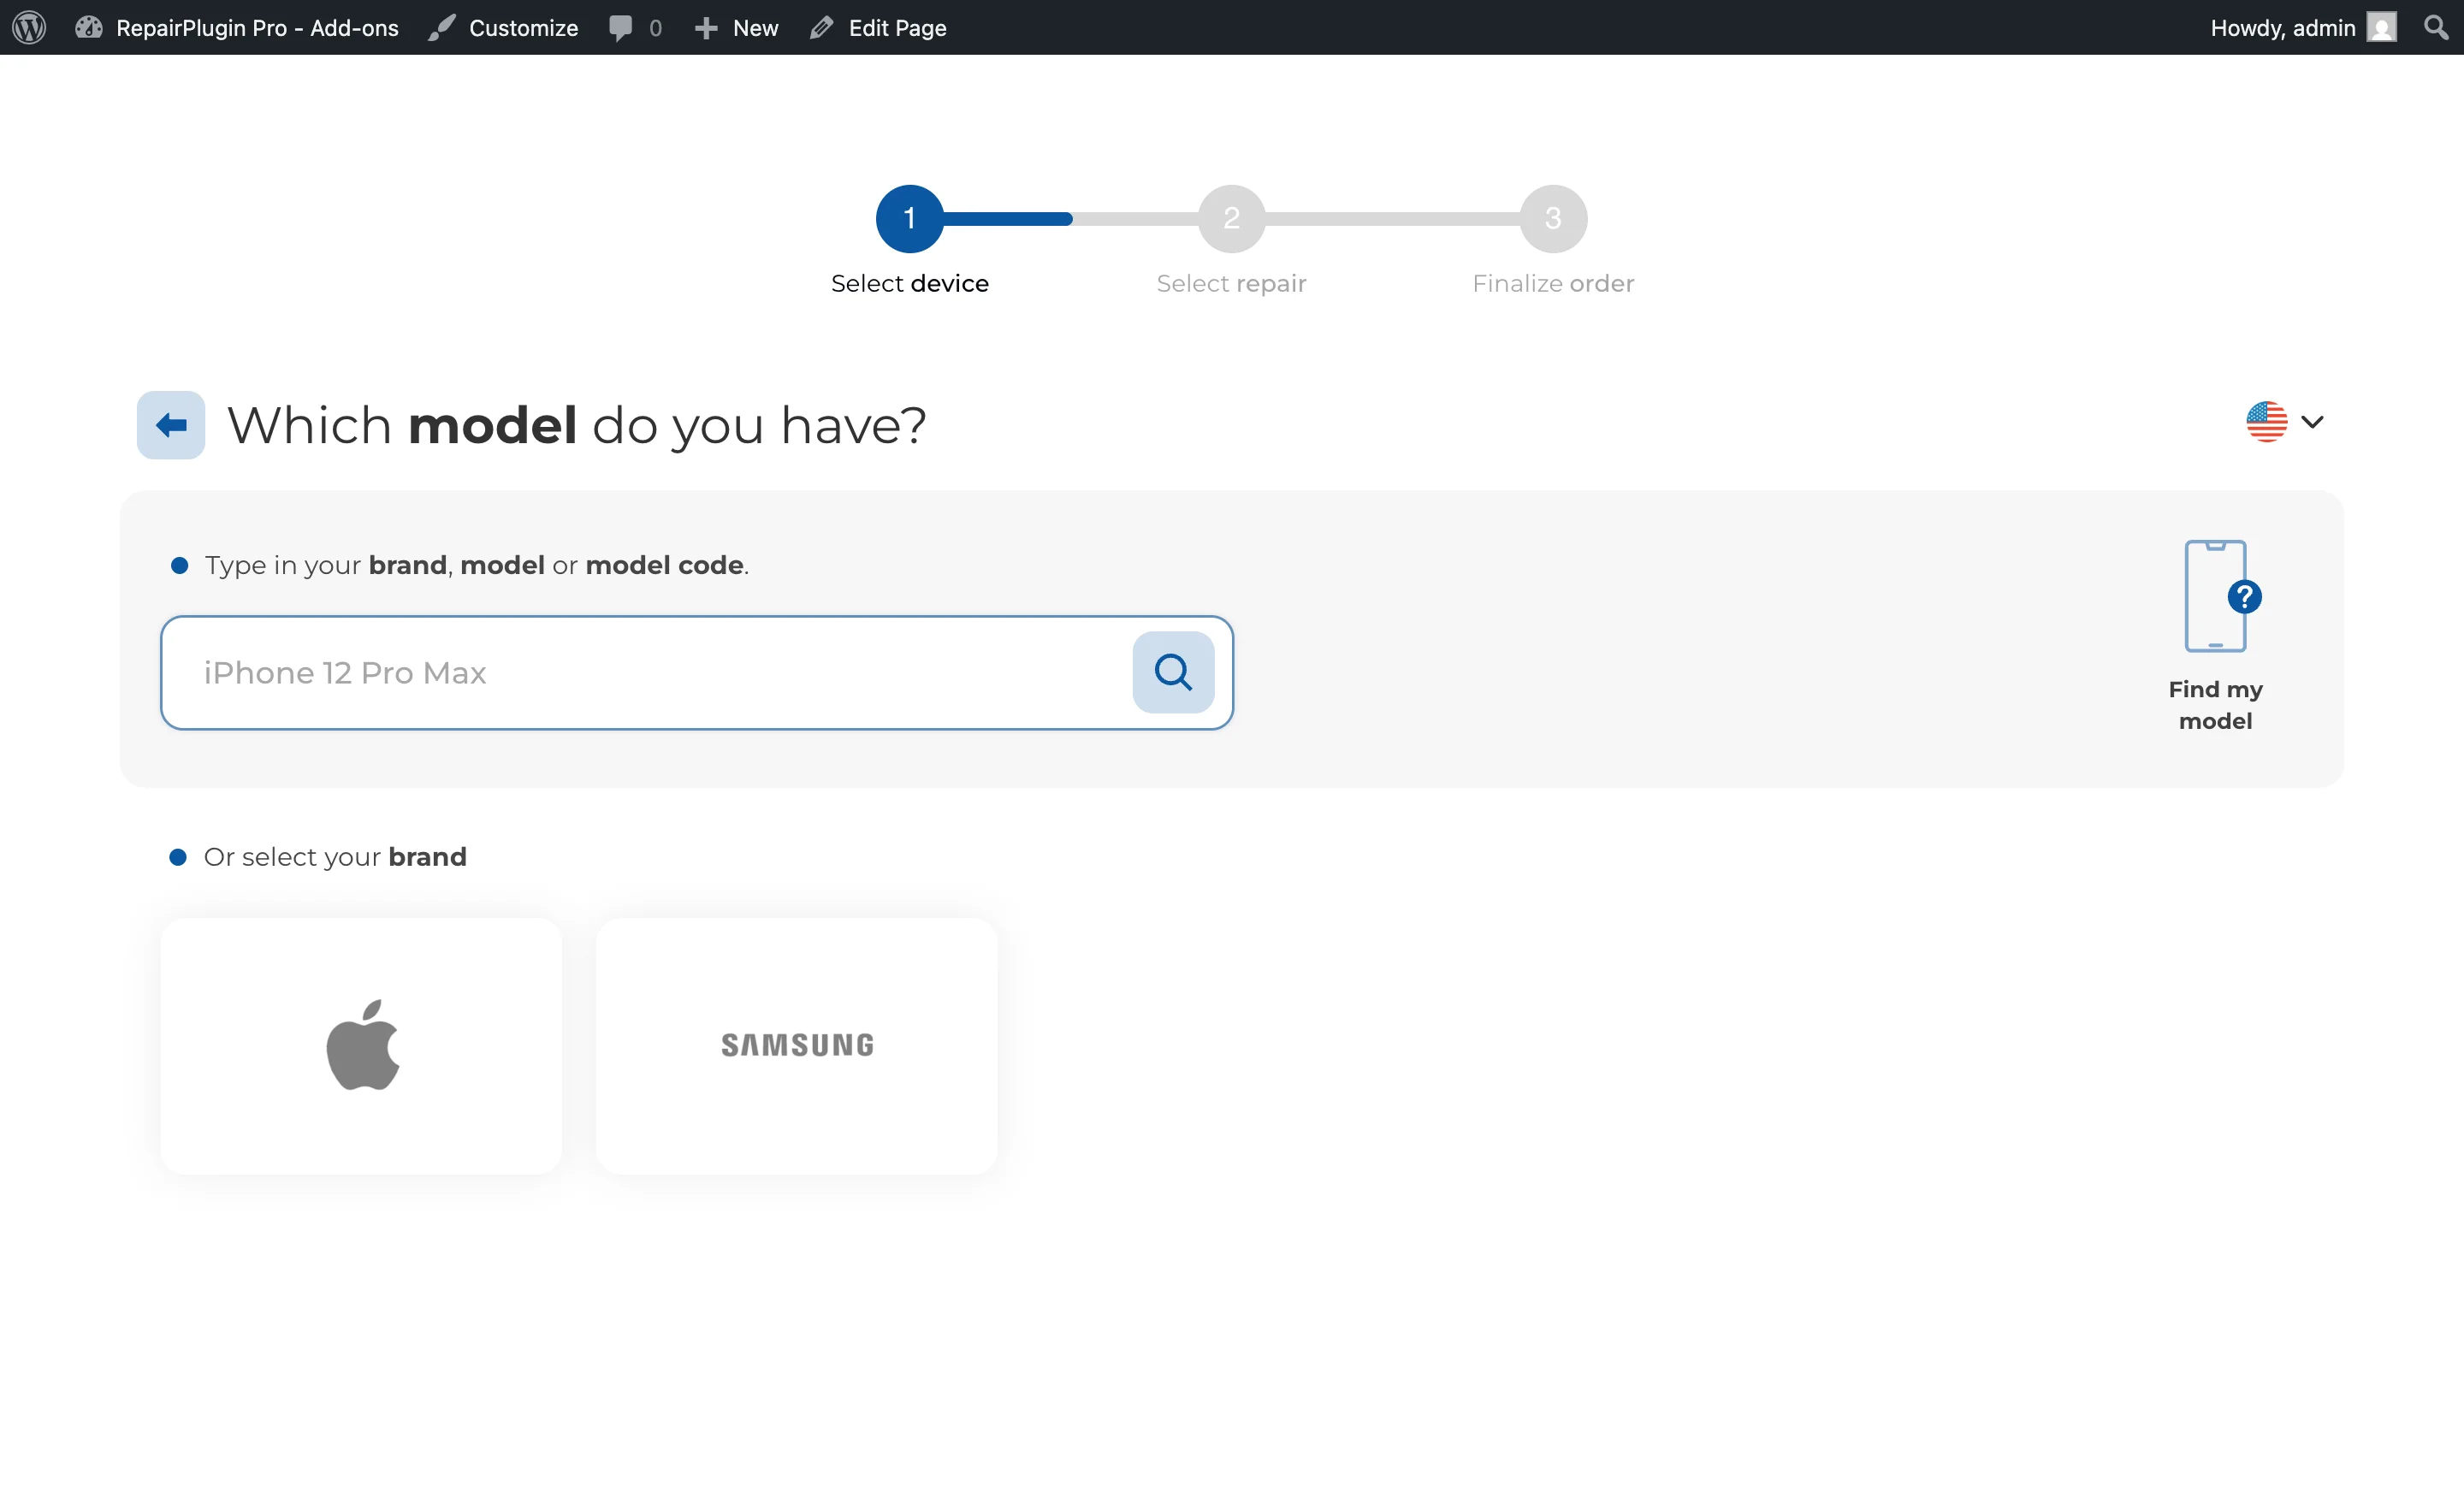
- Models -- The customer selects the specific model (e.g., iPhone 15 Pro). Models are managed under RepairPlugin > Manage Models.
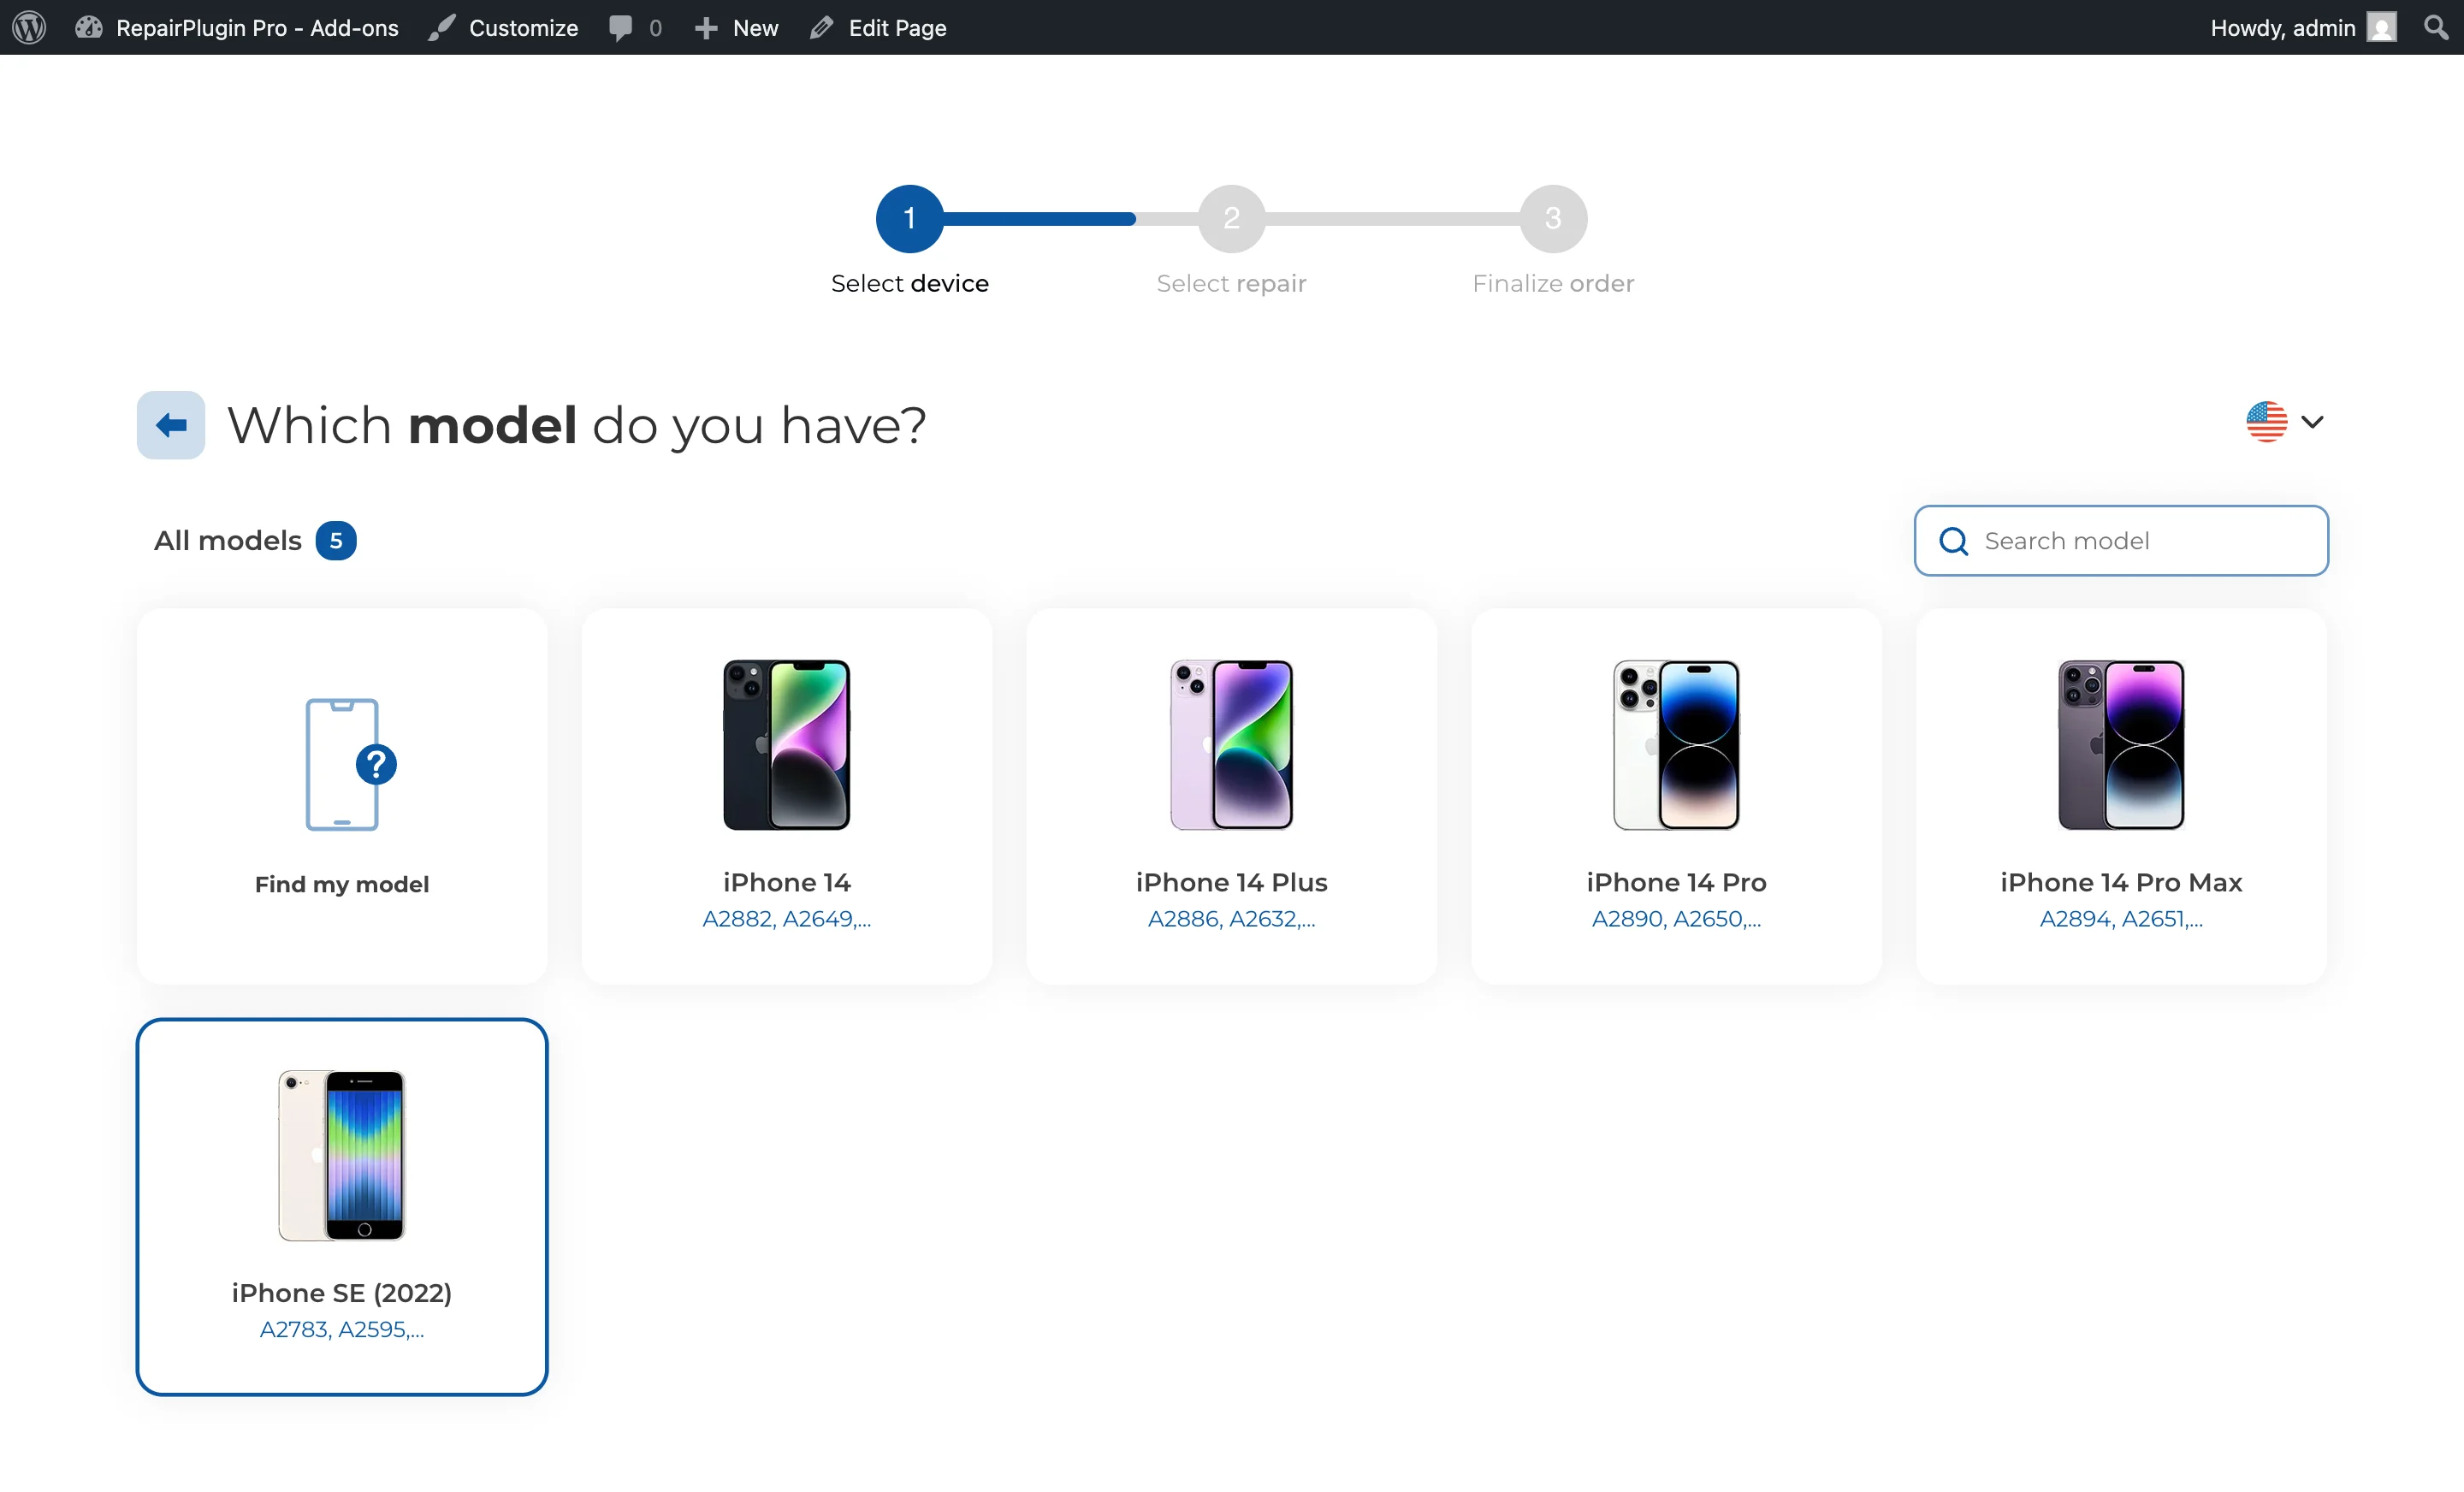
The progress bar shows "1" for this entire step. Internally, the progress percentage increases from approximately 16% (Types) through 25% (Brands) to 35% (Models).
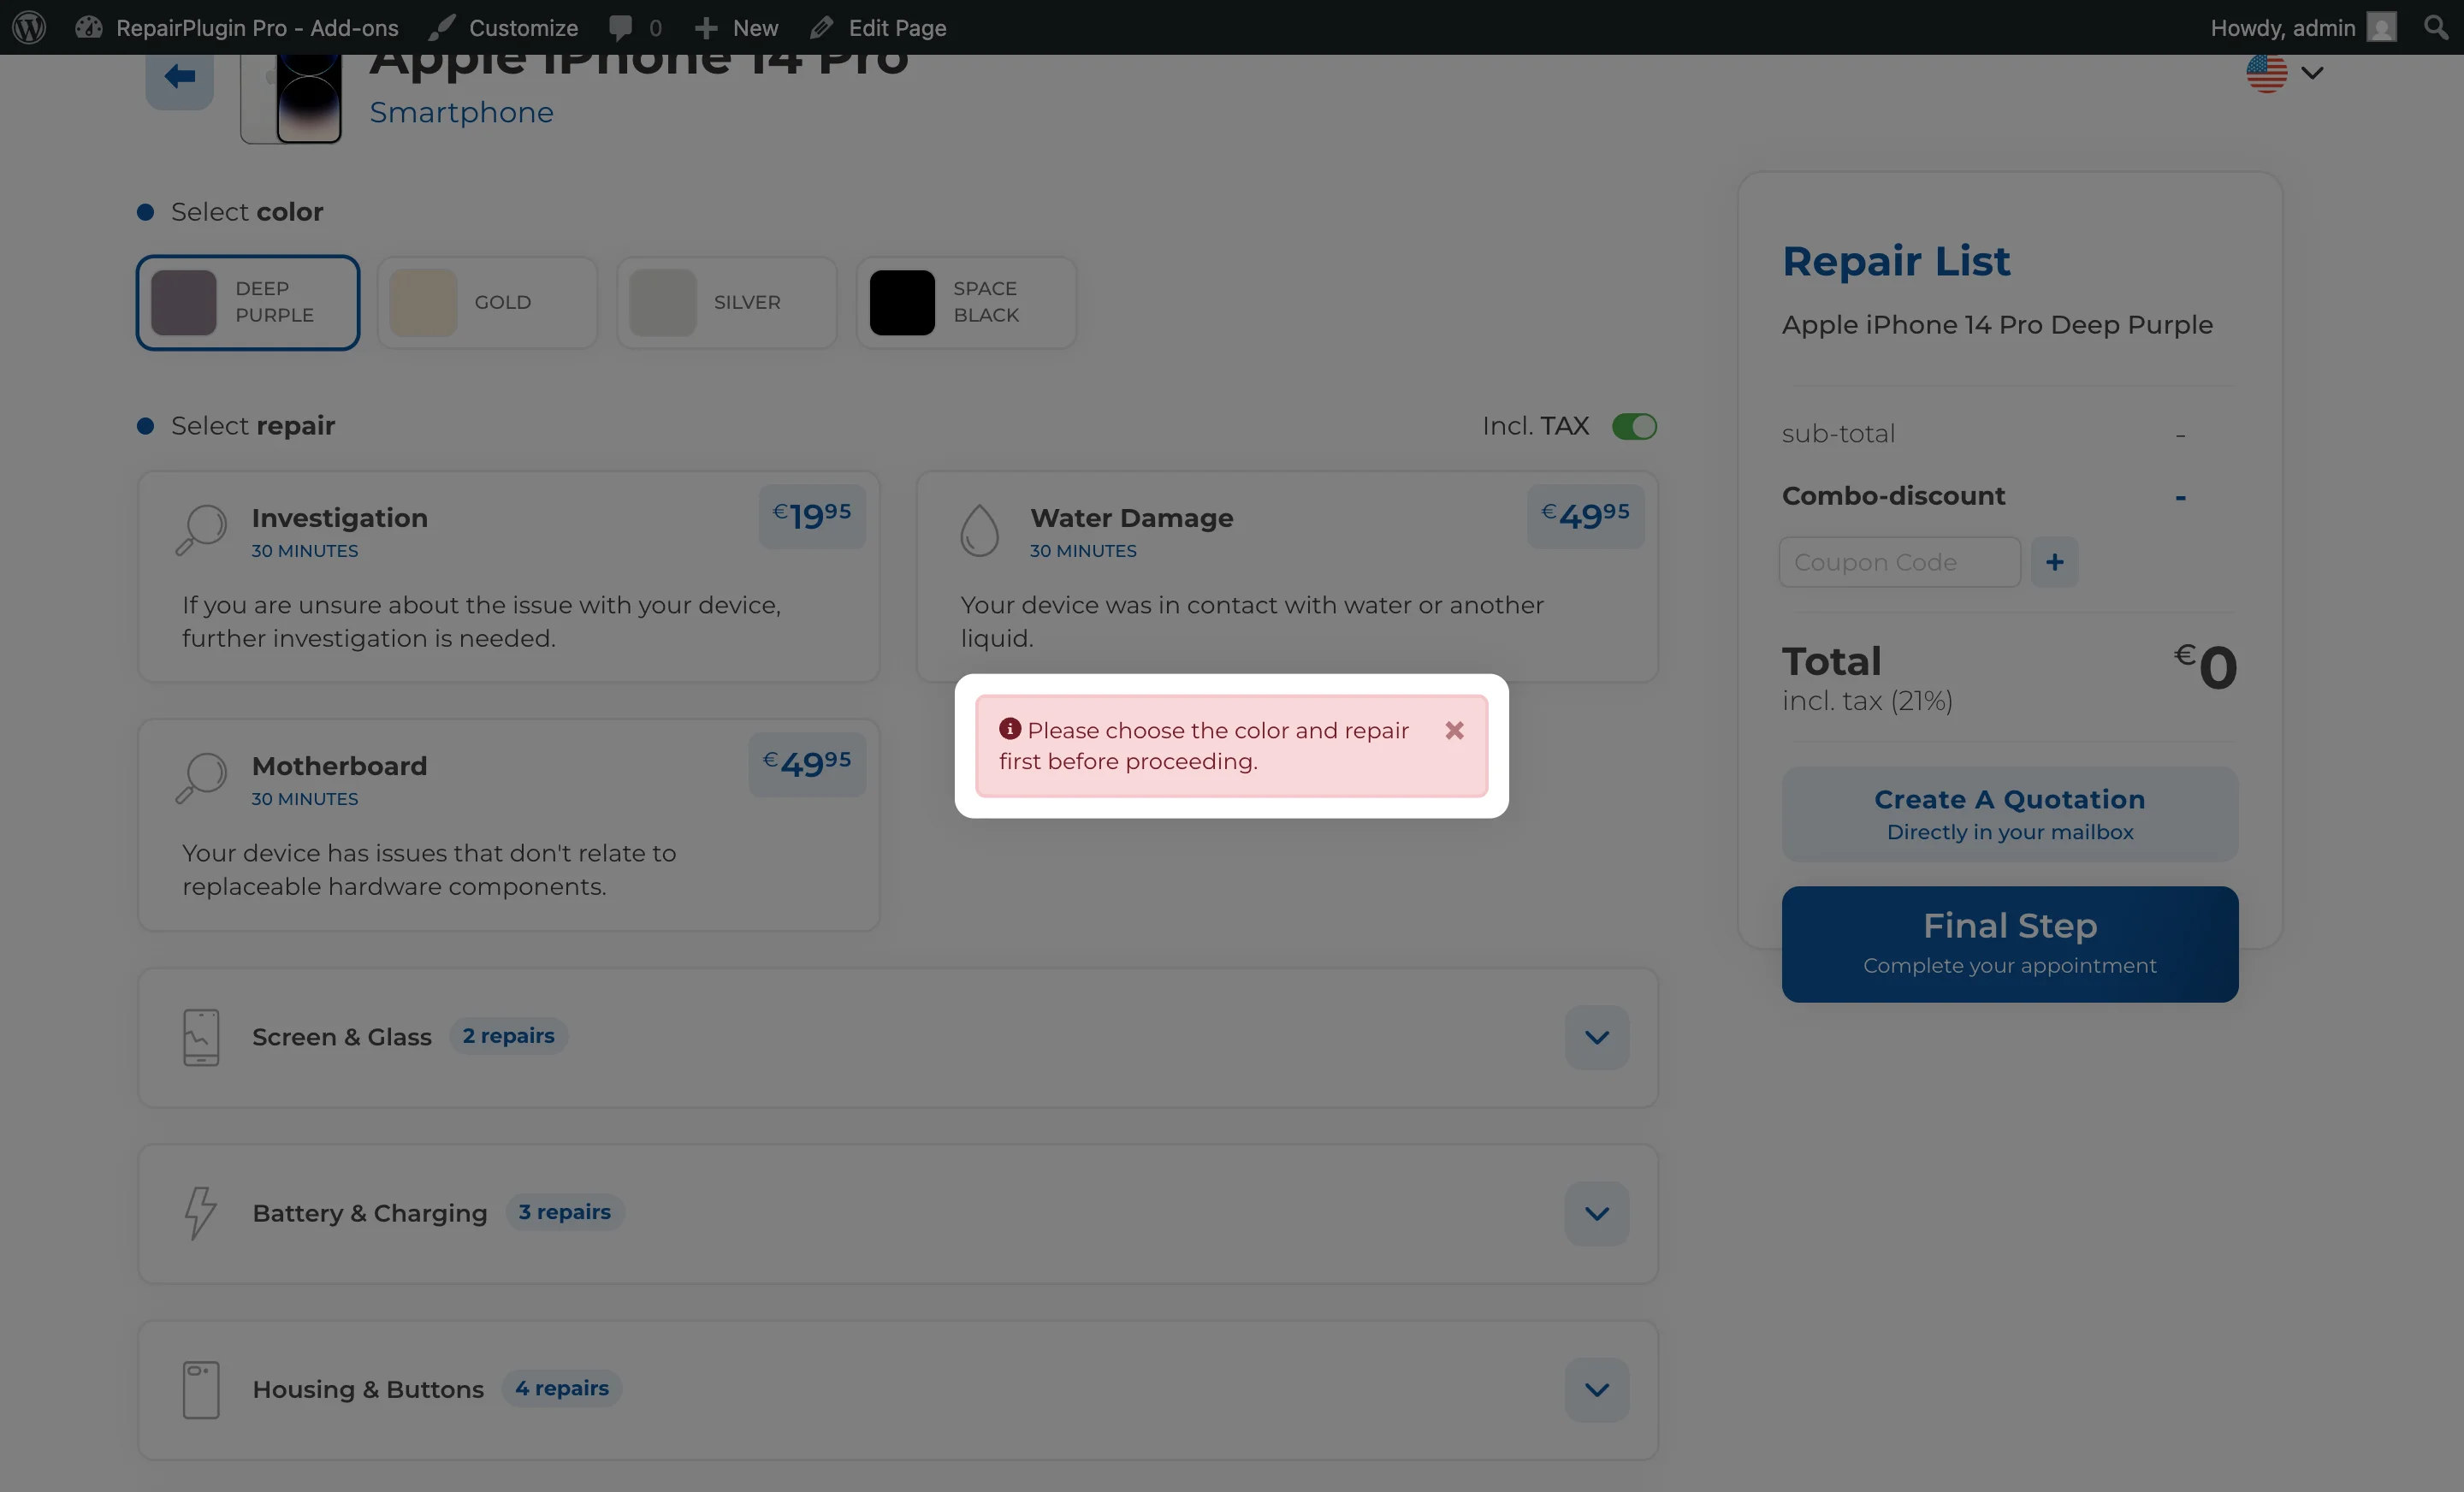
Step 2: Select Repairs
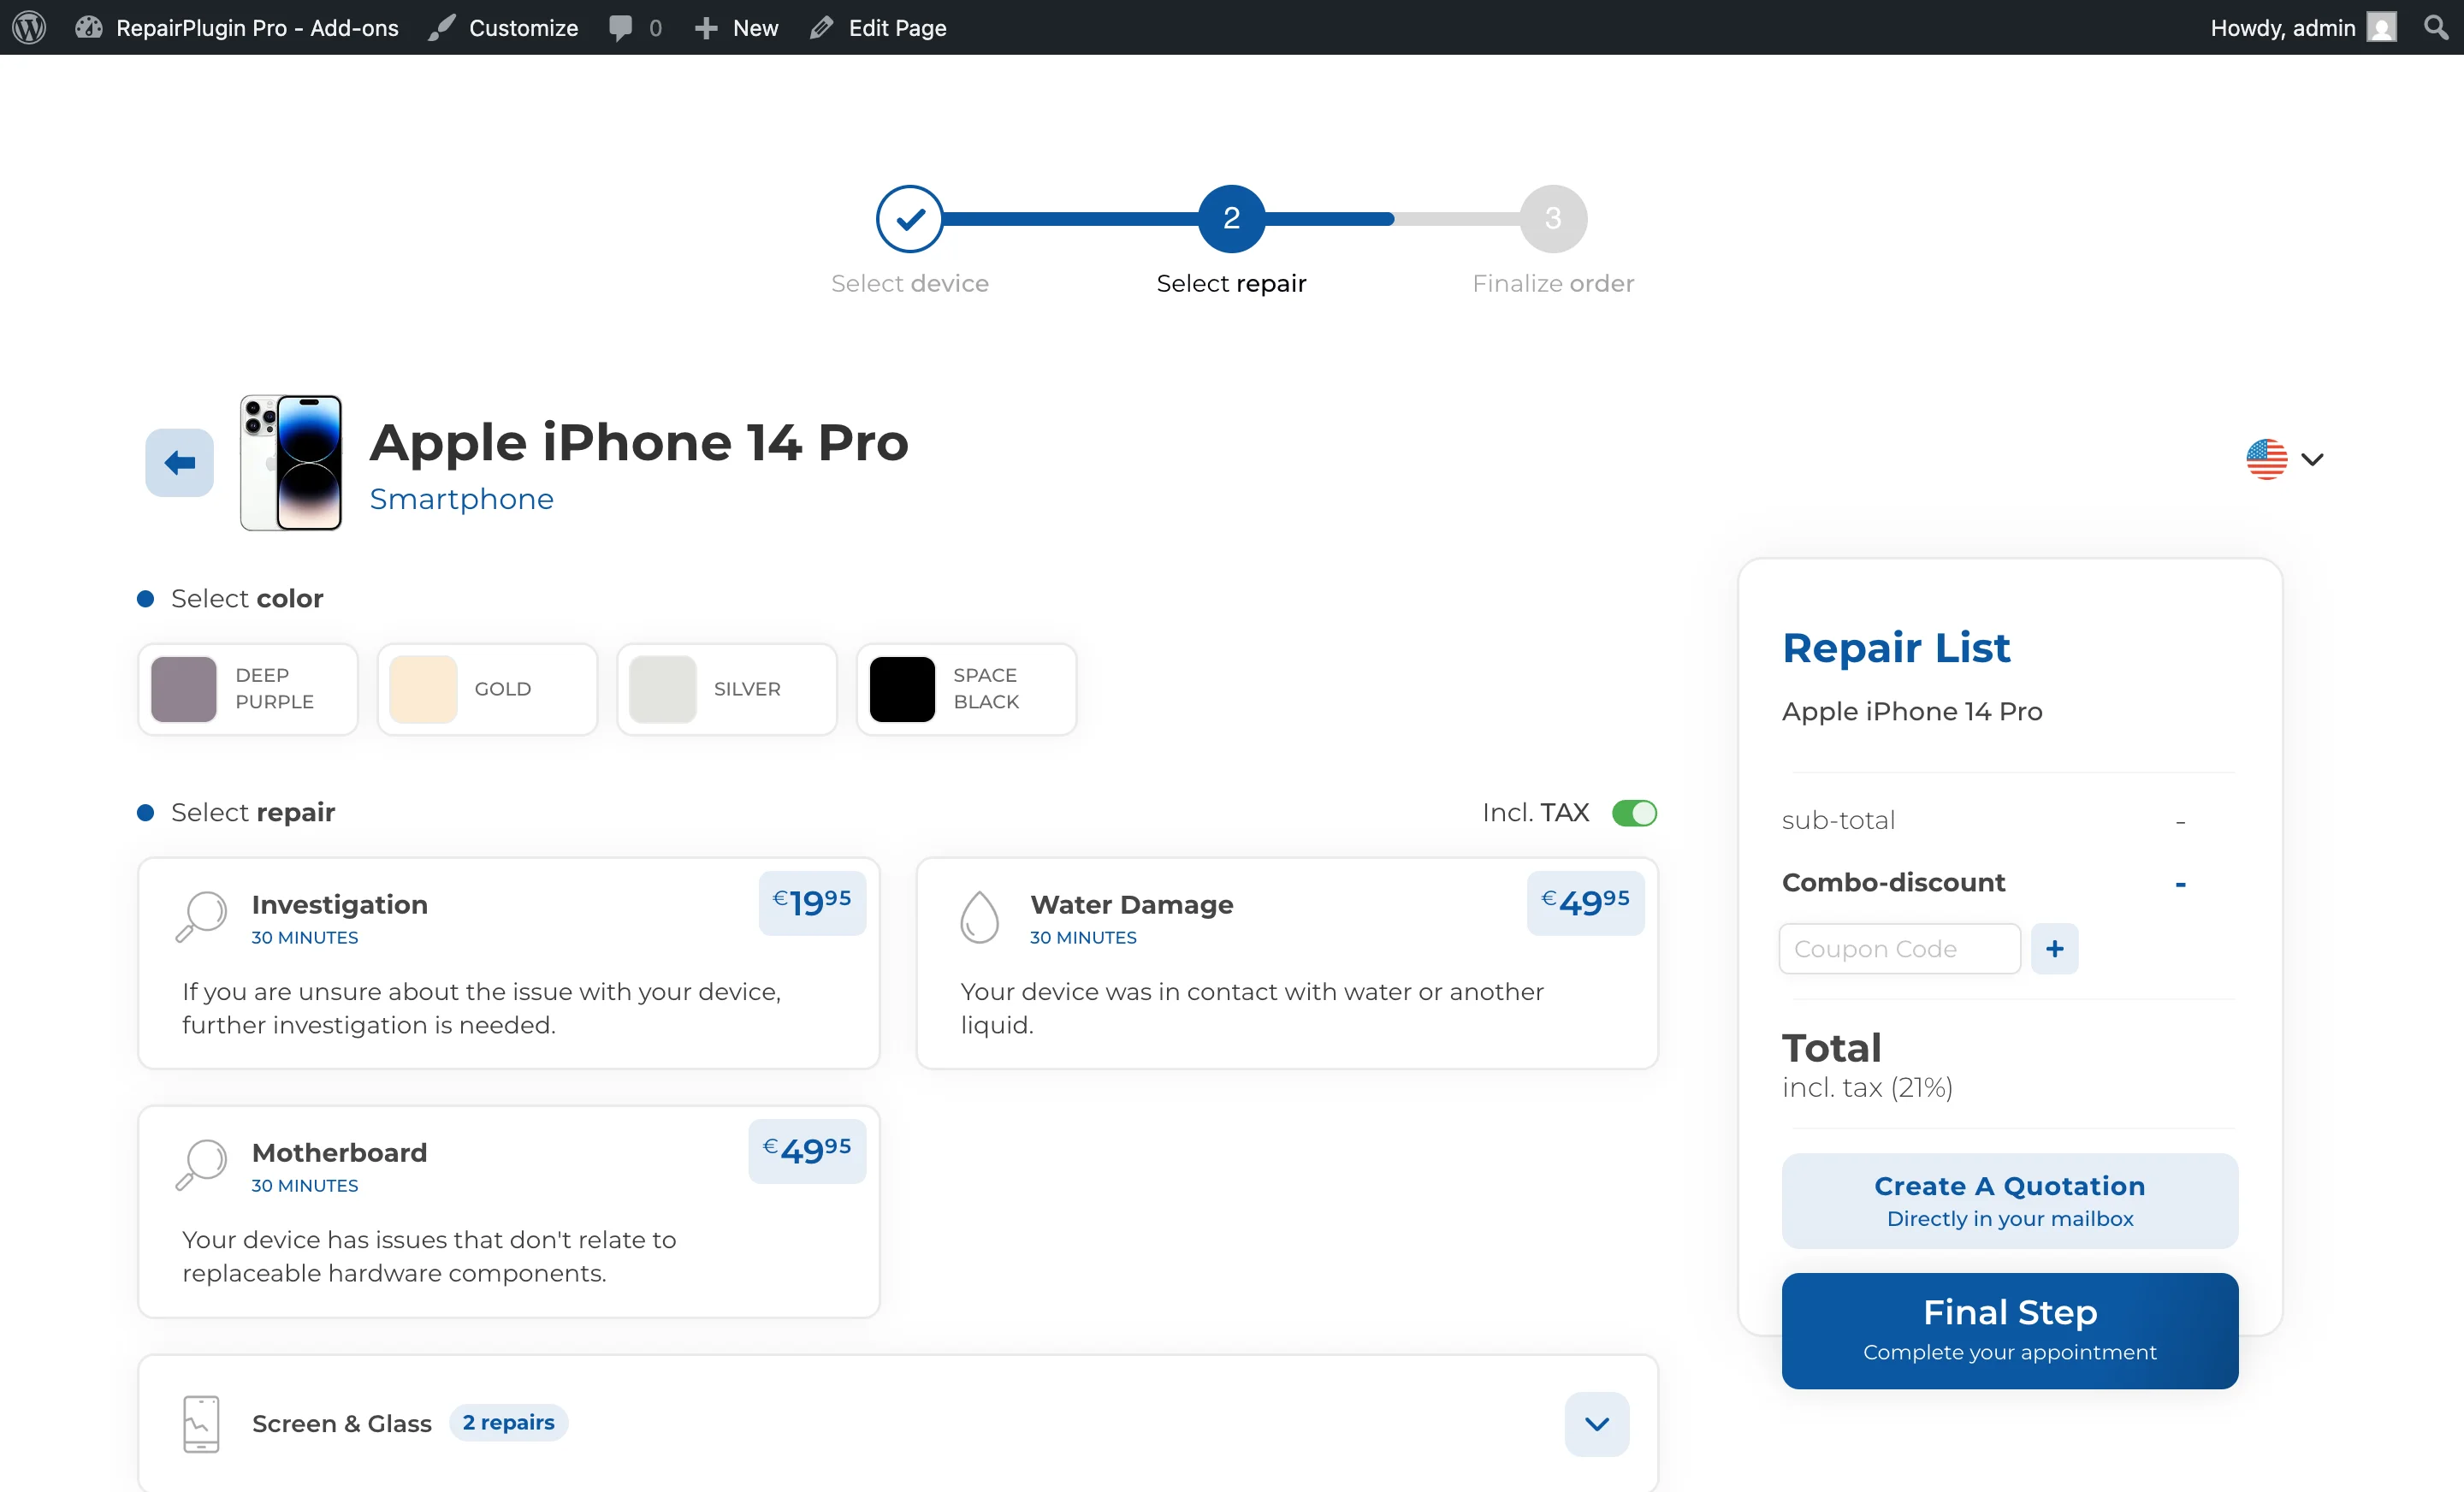
After selecting a device model, the customer sees the available repairs for that model along with pricing. Customers can select one or multiple repairs. Repairs are managed under RepairPlugin > Default Repairs and can be overridden per model.
The progress bar shows "2" for this step, with the bar at approximately 75%.
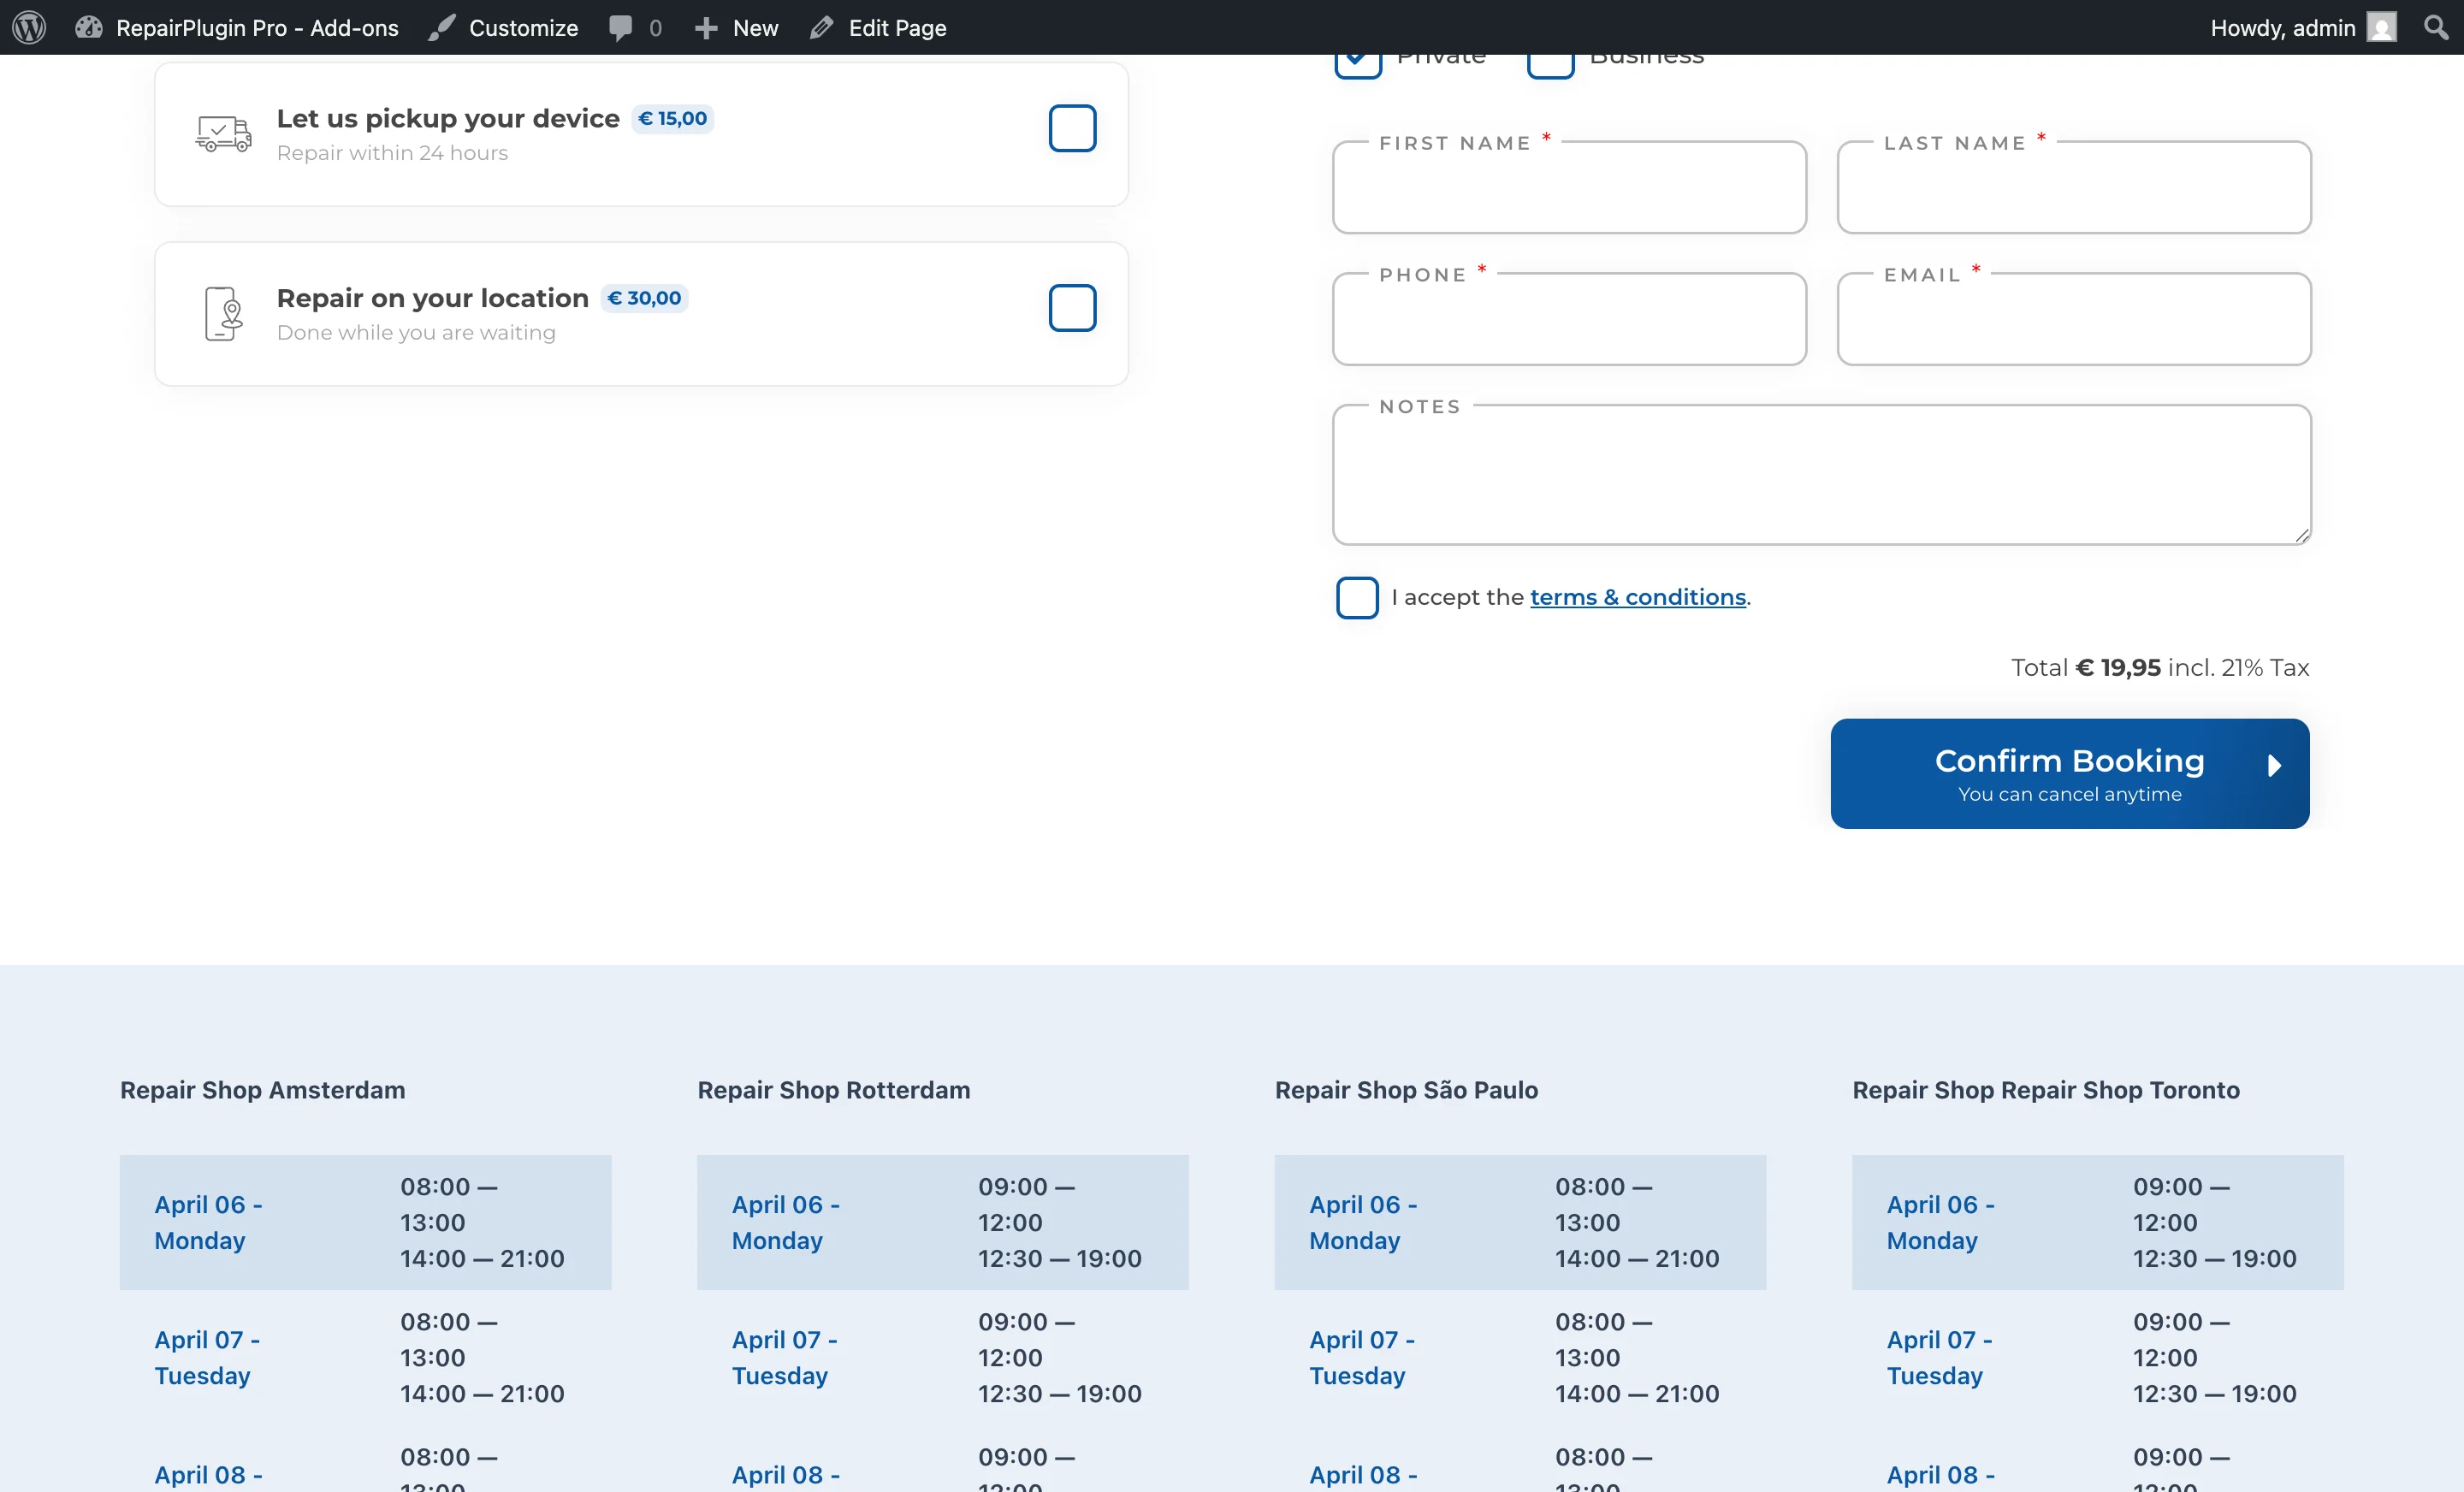
Step 3: Finalize Appointment
This is the checkout step where the customer completes their booking. It includes:
- Contact details -- Name, phone, email, and optionally business name and address fields. You can customize these via the Checkout Field Editor.
- Delivery method selection -- The customer picks how they want the repair handled (e.g., Come by our store, Ship device, Pickup service, Repair on your location). See Delivery Methods.
- Date and time selection -- For applicable delivery methods (Come by our store uses opening hours and booking slots; Pickup and Repair on location use timeslots). See Planning & Timeslots.
- Notes -- An optional text area for additional instructions.
- Custom checkout fields -- Any additional fields configured in the Checkout Field Editor.
- Payment -- If payment methods are enabled, the customer can pay during checkout.
- Order summary -- A summary of selected repairs, pricing, and the delivery method.
The progress bar shows "3" for this step, with the bar at 100%.
After Booking: Thank You Page
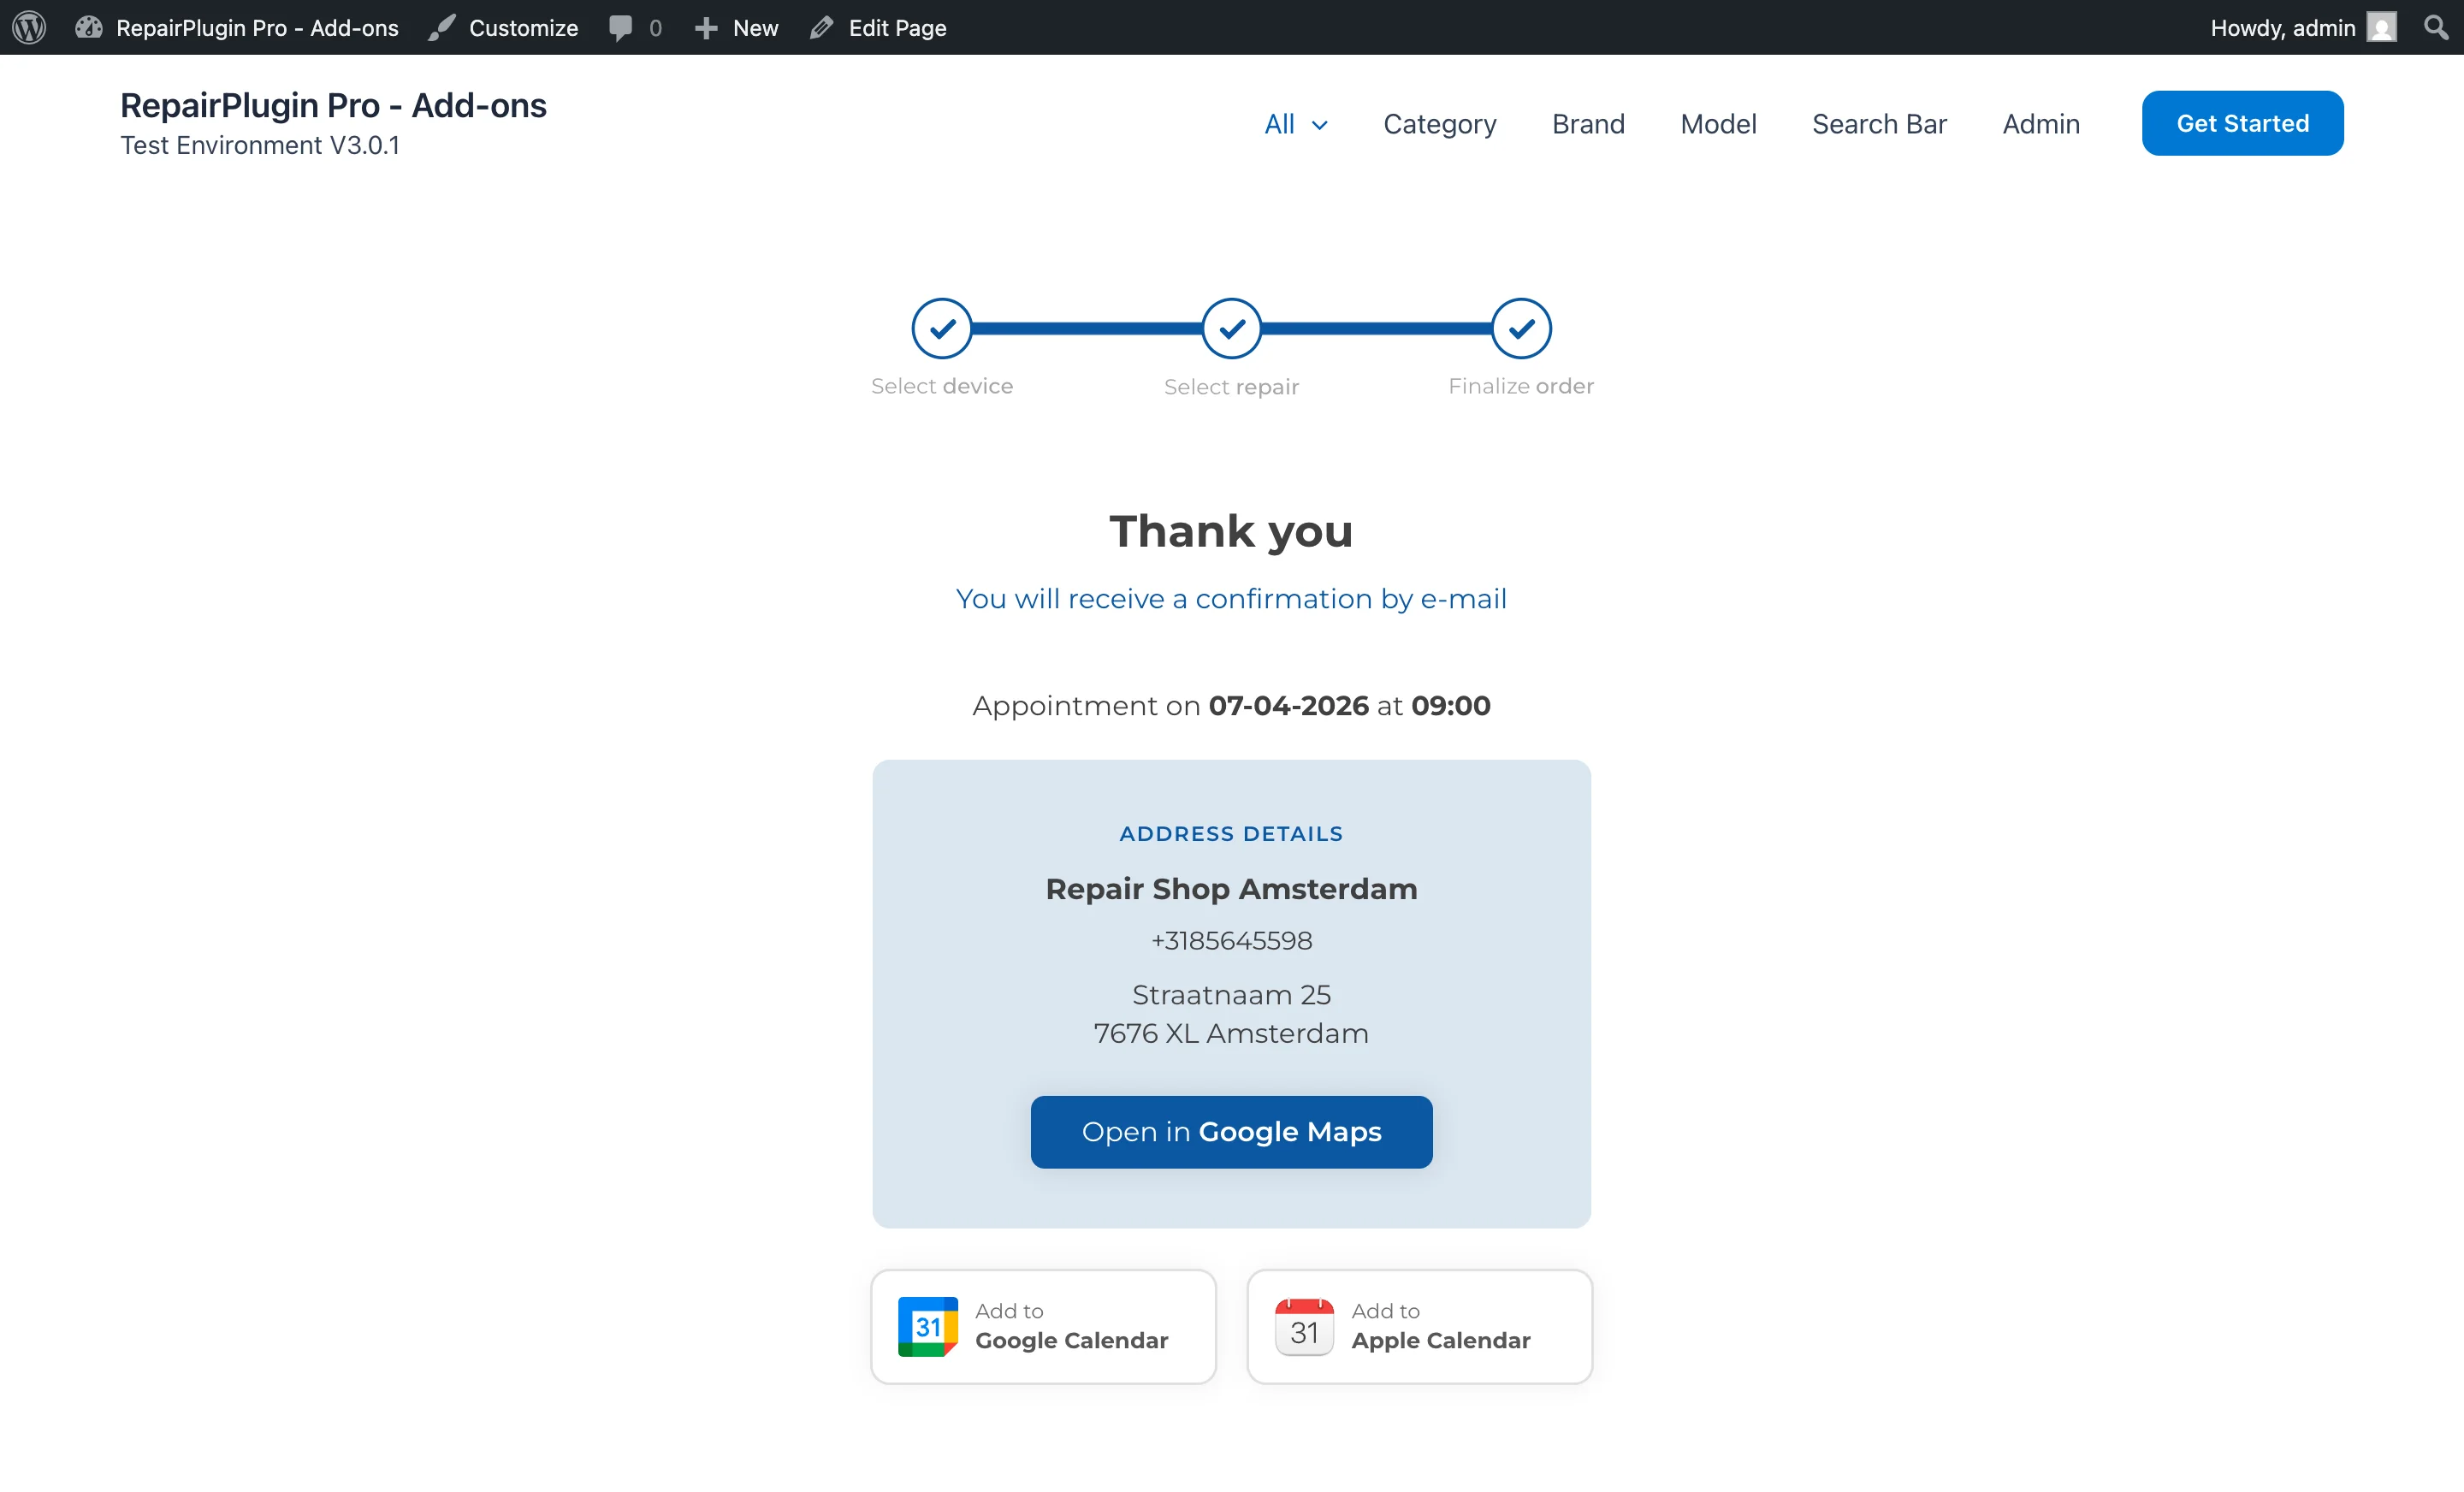
Once the customer submits their booking, they're taken to a Thank You page. This page can be:
- The default RepairPlugin Thank You page, which shows a confirmation message, appointment details, and optionally the Pre-Appointment Checklist.
- A custom WordPress page configured under Settings > Checkout & Discount > Thank You Page.
Settings reference
The booking process steps themselves can't be turned on or off individually -- they're always part of the flow. However, several settings affect how the steps behave:
Front-End Steps settings (under Settings > Front-End Steps) control the visual appearance and behavior of the progress bar and booking form. You can manage the search bar (which lets customers skip category/brand selection by searching directly for a model) and configure the Pre-Appointment Checklist shown on the Thank You page.

| Setting | Description | Default | Customers see |
|---|---|---|---|
| Thank You Page | Sets the page your customer sees after completing a booking. You can use the built-in page or redirect to any custom WordPress page | Default Thank You Page (by RepairPlugin) | After submitting their appointment, customers are redirected to the selected page with their booking confirmation details. |
Checkout & Discount settings (under Settings > Checkout & Discount) include additional options that affect the booking flow: |
- Service Methods -- Enable or disable which delivery methods are available at checkout. See Delivery Methods.
- Checkout Field Editor -- Customize which fields appear in the finalize step. See Checkout Field Editor.
- Payment Methods -- Enable online payment collection during checkout.
- Combo Discount -- Apply automatic discounts when customers select multiple repairs.
- Require Deposit -- Collect a partial payment upfront to confirm the appointment.
Localization (under
Settings > Localization) lets you translate or customize all text labels in the booking steps (e.g., "Select Device", "Select Repair", "Finalize Appointment").
Frequently asked questions
Can customers add the appointment to their own calendar?
Yes. RepairPlugin generates a downloadable .ics calendar file for each appointment. This file can be opened with Google Calendar, Apple Calendar, Outlook, and other calendar apps. The file includes the appointment date and time, location, and a summary of the booking.
Can customers go back to a previous step?
Yes. Every step in the device selection flow (category, brand, model, repairs) has a back button that lets customers return to the previous step without losing their selections.