Caching & Performance
Configure RepairPlugin's Smart Cache, Pre-load Next Step, and Optimized Ajax to speed up your booking flow and reduce server load.
What can you do with this?
- Speed up the booking flow -- Smart Cache stores repair lists, prices, and model data so they load from cache instead of the database.
- Make step transitions feel instant -- Pre-load Next Step fetches the next booking step in the background while your customer is still browsing.
- Reduce server load -- Optimized Ajax prevents unnecessary WordPress plugins from loading during RepairPlugin's requests.
- Stay up to date automatically -- the cache clears itself whenever you make changes in the admin panel.
Where to find it
- In your WordPress admin, go to RepairPlugin in the left sidebar.
- Click Settings.
- In the settings sidebar, click Caching & Performance.
Tip: This section is only visible to users with Full or Top Level access.
How to set it up
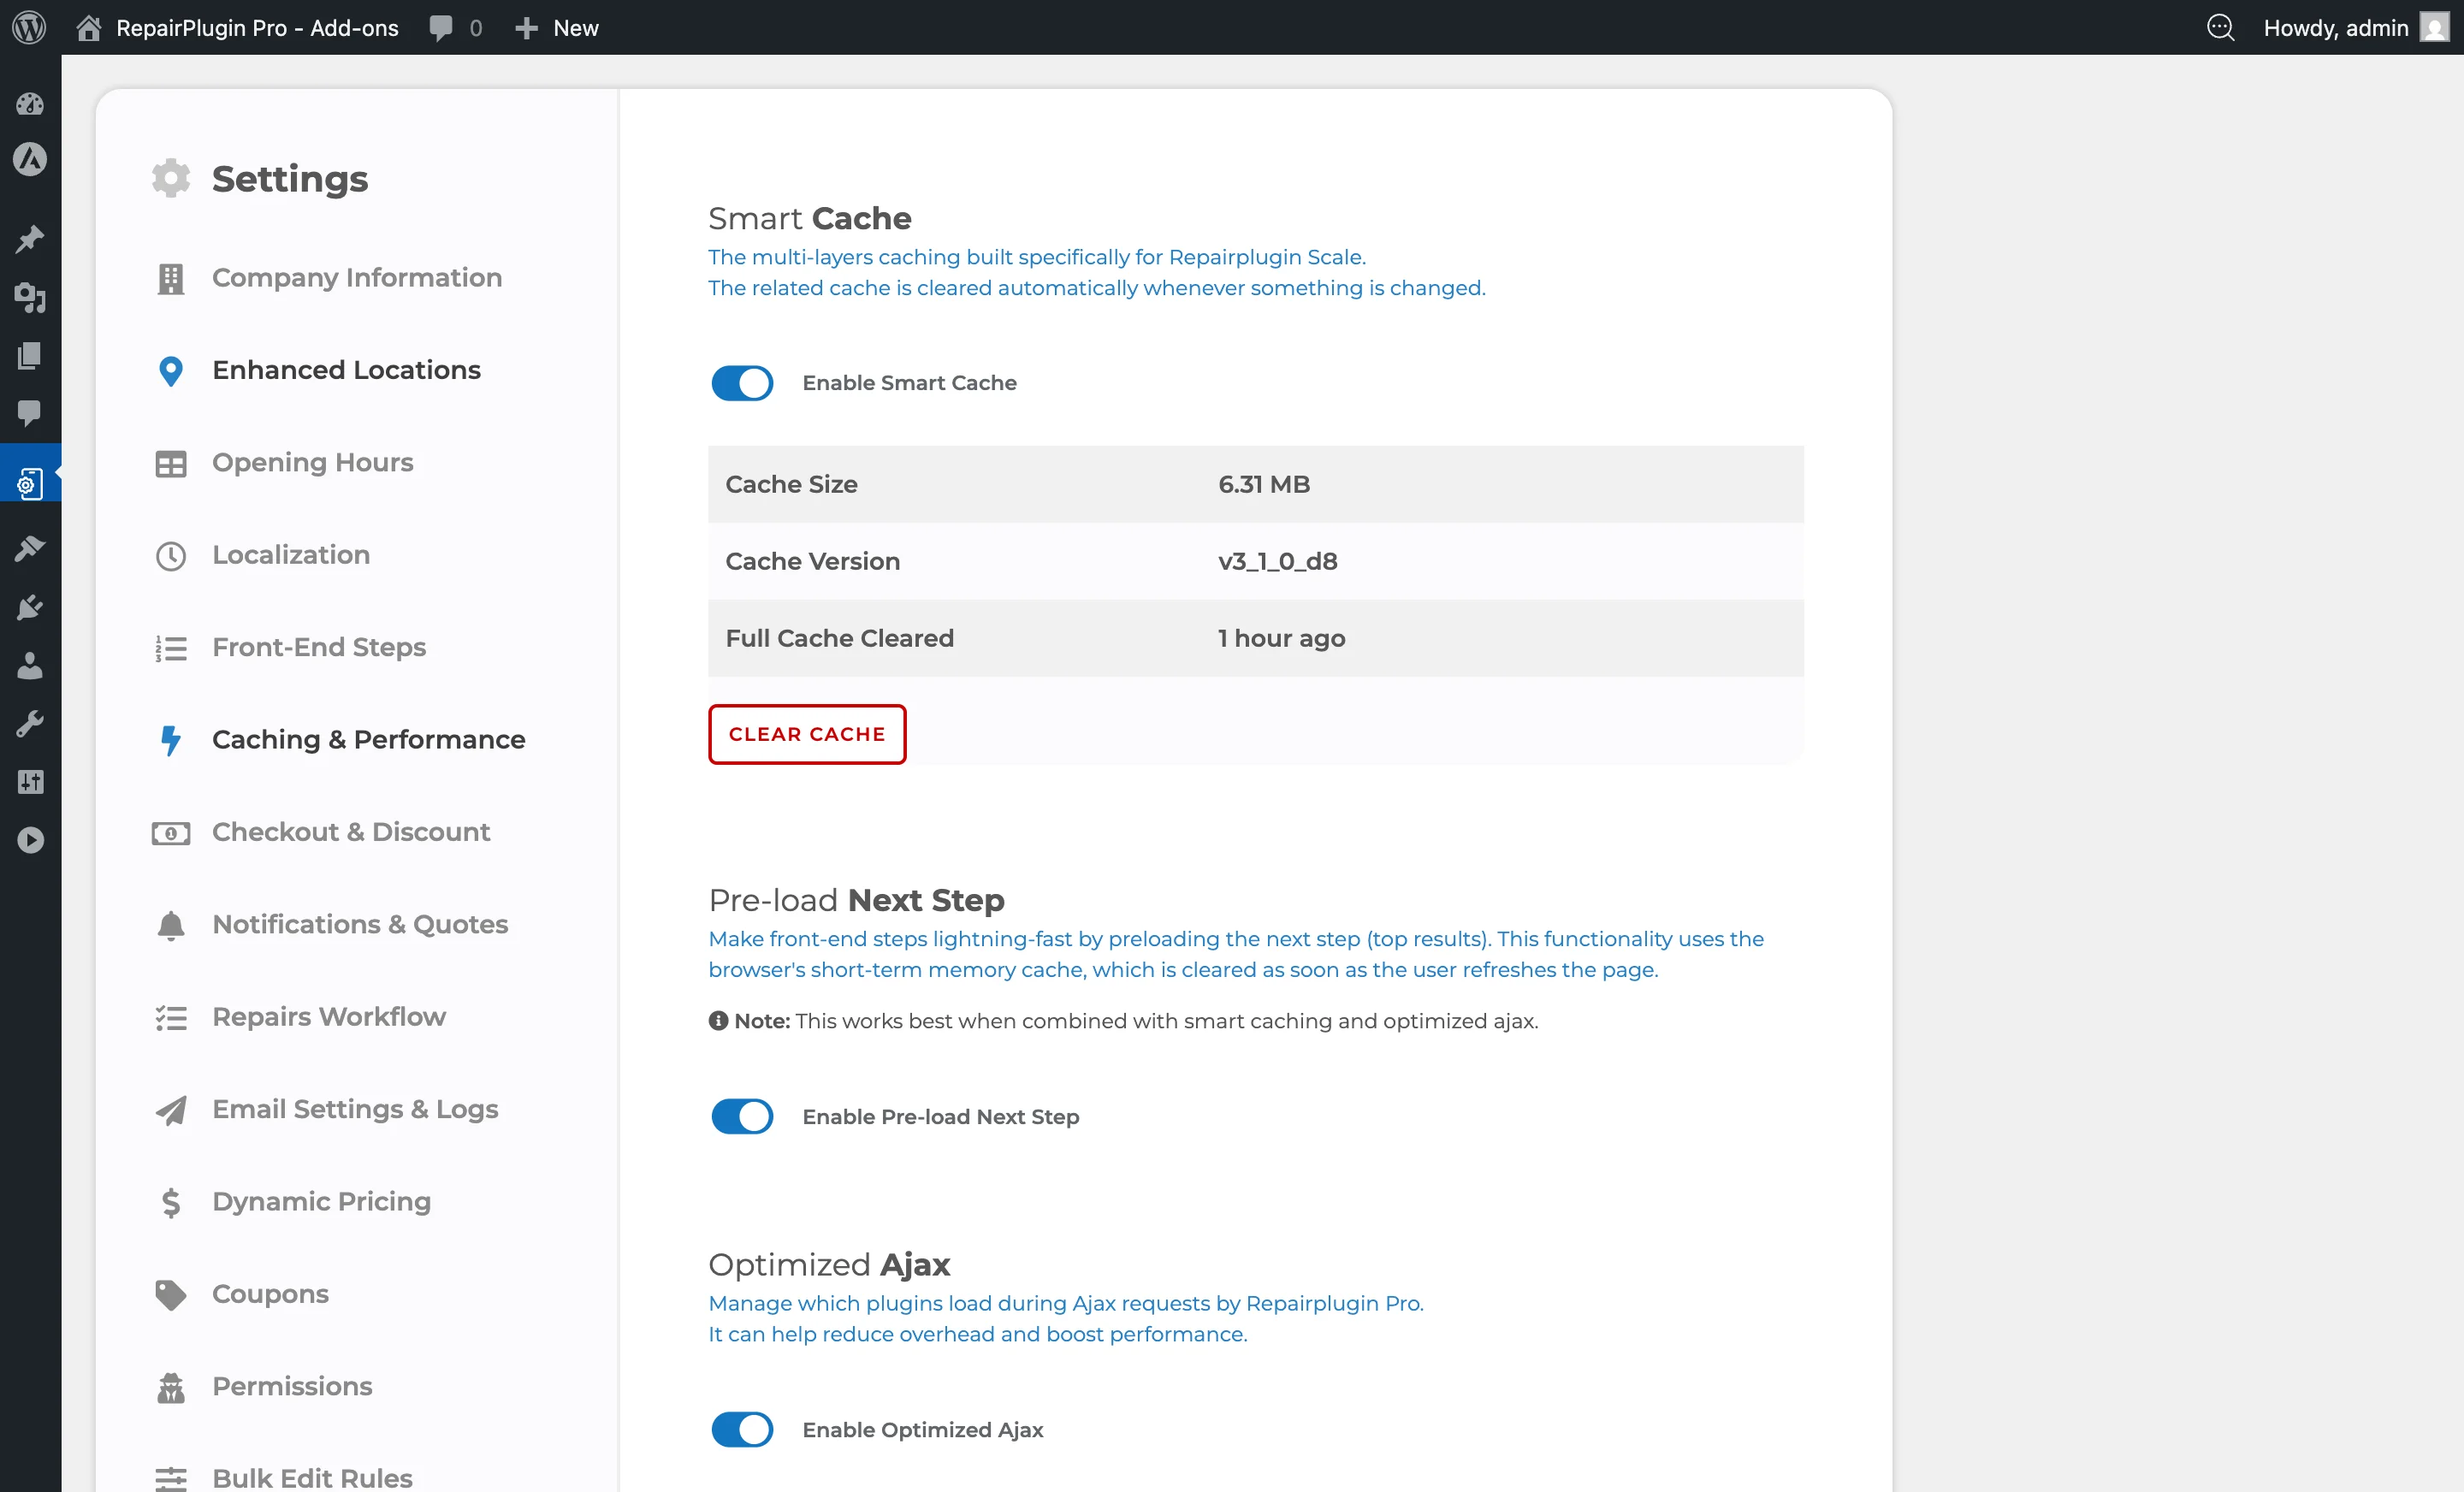
Enable Smart Cache
- Switch Enable Smart Cache to ON.
- Click Save Settings.
Once enabled, a Cache Information panel appears showing:
| Field | What it shows |
|---|---|
| Cache Size | Total size of all cached data files |
| Cache Version | The active cache version number |
| Full Cache Cleared | When the cache was last fully cleared (e.g., "5 minutes ago") |
Clear the cache manually
- Make sure Smart Cache is enabled and there's cached data (Cache Size isn't "N/A").
- Click the Clear Cache button below the cache information table.
- The page reloads and the cache is fully cleared.
You normally don't need to clear the cache manually -- RepairPlugin does it automatically when you save changes. Manual clearing is useful when you're troubleshooting display or pricing issues.
Enable Pre-load Next Step
- Switch Enable Pre-load Next Step to ON.
- Click Save Settings.
The pre-loaded data uses the browser's short-term memory and is cleared when the customer refreshes the page. For best results, use this together with Smart Cache and Optimized Ajax.
Enable Optimized Ajax
- Switch Enable Optimized Ajax to ON.
- The Active Plugins section appears below the switch.
- Review the list and switch off any plugins that don't need to load during RepairPlugin's requests.
- Click Save Settings.
Manage Active Plugins
When Optimized Ajax is enabled, you'll see a grid of all active WordPress plugins on your site. Each plugin has its own switch:
- ON -- this plugin loads during RepairPlugin requests.
- OFF -- this plugin doesn't load during RepairPlugin requests.
Keep essential plugins enabled -- especially SMTP plugins for email delivery and any security plugins your site depends on. RepairPlugin itself is always enabled and can't be switched off.
Tip: Switching a plugin off here only affects RepairPlugin's own requests. It doesn't deactivate the plugin on the rest of your site.
Settings reference
| Setting | Description | Default | Customers see |
|---|---|---|---|
| Enable Smart Cache | Turns on a server-side caching system that stores frequently used data (repair lists, prices, model data) to reduce database queries. The cache clears automatically when you make admin changes | off | Faster page loads in the booking flow -- repair lists, model data, and pricing load from cache instead of the database. |
| Clear Cache | Completely clears all cached data. The cache version resets and the "Full Cache Cleared" timestamp updates | N/A | The next page load may be slightly slower while the cache rebuilds, then everything speeds up again. |
| Enable Pre-load Next Step | Loads the next step in the booking flow in the background while your customer is viewing the current step. Uses the browser's short-term memory | off | Moving between booking steps feels nearly instant. The pre-loaded data clears when the page is refreshed. |
| Enable Optimized Ajax | Limits which WordPress plugins load during RepairPlugin's requests. Shows the Active Plugins panel when enabled | off | Faster responses in the booking flow because fewer plugins are loaded per request. |
| Active Plugins | Controls which plugins load during RepairPlugin requests. RepairPlugin is always included and can't be switched off Tip: Only affects RepairPlugin's own requests. Switching a plugin off here doesn't affect the rest of your site. | all plugins enabled | Nothing changes visually -- this only affects how quickly RepairPlugin responds behind the scenes. |
| Cache Information Panel | Shows the current cache size, cache version, and when the cache was last fully cleared | N/A (only shown when Smart Cache is enabled) | Nothing -- this is for your reference only. |
Frequently asked questions
Do I need to clear the cache after making changes?
No. RepairPlugin automatically clears the relevant cache entries when you save changes in the admin panel. Manual clearing is only needed when troubleshooting.
Will Optimized Ajax break other plugins on my site?
No. Switching a plugin off in the Active Plugins list only affects RepairPlugin's own requests. The plugin still works normally everywhere else on your site.
What does Optimized Ajax actually do?
When a visitor interacts with the booking form, RepairPlugin sends requests to your server. Normally, WordPress loads all active plugins for every request. Optimized Ajax limits this to only the plugins you select, so RepairPlugin's requests are handled faster because fewer plugins are loaded.
What does Smart Cache store?
Smart Cache saves the results of database queries (repair lists, model data, prices) in files on your server. When the same data is requested again, it's served from the cache instead of querying the database. The cache automatically clears when you make changes in the admin panel, so you always see up-to-date data.
Can I use a third-party caching plugin alongside RepairPlugin?
Yes, but exclude the page containing the RepairPlugin shortcode from your caching plugin's page cache. RepairPlugin doesn't set any cache-exclusion headers automatically, so full-page caching plugins may serve stale content if the booking page isn't excluded.