Webhooks
Configure webhooks in RepairPlugin to send booking and quote data to Zapier, Pabbly Connect, Make, or any automation platform.
What can you do with this?
- Send booking data to any app — automatically push appointment details to your CRM, accounting software, or email marketing tool.
- Get instant notifications — trigger an SMS or Slack message whenever a new appointment is booked or cancelled.
- Automate your workflow — create invoices, update spreadsheets, or assign tasks the moment a booking comes in.
- Filter by location — with the Enhanced Locations, scope webhooks to a specific location so each shop triggers its own automations.
- Choose what triggers the webhook — pick from 8 different events covering appointments and quotes.
Where to find it
- In the WordPress admin sidebar, click RepairPlugin.
- Click Settings.
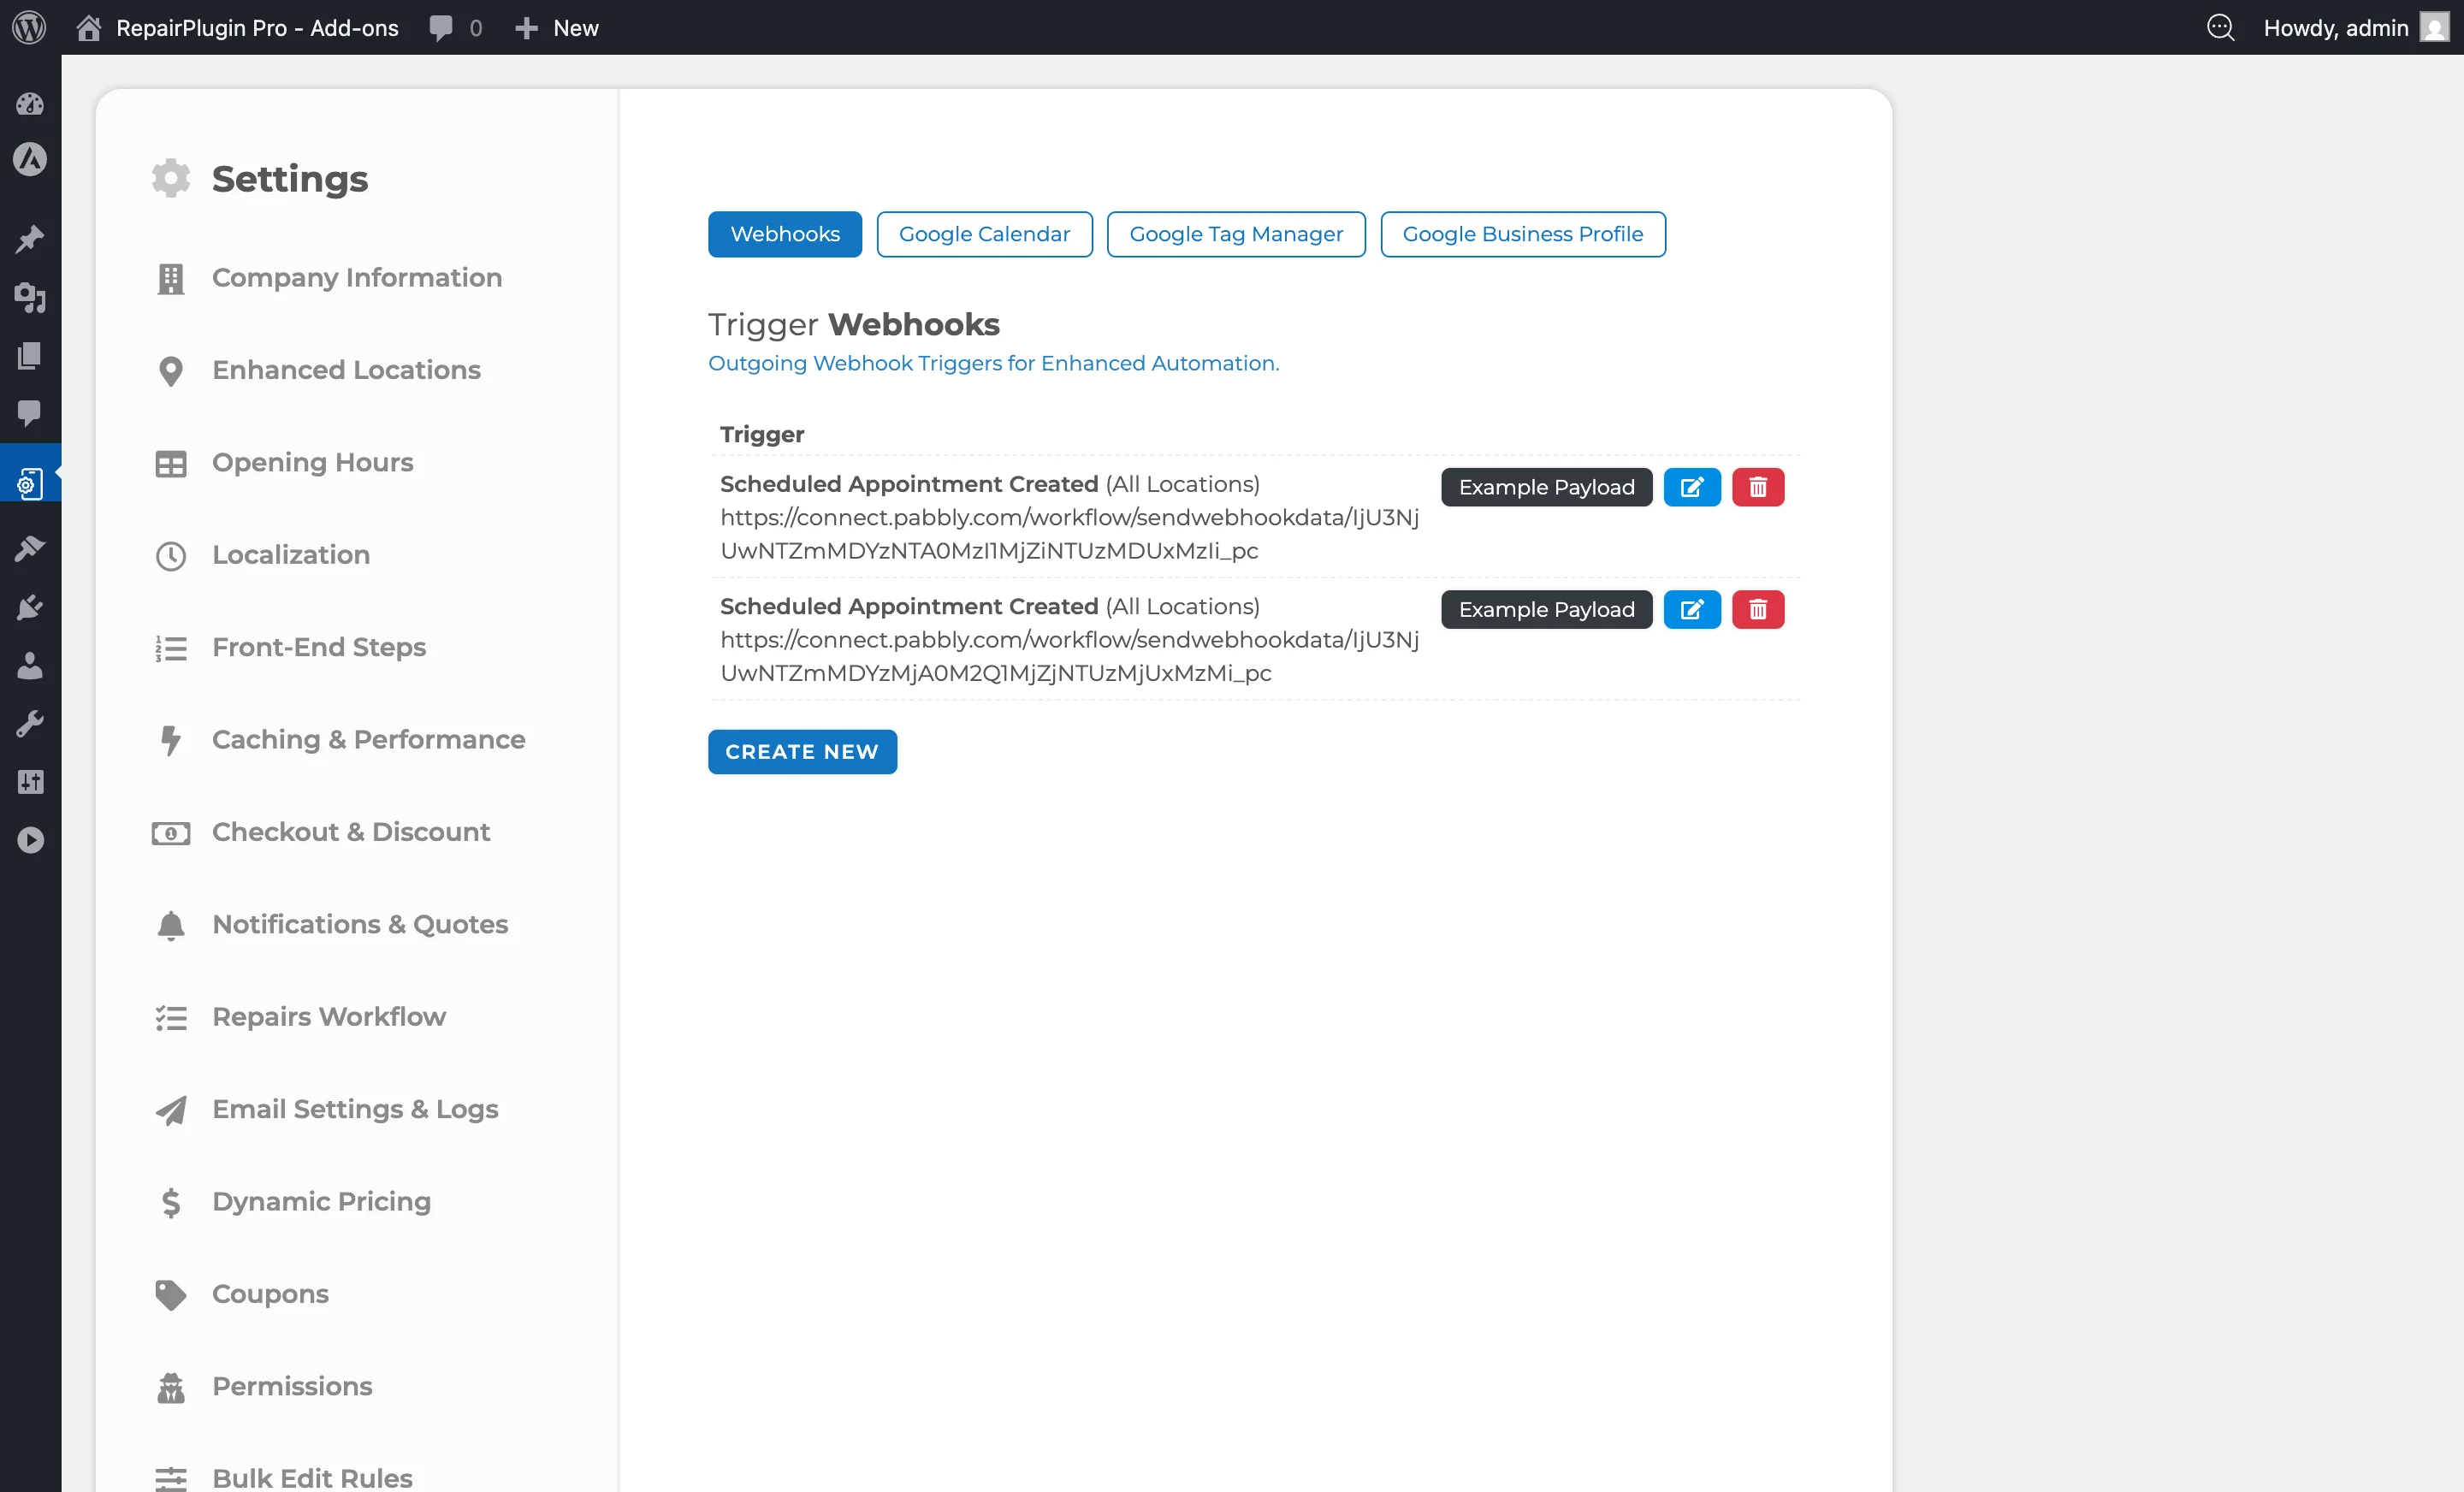
- Click Webhooks & Integrations in the sidebar.
- The Webhooks tab is the default view (first tab).
How to set it up
Create a new webhook
- Go to RepairPlugin > Settings > Webhooks & Integrations > Webhooks.
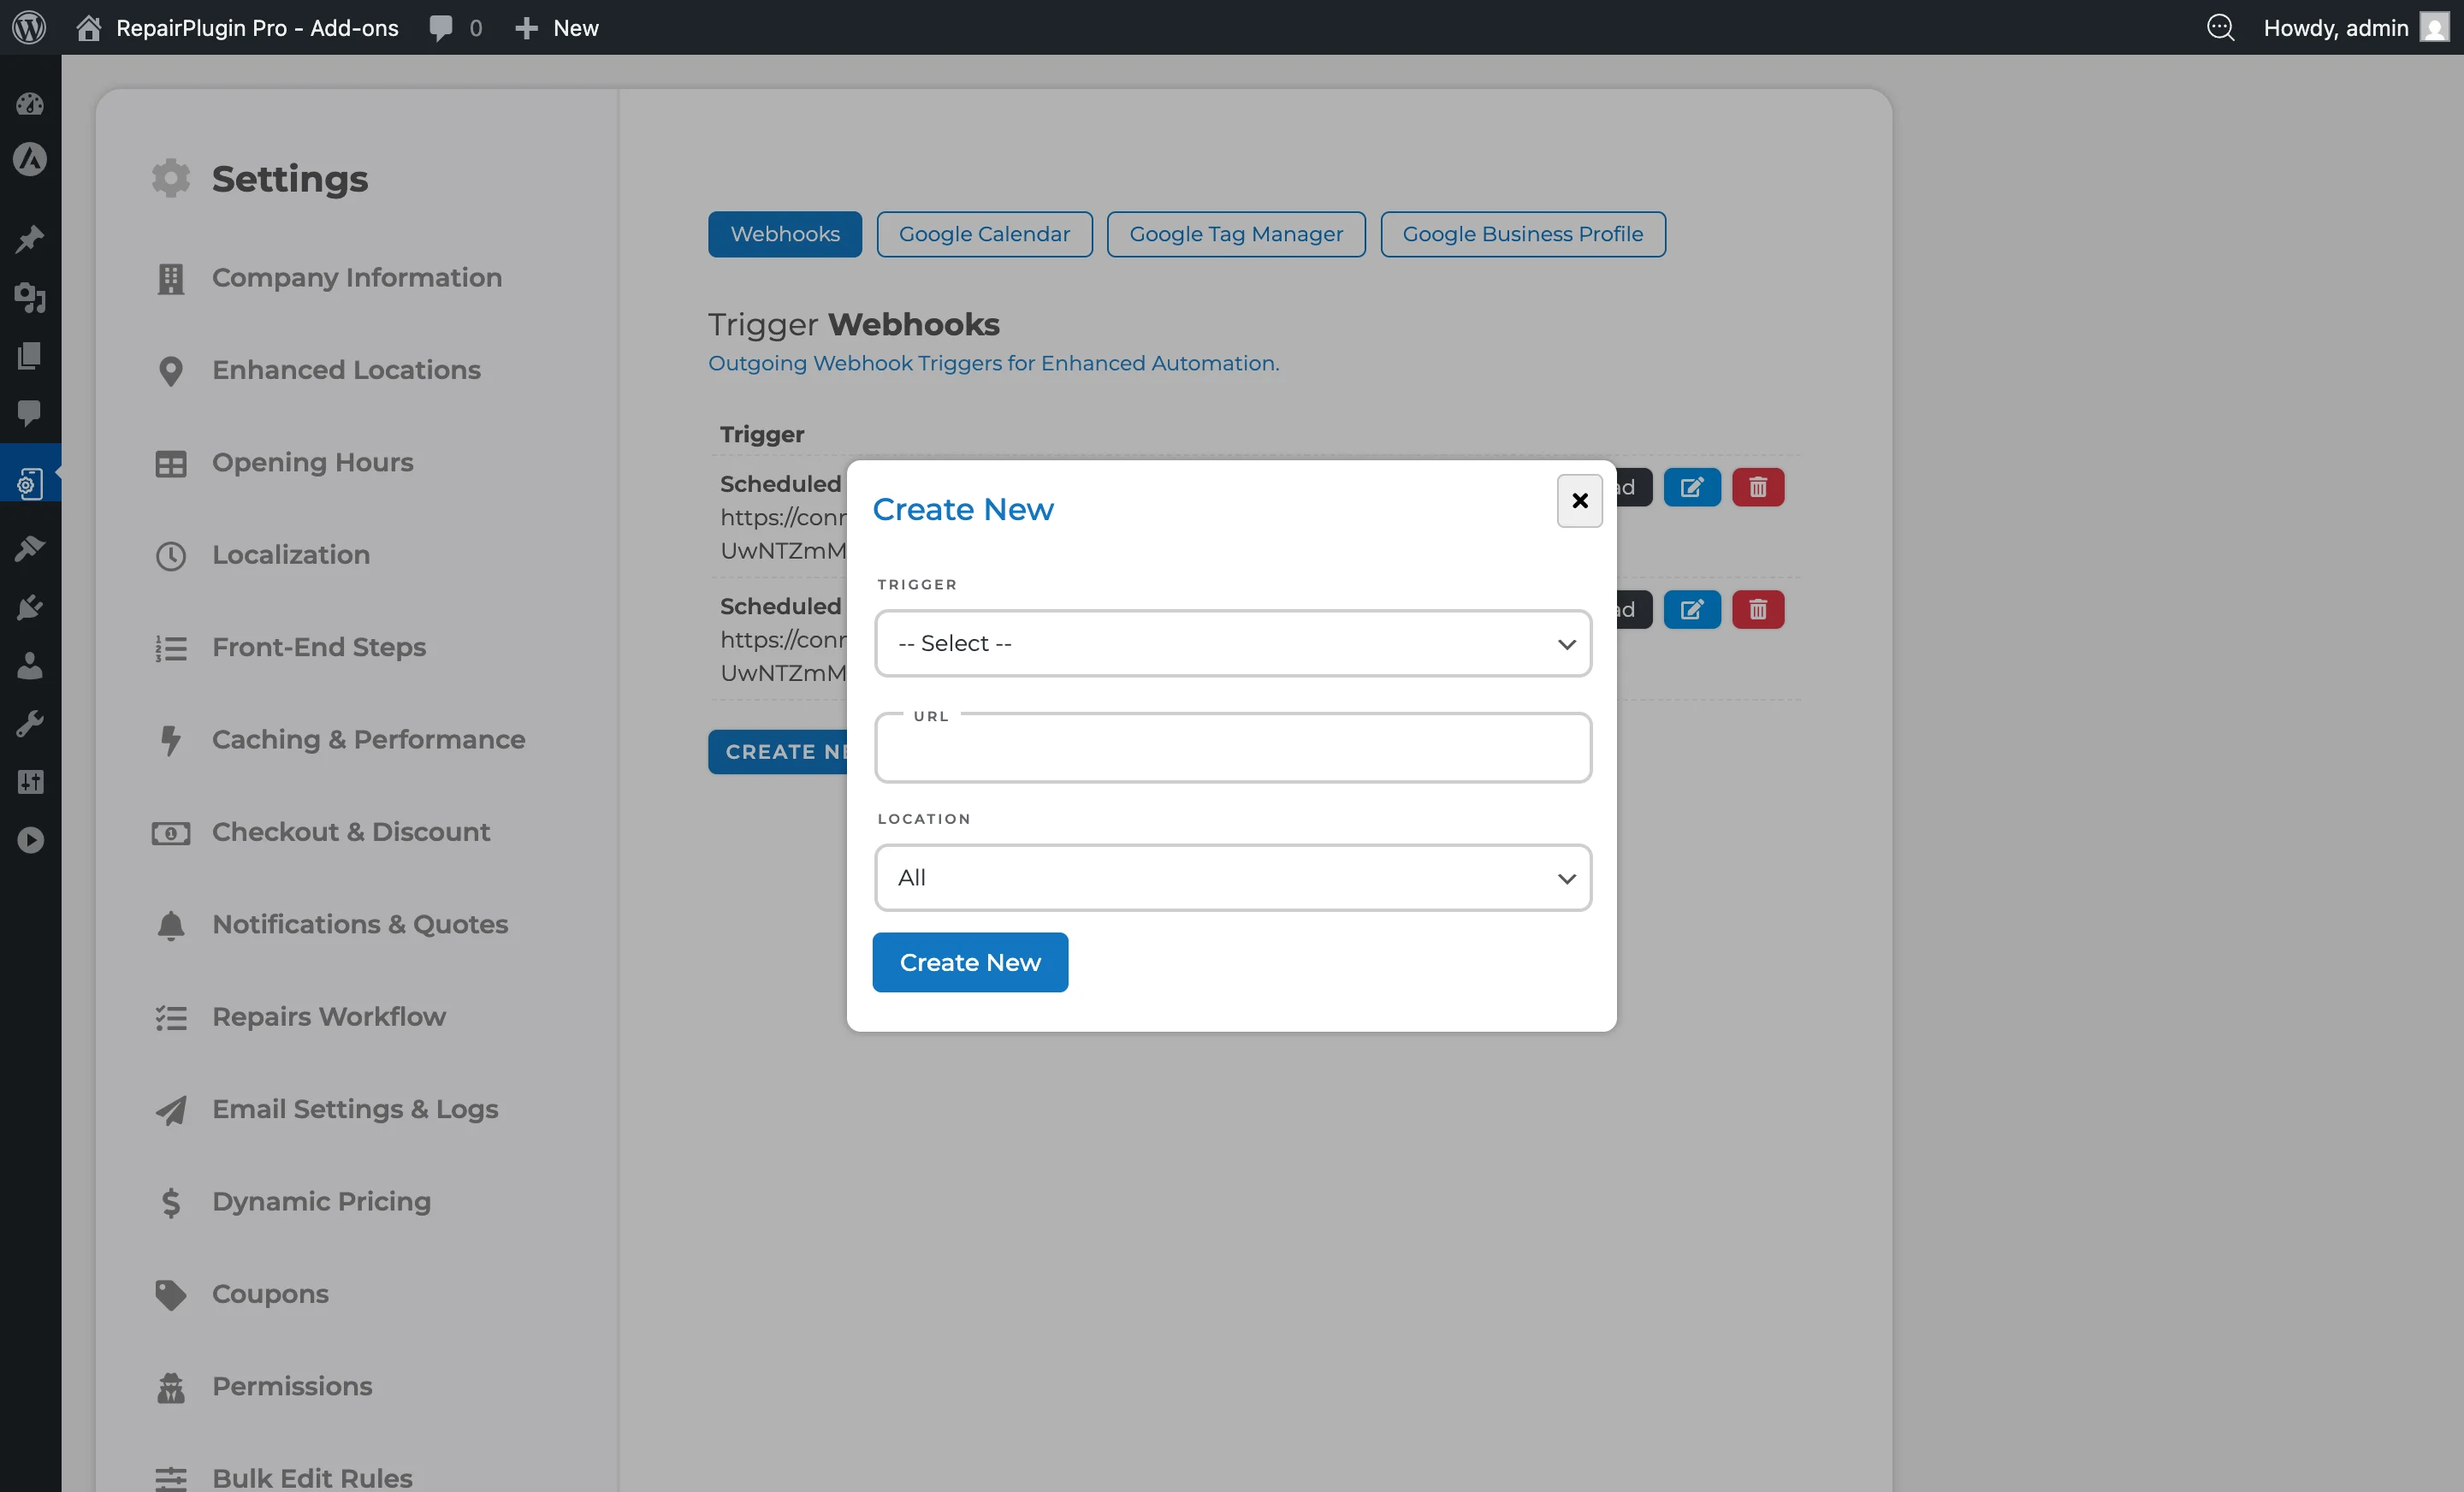
- Click the Create New button below the webhook table.
- A popup opens with:
- Trigger dropdown — select the event that fires the webhook.
- URL field — paste the webhook URL from your automation platform.
- Location dropdown — (only visible with Enhanced Locations) select a specific location or leave as "All" to fire for any location.
- Click Create New to save.
- The page reloads and the new webhook appears in the table.
Edit a webhook
- Click the edit icon (pencil) next to the webhook you want to change.
- Update the trigger, URL, or location.
- Click Update to save.
Delete a webhook
- Click the delete icon (trash can) next to the webhook.
- Confirm the deletion.
- The webhook is removed.
View the example data
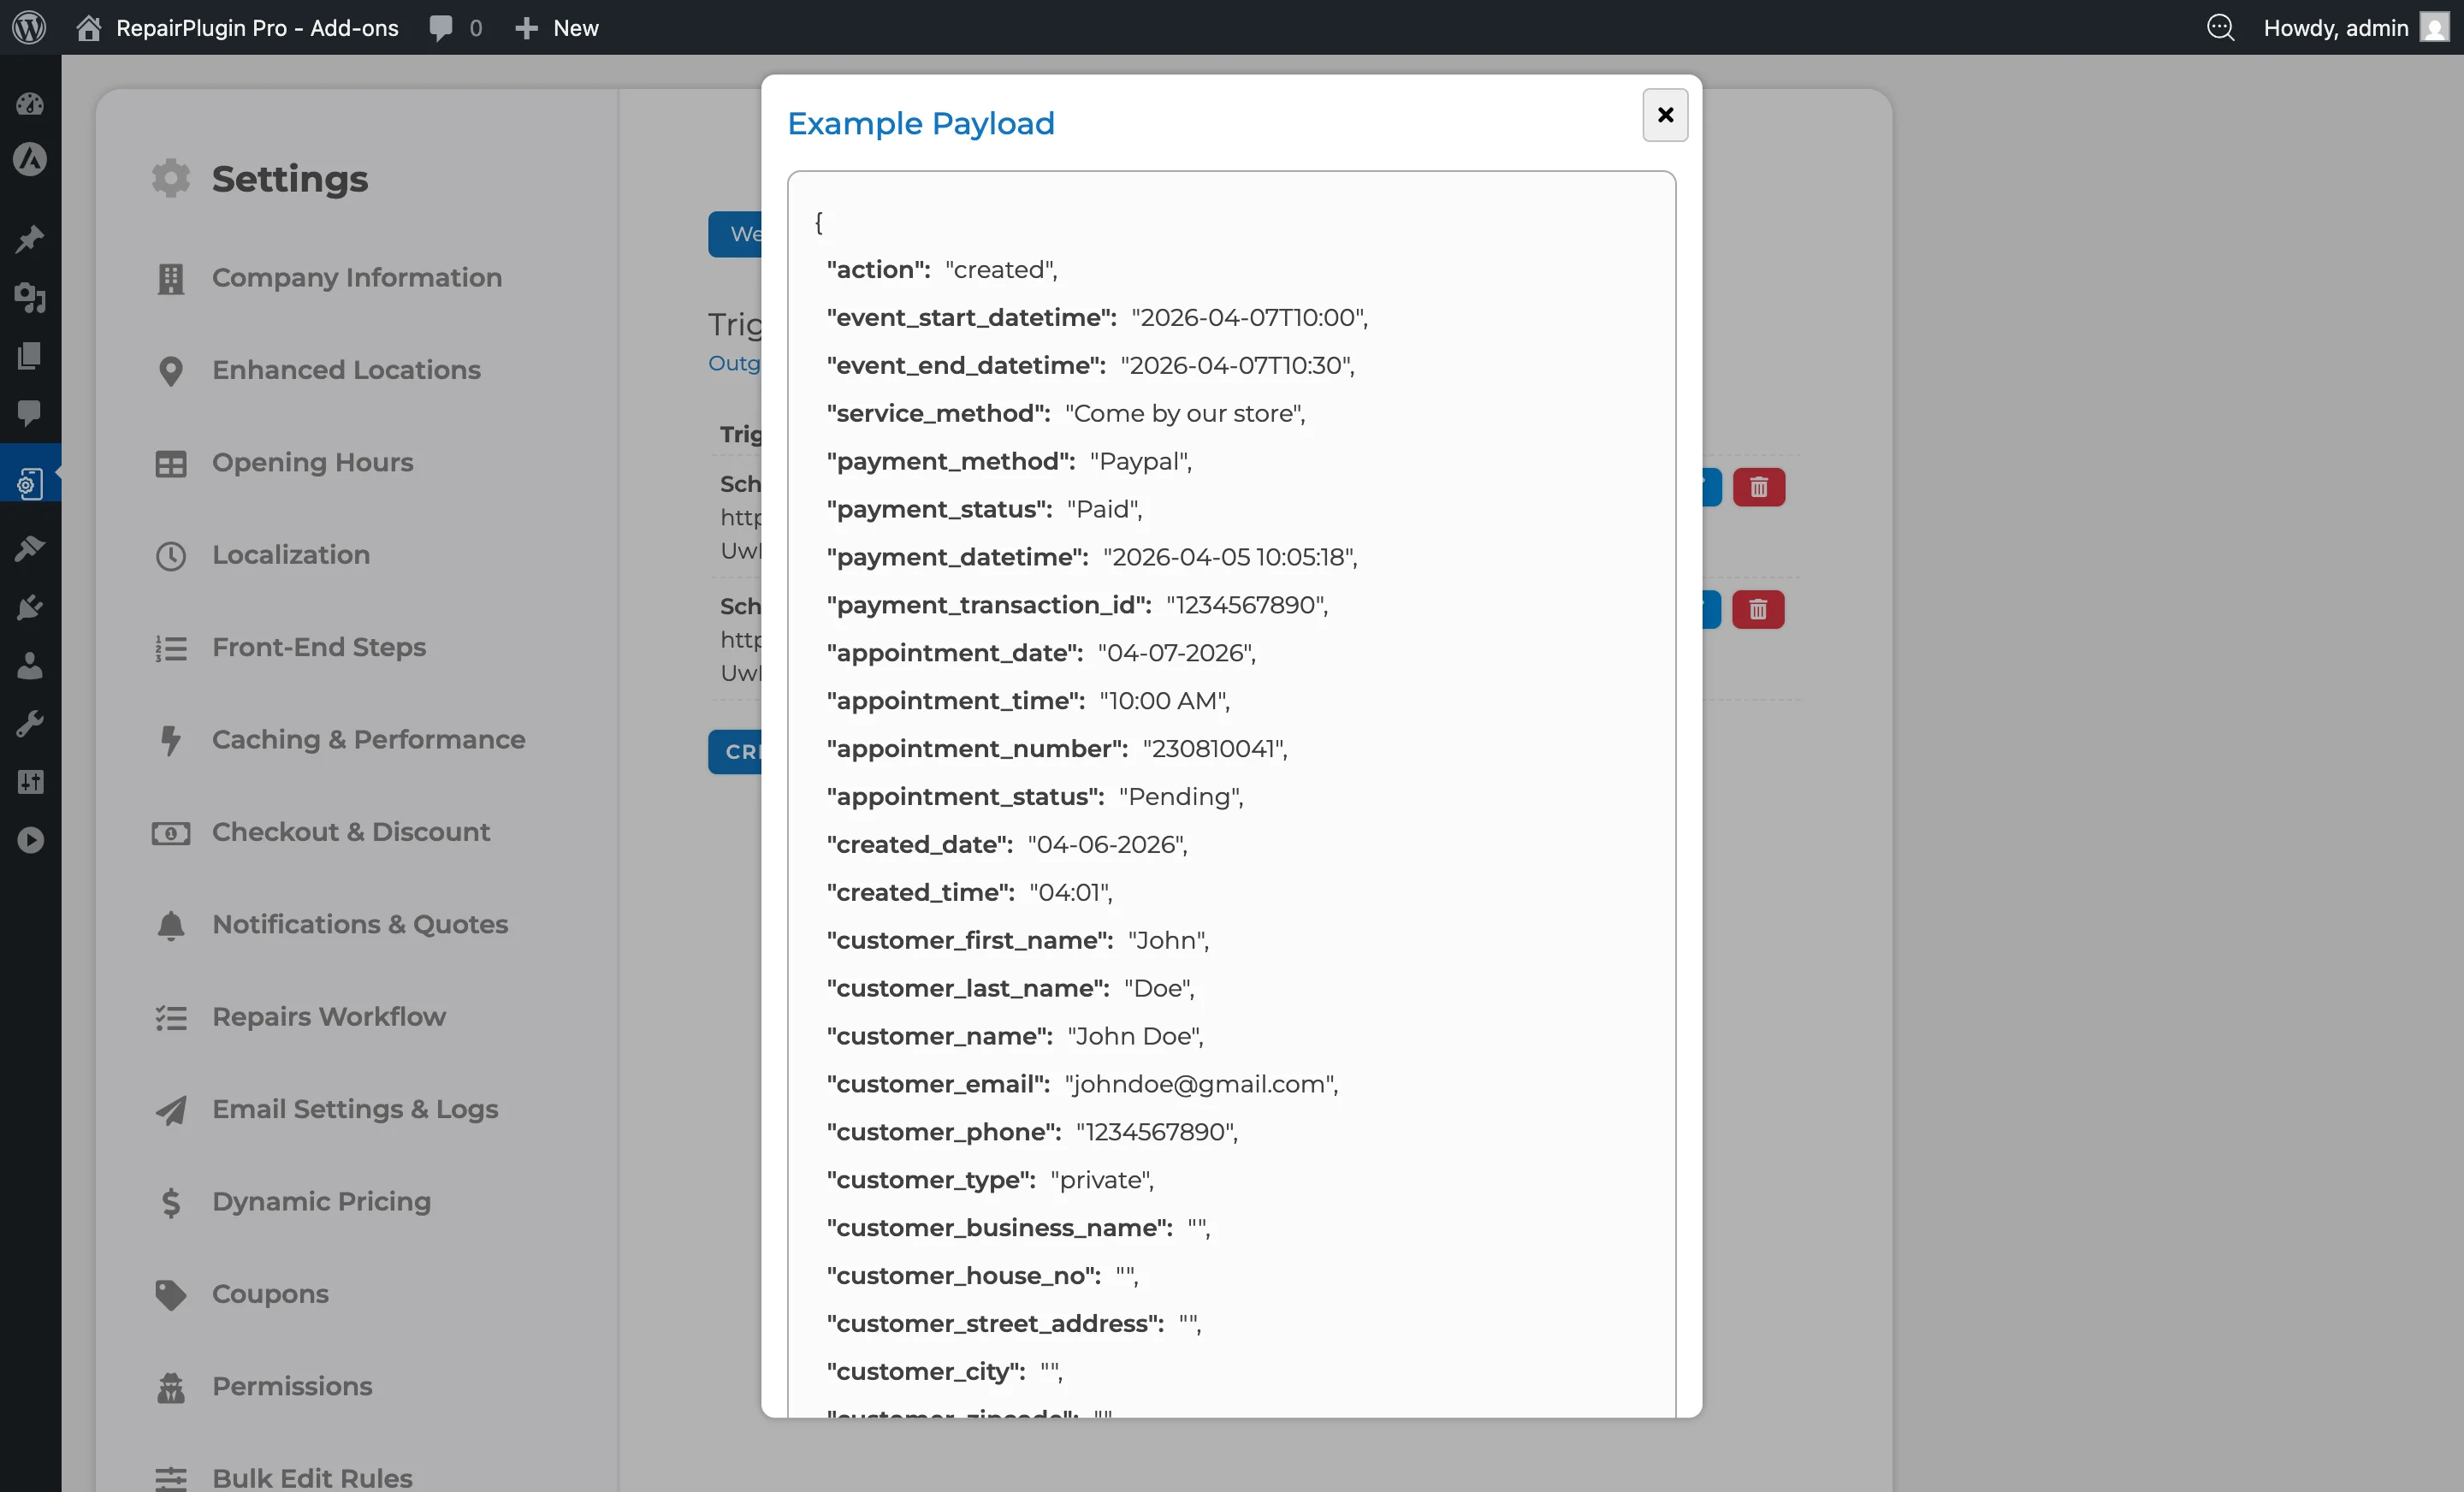
- Click the Example Payload button next to any webhook.
- A popup shows the full data structure that would be sent for that trigger.
- Use this to understand the format when setting up your automation platform.
Connect to Pabbly Connect
- In Pabbly Connect, create a new workflow and choose Webhook as the trigger.
- Copy the webhook URL provided by Pabbly.
- In RepairPlugin, create a new webhook with the desired trigger and paste the Pabbly URL.
- Save the webhook.
- Trigger a test event (for example, create a test appointment).
- Go back to Pabbly to verify the data was received, then set up your actions.
Connect to Zapier
- In Zapier, create a new Zap and search for Webhook as the trigger.
- Select Catch Hook and copy the webhook URL.
- In RepairPlugin, create a new webhook with the desired trigger and paste the Zapier URL.
- Save and trigger a test event.
- Go back to Zapier to verify the data and set up your actions.
Connect to Make (formerly Integromat)
- In Make, create a new scenario and select Webhook > Custom webhook as the trigger.
- Click Add to generate a webhook URL and copy it.
- In RepairPlugin, create a new webhook with the desired trigger and paste the Make URL.
- Save and trigger a test event.
- Go back to Make to verify the data and build your scenario.
Settings reference
Available triggers
| Trigger | When it fires |
|---|---|
| Scheduled Appointment Created | A new appointment is booked by a customer |
| Scheduled Appointment Updated | An existing appointment is changed |
| Scheduled Appointment Cancelled | An appointment is cancelled |
| Scheduled Appointment Deleted | An appointment is permanently deleted |
| Quote Created | A new PDF quote is generated |
| Quote Updated | An existing quote is changed |
| Quote Cancelled | A quote is cancelled |
| Quote Deleted | A quote is permanently deleted |
| Setting | Description |
| --- | --- |
| Trigger | Determines which event fires this webhook. Each trigger matches a specific action in RepairPlugin |
| URL | The destination URL where RepairPlugin sends the booking or quote data when the selected trigger fires |
| Location | Limits the webhook to fire only for events at a specific location |
What data is sent
Every webhook sends a package of data with these sections:
| Section | What's included |
|---|---|
| Action | What happened (created, updated, cancelled, deleted) |
| Timing | Start/end times, appointment date and time |
| Service & Payment | Service method, payment method, payment status |
| Appointment Details | Appointment number, status, created date and time |
| Customer Information | First name, last name, full name, email, phone, address (house number, street, city, zipcode, country), customer type (private/business), business name, notes |
| Location Details | Shop name, location name, phone, address |
| Device | Category, brand, model, color |
| Items | List of repairs and upsells, each with name, type, price, tax rate, tax amount, and price excluding tax |
| Financials | Service method cost, subtotal, combo discount, coupon code/type/amount, booking deposit, balance due, tax percentage, tax price, excluding-tax price, total price |
| Payment | Payment method, payment status, payment date/time, transaction ID, payment method cost/discount |
| Links | Reschedule link, approve link, cancel link, finalize link |
Tip: Click the Example Payload button next to any webhook to see exactly what data is sent. This makes it much easier to set up your automation.
Dynamic Pricing supplier fields
On Dynamic Pricing Growth or Scale plans, each item in the data also includes supplier details: supplier name, product code, and supplier cost price. On the Essential plan, these fields aren't included.
Route actions by service method
You can use the service method field in your automation platform to handle bookings differently based on how the customer chose to have their device repaired:
- Come by our store — send a store visit confirmation
- Ship device — generate shipping label and instructions
- Pickup service — schedule a pickup with your logistics provider
- Repair on your location — notify your field technician team Set up routing using Filters (Zapier), Router steps (Pabbly), or Router modules (Make).
Frequently asked questions
Does RepairPlugin help me set up Zapier, Pabbly, or Make?
RepairPlugin supports the webhook setup on its side — creating webhooks, selecting triggers, and sending data. Setting up the receiving side in your automation platform is your responsibility. RepairPlugin doesn't provide support for configuring third-party platforms.
Can I create multiple webhooks for the same trigger?
Yes. You can create as many webhooks as you need. For example, you could send "Scheduled Appointment Created" to both Zapier (for your CRM) and Pabbly (for SMS notifications).
Does RepairPlugin retry failed webhook deliveries?
No. Each webhook is sent once with a 4-second timeout. If the receiving server is unreachable or returns an error, the delivery is lost. If you need guaranteed delivery, use a middleware service like Zapier or Make that handles retries.
Can I send a test webhook?
There's no "test send" button. You can view an example payload for each trigger in the admin panel, but to test the actual delivery, you need to create a real booking. Tip: use a service like webhook.site to inspect the payload your endpoint receives.
What format does the webhook use?
RepairPlugin sends webhooks as an HTTP POST request with a JSON body and Content-Type: application/json header.