Google Business Profile
Set up the Google Business Profile integration in RepairPlugin to automatically sync your opening hours and special dates to your Google listing.
google-business-profileintegrationoauthopening-hourslocations
What can you do with this?
- Sync opening hours to Google automatically — when you update your hours in RepairPlugin, the changes push to your Google Business Profile listing.
- Sync special dates and holidays — closures and adjusted hours appear on your Google listing without manual editing.
- Map multiple locations — with Enhanced Locations active (available on the Scale plan), connect each RepairPlugin location to its own Google Business Profile.
- See sync status at a glance — a status badge shows whether each location is synced or pending.
Where to find it
- In the WordPress admin sidebar, click RepairPlugin.
- Click Settings.
- Click Webhooks & Integrations in the sidebar.
- Click the Google Business Profile tab at the top of the page.
https://www.repairplugin.com/wp-admin/admin.php?page=wp_repair_settings§ion=webhooks
How to set it up
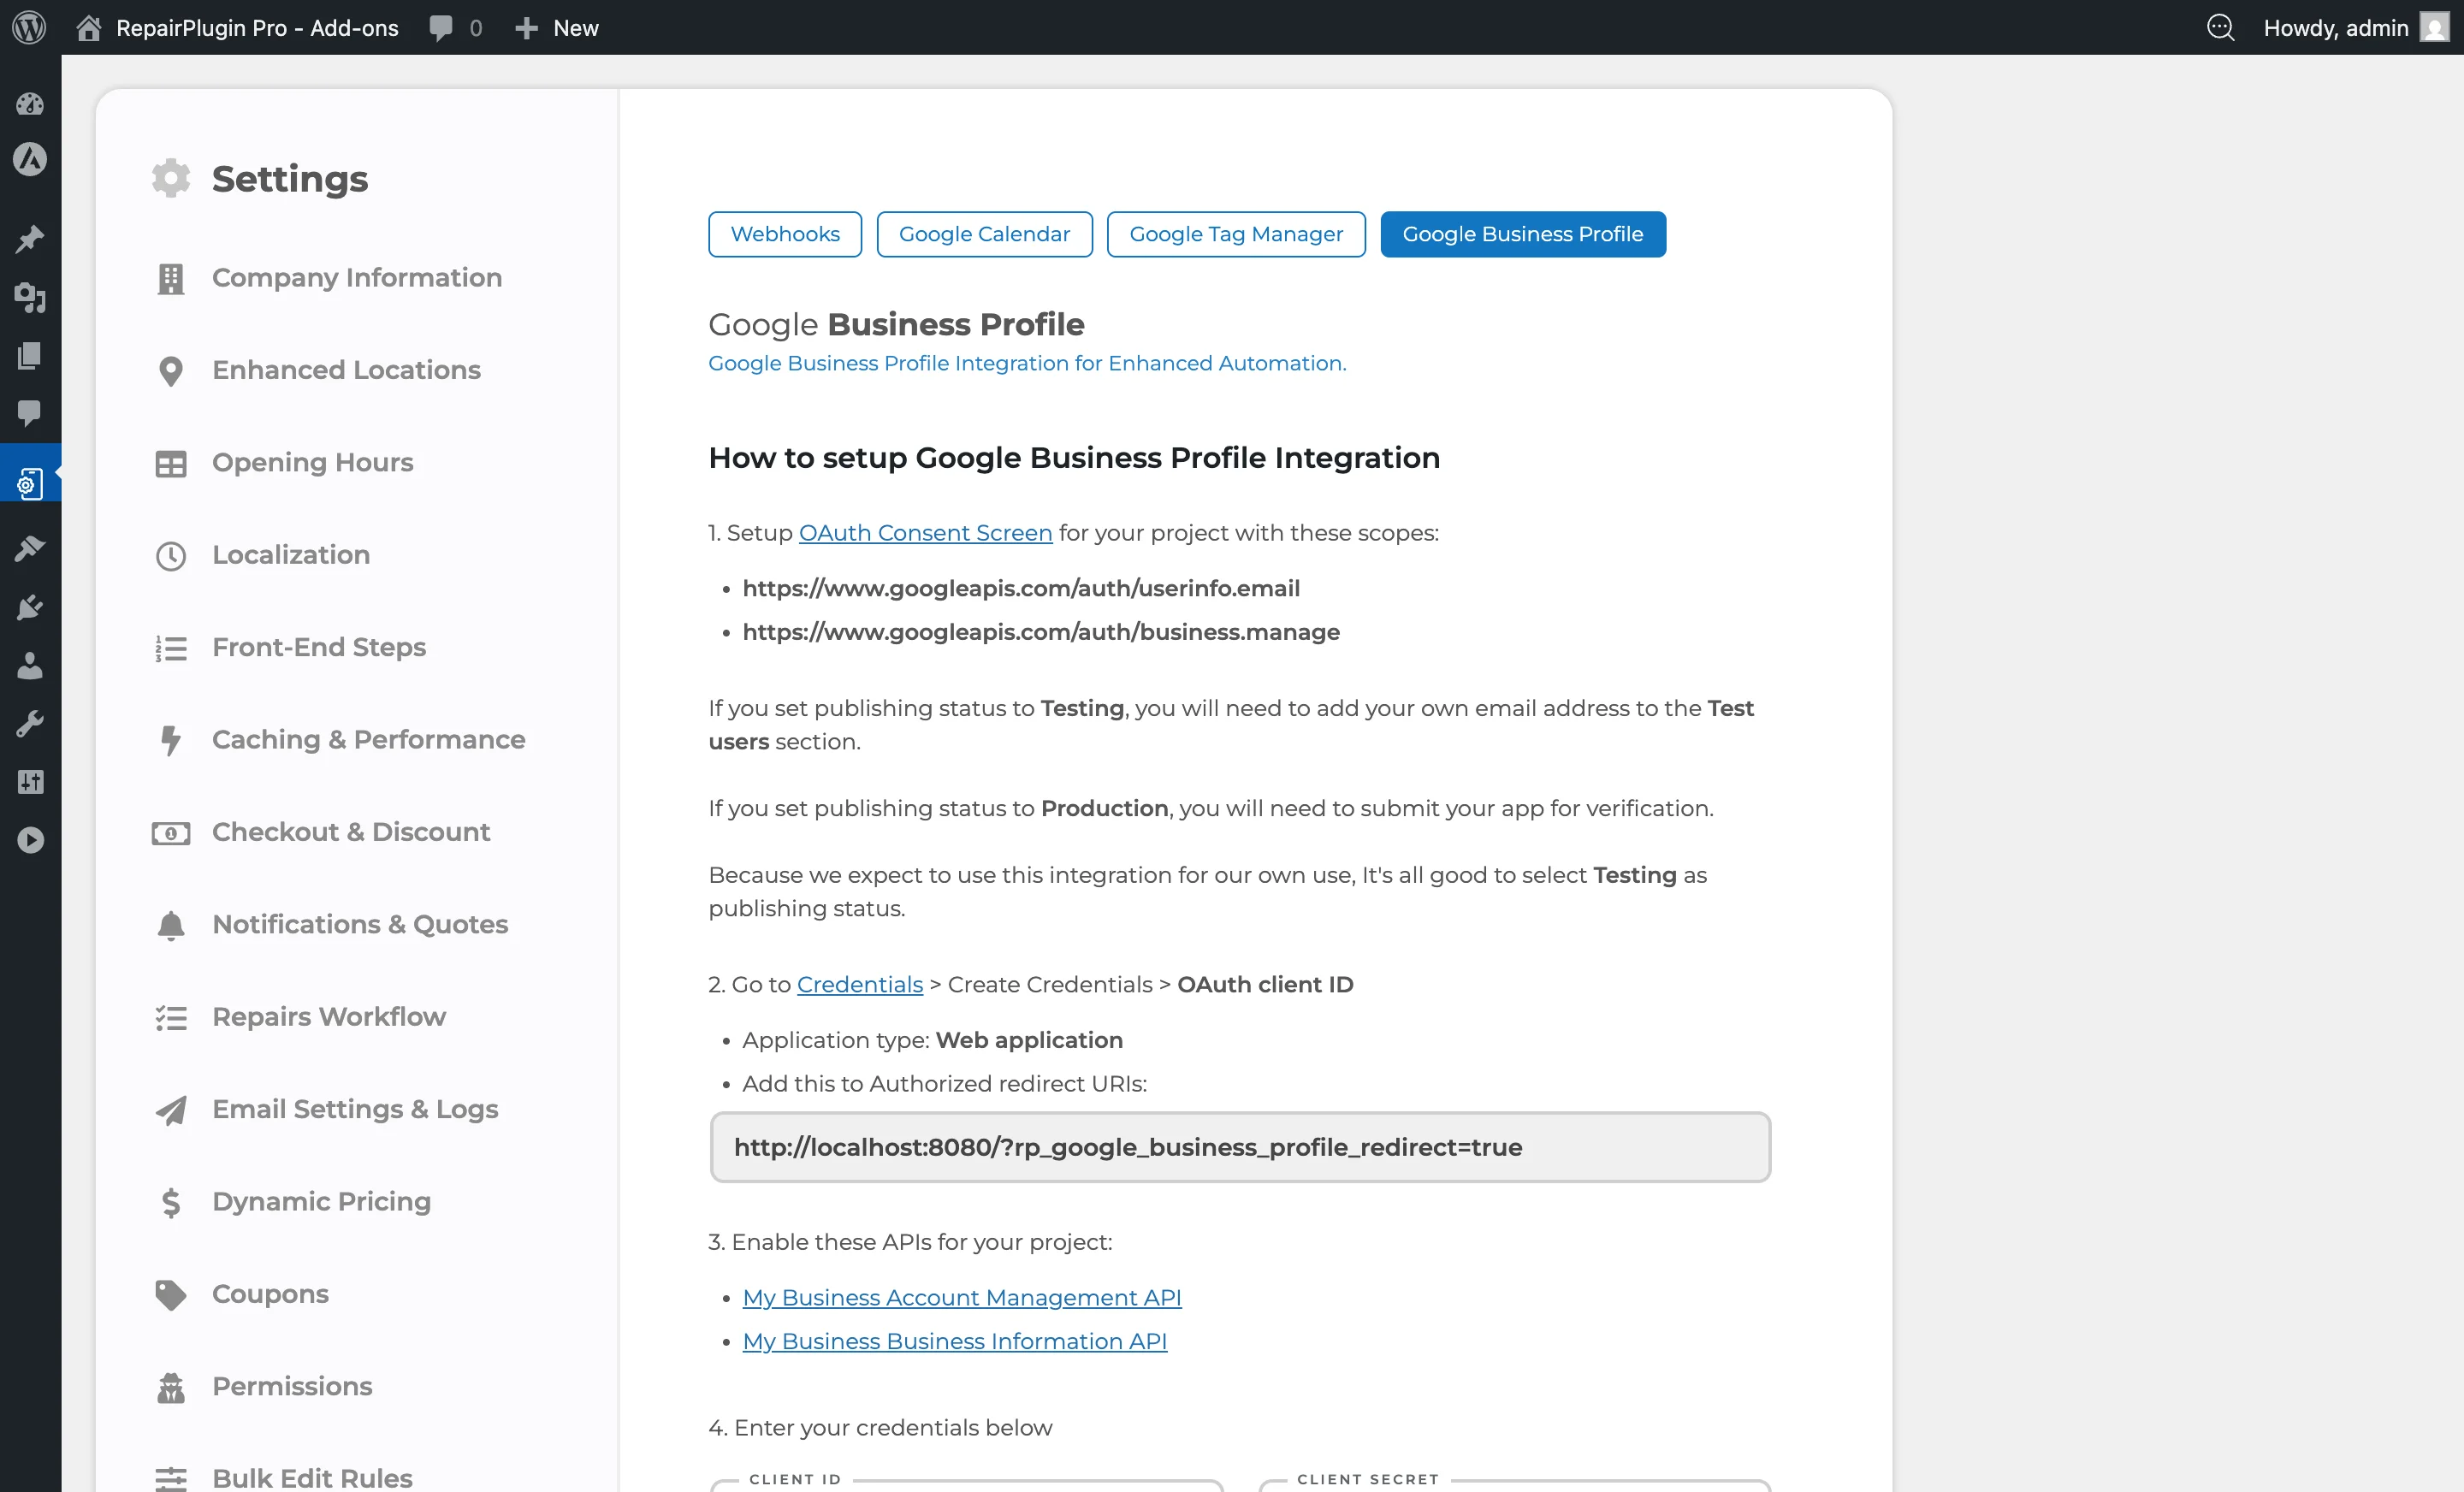
Step 1: Set up the OAuth consent screen
- Go to the Google Cloud Console OAuth Consent Screen.
- Configure the consent screen with these required scopes:
https://www.googleapis.com/auth/userinfo.emailhttps://www.googleapis.com/auth/business.manage
- Set the publishing status to Testing (add your email to Test Users) or Production (requires Google verification).
Step 2: Create OAuth credentials
- Go to Google Cloud Console Credentials.
- Click Create Credentials > OAuth client ID.
- Select Web application as the application type.
- Under Authorized redirect URIs, add the redirect URI shown on the RepairPlugin settings page.
- Copy the Client ID and Client Secret.
Step 3: Enable required APIs
Enable both of these APIs in your Google Cloud project:
Step 4: Enter credentials in RepairPlugin
- Go to RepairPlugin > Settings > Webhooks & Integrations > Google Business Profile.
- Enter the Client ID and Client Secret.
- Click Save Settings.
Step 5: Authorize the connection
- Click the Click Here To Authorize button.
- Sign in with the Google account that owns or manages the Business Profile.
- Grant the requested permissions.
- When you return, the Is Authorized indicator shows Yes and the Connected Account displays your email.
Step 6: Select an account (multi-account only)
If your Google account manages multiple business accounts:
- Select the right account from the Please choose one account dropdown.
- Click Save Settings.
Step 7: Map locations to profiles
- The location mapping table shows your RepairPlugin locations with a dropdown of available Google Business Profiles.
- For each location, select the matching Google Business Profile. The dropdown is searchable by name and address.
- Each Google Business Profile can only be mapped to one RepairPlugin location — no duplicates.
- Without Enhanced Locations, only your main location appears.
- Click Save Settings.
Step 8: Turn on syncing
- Turn the Enable Syncing Google Business Profile Opening Hours and Special Dates with RepairPlugin switch to on.
- Click Save Settings.
- The sync runs as a background job. Check the sync status badges next to each location.
Disconnect the integration
Click the X icon next to the Connected Account email to revoke the authorization.
Settings reference
| Setting | Description | Default | Customers see |
|---|---|---|---|
| Client Id | Stores the OAuth Client ID from your Google Cloud project, needed for authentication. | empty | Nothing — admin-only |
| Client Secret | Stores the OAuth Client Secret from your Google Cloud project. | empty | Nothing — admin-only |
| Authorized Redirect URI | Shows the URI you need to add as an Authorized Redirect URI in Google Cloud Console. Copy this value into your Google Cloud settings. | auto-generated based on your site URL | Nothing — admin-only |
| Is Authorized | Shows whether RepairPlugin is connected to Google. Displays "Yes" when connected, "No" when not. | no | Nothing — admin-only |
| Connected Account | Shows the connected Google account email. Click the X icon to disconnect the integration. | N/A | Nothing — admin-only |
| Account Selector (multi-account) | When your Google account manages multiple business accounts, lets you choose which account's profiles to use. Changing the account hides the mapping table until you save. | first account | Nothing — admin-only |
| Location Mapping Table | Maps each RepairPlugin location to a Google Business Profile. With Enhanced Locations active, all locations appear. Without it, only the main location shows. A "Main" badge marks the primary location. | no profiles selected | Nothing — affects Google listing only |
| Enable Syncing | When turned on, RepairPlugin pushes your opening hours and special dates to the mapped Google Business Profile locations. The sync runs as a background job. | off | Nothing directly — but your Google listing shows correct hours |
| Sync Status Badge | Shows a green checkmark when synced, or gray when pending. | hidden (shown when syncing is on and a profile is mapped) | Nothing — admin-only |
Frequently asked questions
Do I need Enhanced Locations?
Only if you have multiple locations. Without it, you can still connect and sync your main location. Enhanced Locations lets you map each location to its own Google Business Profile.
What gets synced to Google?
RepairPlugin syncs your regular opening hours and special dates (holidays, adjusted hours, closures). Other Business Profile information like your address, phone number, or photos are not affected.